DoorBird Connect
Divus
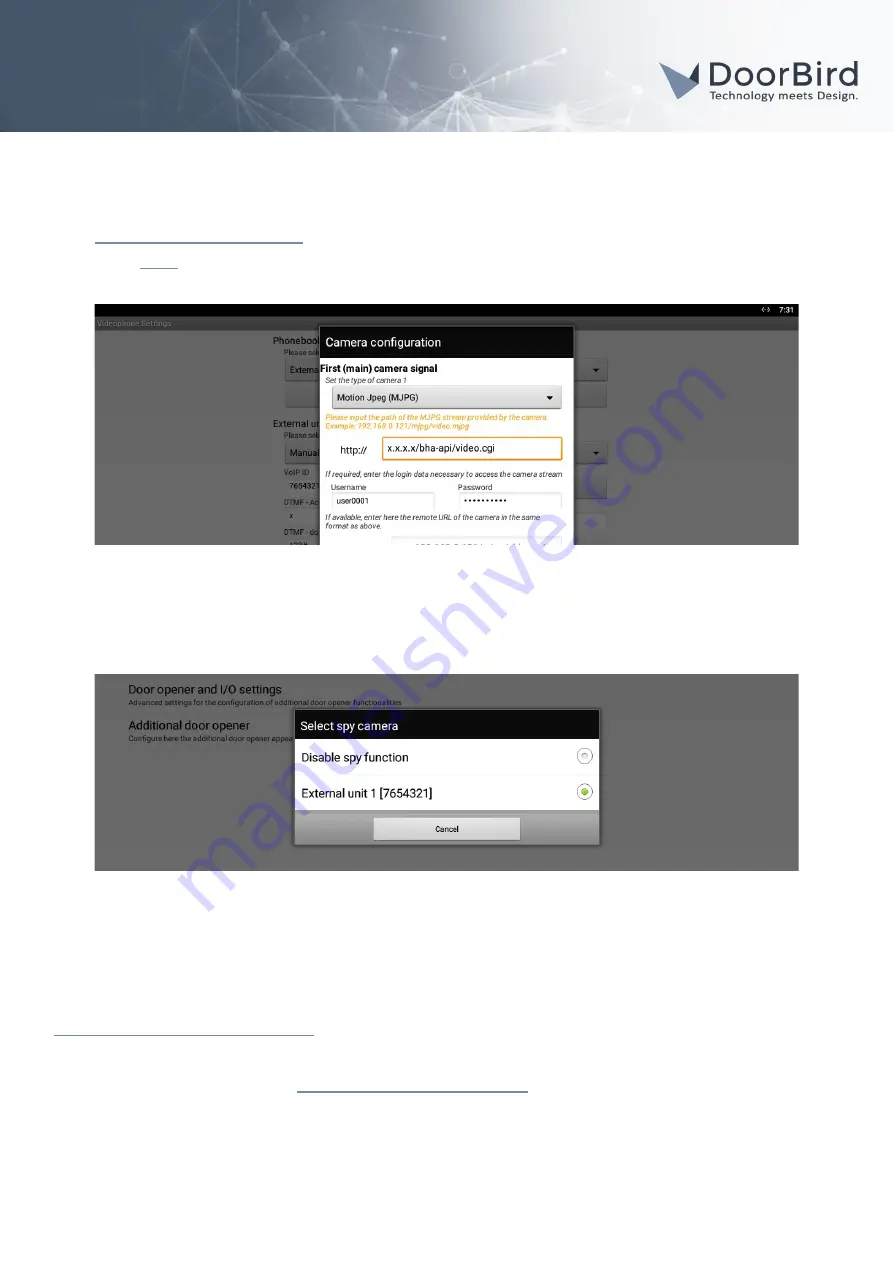
11. Tap on
“Camera configuration”
to bring up the camera settings for the DoorBird IP Video Door Station.
12. From the drop-down menu at the top, select
“Motion Jpeg (MJPEG)”
.
13. Enter an address of the following format into the URL field:
(http://) x.x.x.x/bha-api/video.cgi
where
x.x.x.x
is the IP address of your DoorBird IP Video Door Station.
14. Enter your DoorBird Username (e.g.
user0001
) and password into the respective fields.
15. Complete the camera setup by tapping on
“OK”
.
16. Tap
“Save”
to store the settings.
17. Return to the main
“Phonebook Settings”
menu and tap on
“Select spy camera”
, choosing the
“External unit”
that was just created.
18. Return to the main screen of the Divus Videophone app and try pushing the call button of the
DoorBird IP Video Door Station. If everything was set up correctly, a live video image from the
DoorBird IP Video Door Station should be displayed and the Divus Videophone will start ringing.
For questions and problems regarding the product “Divus Touchpanel” please contact the manufacturer online:
https://www.divus.eu/en/utility/support
For questions and problems regarding our devices (DoorBird IP Video Door Station) please use the contact for to get
In touch with our technical support:
https://www.doorbird.com/contact
All companies, logos and product names are registered trademarks of the respective companies.
Errors and omissions excepted – Last Update 02/2021 - Copyright © 2021 - Bird Home Automation GmbH – www.doorbird.com
5


