CAUTION:
Always be sure that the tool is switched OFF and unplugged before installing or
removing the drill bit.
The SDS-plus drill bit will be
off-center when rotating with no-load,
but it will align with the center
automatically during operation and
its precision won
’t be affected.
Clean the bit shank and smear it with
bit grease before installation.
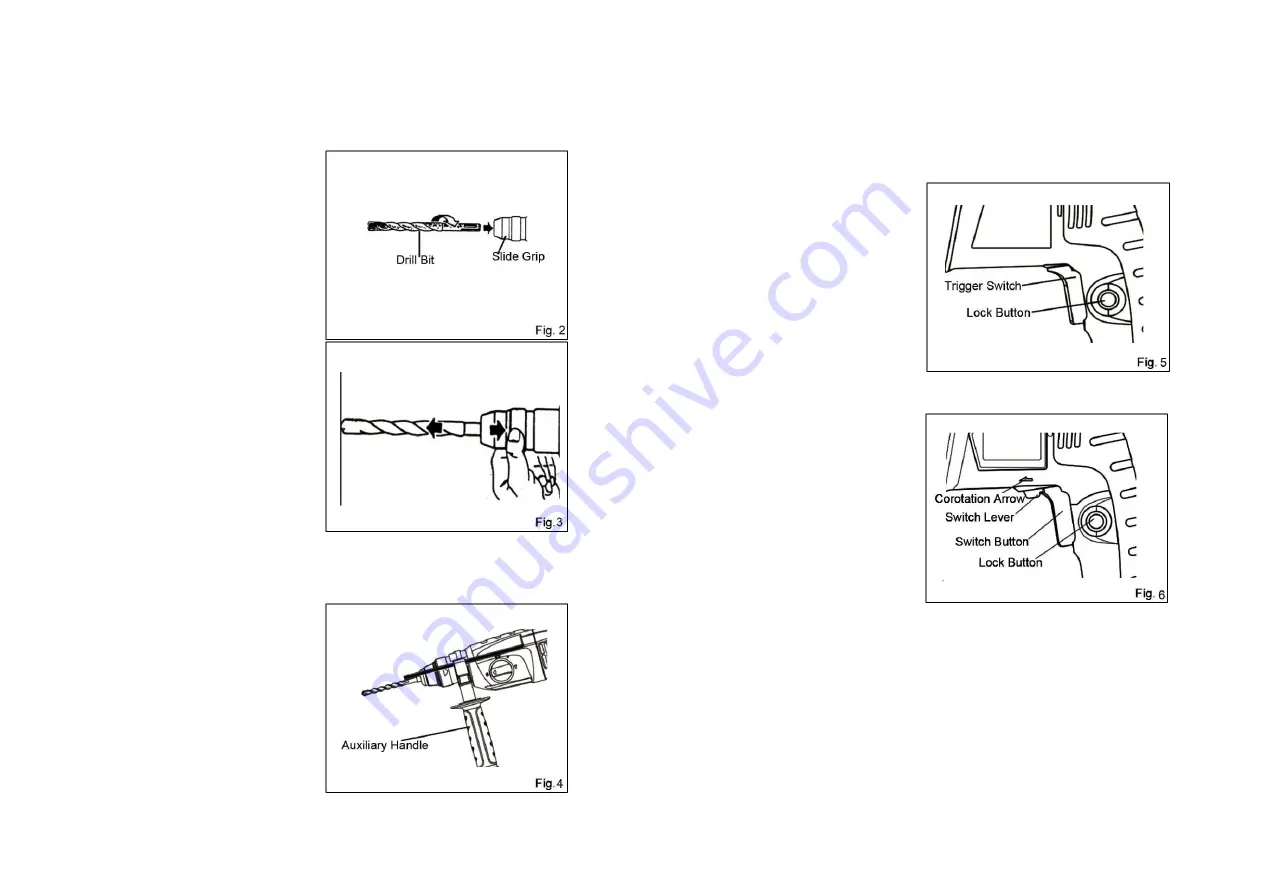
To install the drill bit (SDS-plus shank),
fully pull back the slide grip and insert
the drill bit as far as it will go while
rotating. (
Fig. 2
)
By releasing the slide grip, the drill bit
will be secured automatically.
To remove the SDS-plus drill bit, fully
pull back and hold the slide grip and
the drill bit can be removed. (
Fig. 3
)
Auxiliary Handle
Always use the auxiliary handle
ensure operating safety. Loosen the
auxiliary
handle
by
turning
it
counterclockwise, swing it to the
desired position and then tighten it by
turning clockwise. (
Fig. 4
)
Switch Action
CAUTION:
Before plugging in the tool, always check to see that the trigger switch actuates
properly and returns to the
“OFF” position when released.
To start the tool, simply pull the switch
trigger. Release the switch trigger to
stop.
For continuous operation, pull the switch
trigger and then push in the lock lever.
To stop the tool from the locked position,
pull the switch trigger fully, and then
release it. The rotating speed of the tool
becomes faster and faster until it
reaches the full speed during the
process of pressing the switch. (
Fig. 5
)
The switch of Z1C-FF05-26 is with
positive and negative going motion,
which can be used to change the tool
’s
direction of rotation. You can only
change it when the tool completely stops
rotating, otherwise the tool will be
damaged. (
Fig. 6
)
Set the direction of
rotation for hammer drilling, drilling and chiseling always to right rotation.
Depth Gauge
CAUTION:
The depth gauge cannot be used at the position where he depth gauge strikes
against the tool body.
-7- -8-


