Page 5
6)Remove Water tank by lifting straight up and away from the unit. Unscrew
the water tank cap and remove the insert assembly. Fill with cool tap water,
and replace the insert assembly tightening the cap. Place the Water Tank on
the unit.
7)
Twist the Quick Release Cord Wrap clockwise to unwrap the Power Cord
completely and plug into a power supply.
8)
The LED will illuminate when the steamer is connected to power socket.
Please wait for 20 seconds (heat up period) before pressing trigger. The
steam unit is now ready for use.
NOTE: It is recommended that another high wattage appliance is not operated
on the same circuit to avoid a circuit overload.
9)
Slowly pass over surface to be cleaned while pressing trigger to emit
steam. It is recommended to sweep or vacuum floor prior using the steamer.
CAUTION:
TO SANITIZE AN AREA OF YOUR FLOOR, LEAVE THE
STEAMER OVER THE AREA FOR A MINIMUM OF 8 SECONDS, BUT NO
LONGER THAN 15 SECONDS. LEAVING THE STEAMER STATIONARY
FOR A LONGER PERIOD THAN RECOMMENDED MAY CAUSE THE
BUILD UP OF A PALE RESIDUE. THIS RESIDUE CAN BE REMOVED BY
USING A DECALCIFYING PRODUCT OR WITH A FEW DROPS OF
VINEGAR. (SEE TROUBLESHOOTING GUIDE)
WARNING!
Do not use on velvet or dralon fabrics. If in doubt try on a small area that
does not show and consult fabric manufacturers cleaning instructions.
BAG CONTAINING RUBBER O RINGS.
The two large
O
Rings can be used to replace the two
O
Rings on the
water tank if deemed necessary. Smear a small amount or petroleum
jelly onto the
O
rings to aid sealing. The small
O
ring can be used as a
replacement on the scale filter spigot.
Содержание DSC20
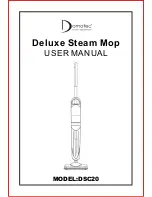
Страница 1: ...MODEL DSC20 Deluxe Steam Mop USER MANUAL...


