background image

FR

RML10.4, RML10.4S, RML10.4T

Raccordement du réfrigérateur

55

Schéma de câblage du réfrigérateur (fig.

j

, page 10)

Position 

dans 

fig.

j

page 10

Description

1

Ventilateur 2 (si le module d’options n’est pas disponible)

2

Ventilateur 1 (si le module d’options n’est pas disponible)

3

S+ (en option)

4

Élément de chauffage CC

5

Relais CC avec fusible 20 A pour la cartouche chauffante

6

NTC 1: Chambre de réfrigération

NTC 2: Température extérieure (en option)

7

Vanne du gaz

8

Raccordement au courant alternatif

9

Élément de chauffage CA

10

Brûleur de gaz

11

Bloc de connexion

12

Éclairage

13

Écran

14

Ventilateur 2 (si le module d’options est disponible)

15

Ventilateur 1 (si le module d’options est disponible)

16

Module d’options

17

Four alimentation CC (si le module d’options est disponible)

18

Module d’options alimentation CC

19

Raccordement bus CI

20

 Câble d’alimentation CC

21

Carter terminal 12 V (vue avant)

AMP/TE Tyco : 180906

CS Colombo : 63N025

22

Électronique câble alimentation CC

DometicRML10_INM_4445102838_EMEA(en-de-fr-nl)_xxxx-xx-xx.book  Seite 55  Dienstag, 23. März 2021  3:17 15

Содержание RML 10.4S

Страница 1: ...11 Absorber K hlschrank Montageanleitung 27 R frig rateur absorption Instructions de montage 43 Absorptiekoelkast Montagehandleiding 59 EN DE FR NL REFRIGERATION 10 SERIES DometicRML10_INM_4445102838_...

Страница 2: ...The underlying technical design and the products contained herein may be protected by design patent or be patent pending The trademarks mentioned in this manual belong to Dometic Sweden AB All rights...

Страница 3: ...RML10 4 RML10 4S RML10 4T 3 NOTICE NOTICE d 90 420 mm 1293 mm 578 mm 1 2 1 2 DometicRML10_INM_4445102838_EMEA en de fr nl _xxxx xx xx book Seite 3 Dienstag 23 M rz 2021 3 17 15...

Страница 4: ...RML10 4 RML10 4S RML10 4T 4 1050 mm 1050 mm 1 3 15 25 mm 25 mm 25 mm 4 DometicRML10_INM_4445102838_EMEA en de fr nl _xxxx xx xx book Seite 4 Dienstag 23 M rz 2021 3 17 15...

Страница 5: ...RML10 4 RML10 4S RML10 4T 5 1350 mm 15 25 mm 1 5 300 mm 1 2 6 DometicRML10_INM_4445102838_EMEA en de fr nl _xxxx xx xx book Seite 5 Dienstag 23 M rz 2021 3 17 15...

Страница 6: ...RML10 4 RML10 4S RML10 4T 6 A 3 1 2 B 5 mm 5 mm 10 mm C 1 4 7 DometicRML10_INM_4445102838_EMEA en de fr nl _xxxx xx xx book Seite 6 Dienstag 23 M rz 2021 3 17 15...

Страница 7: ...RML10 4 RML10 4S RML10 4T 7 t 40 mm 1 2 8 1 2 3 4 1 3 2 4 LS 230 LS 330 9 0 a DometicRML10_INM_4445102838_EMEA en de fr nl _xxxx xx xx book Seite 7 Dienstag 23 M rz 2021 3 17 15...

Страница 8: ...RML10 4 RML10 4S RML10 4T 8 1 2 3 b 1 c 1 2 d e f g DometicRML10_INM_4445102838_EMEA en de fr nl _xxxx xx xx book Seite 8 Dienstag 23 M rz 2021 3 17 15...

Страница 9: ...e Red Pink Violet White DE Schwarz Braun Blau Rot Pink Violett Wei FR Noir Marron Bleu Rouge Rosa Violeta Blanc NL Zwart Bruin Blauw Rood Roze Paars Wit 1 2 h 2 3 1 i DometicRML10_INM_4445102838_EMEA...

Страница 10: ...face RS232 gy gn D wh rd pk bu bk 86 bn bn bn bn bn rd rd 12V DC Internal rd rd bk bk bk bk NTC2 ye wh wh ye wh rd rd E B A D C F E B A D C F NTC1 20A rd 30 87 85 1 2 5 4 7 6 8 3 9 10 11 13 14 15 16 2...

Страница 11: ...n may result in an injury to yourself and others damage to your product or damage to other property in the vicinity This product manual including the instructions guidelines and warnings and related d...

Страница 12: ...se propane or butane gas not natural gas Health hazard Do not operate the device if it is visibly damaged If the AC power cable for this device is damaged it must be replaced by the manufacturer a ser...

Страница 13: ...ted during operation can dissipate Make sure that the device is sufficiently far away from walls and other objects so that the air can circulate Check that the voltage specification on the type plate...

Страница 14: ...ts other than original spare parts provided by the manufacturer Alterations to the product without express permission from the manufacturer Use for purposes other than those described in this manual D...

Страница 15: ...o that the heat generated can be easily released to the outside Air inlet vent Fit ventilation grill as flush as possible with the base of the instal lation niche Outlet vent fit as far above the refr...

Страница 16: ...outlet vents as this leads to poor performance and increases the power consumption of the refrigerator The air inlet and outlet vents must not be covered by vehicle parts such as an open door or by in...

Страница 17: ...up to 5 mm between refrigerator and furniture B Glue the sealing lips see chapter Accessories on page 13 on the side of the furniture 4 Push the refrigerator oven combination against the flexible sea...

Страница 18: ...prevent sludge or dirt from getting inside while driving fig 8 2 page 7 If you have to use a roof vent instead of the air outlet vent Cut out a section in the roof Refer to the roof vent instruction...

Страница 19: ...from the refrigerator through an opening in the floor which goes outside under the vehicle Variant 2 Attach the condensation hose directly to the fitting intended for it on the ventila tion grill fig...

Страница 20: ...al location Fasten the six screws fig h 1 page 9 through the six plastic washers in the sides of the refrigerator and further into the wall Put the caps fig h 2 page 9 onto the screw heads No in fig d...

Страница 21: ...removed Only use cylinders of propane or butane gas not natural gas or city gas with an approved pressure reduction valve and suitable head Compare the pressure information on the type plate with the...

Страница 22: ...rder to prevent the air circulation from being impaired and to protect the device plug from splashes of water The device plug of the AC connection cable must not be cut off The connection cables must...

Страница 23: ...tions module is available 15 Fan 1 if options module is available 16 Options module 17 DC supply oven if options module is available 18 DCsupply options module 19 CI Bus connection 20 DC supply cable...

Страница 24: ...ning Connect E to the CI BUS Connect 3 with the S signal optional Protect the supply line A with a 2 A fuse in the power distribution box of the vehicle Protect the supply line C with a 20 A fuse in t...

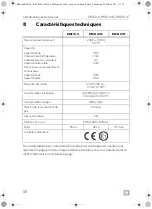
Страница 25: ...emoved and disposed of by a specialist RML10 4 RML10 4S RML10 4T Connection voltage 230 Vw 50 Hz 12 Vg Capacity Gross capacity Refrigerator compartment Freezer compartment Total net capacity Excluding...

Страница 26: ...r device please refer to the respective product page on dometic com or contact the manufacturer directly see back page Weight 35 kg 32 kg 35 5 kg Inspection certification RML10 4 RML10 4S RML10 4T 1 D...

Страница 27: ...zung Ihrer selbst und anderer Personen zu Sch den an Ihrem Produkt oder zu Sch den an anderem Eigentum in der Umgebung f hren Dieses Produkthandbuch einschlie lich der Anweisungen Richtlinien und Warn...

Страница 28: ...fahr Pr fen Sie das Ger t niemals mit einer offenen Flamme auf Undichtig keit Verwenden Sie nur Propan oder Butangas kein Erdgas Gesundheitsgefahr Wenn das Ger t sichtbare Besch digungen aufweist d rf...

Страница 29: ...Vermeiden Sie offenes Feuer und Z ndfunken L ften Sie den Raum gut Bauen Sie das Ger t nicht in der N he von offenen Flammen oder anderen W rmequellen Heizung Gas fen usw ein berhitzungsgefahr Achten...

Страница 30: ...annung Unsachgem e Wartung oder Verwendung von anderen als den vom Hersteller gelieferten Original Ersatzteilen Ver nderungen am Produkt ohne ausdr ckliche Genehmigung des Herstellers Verwendung f r a...

Страница 31: ...baut werden kann ohne gro en Aufwand aus dem Fahrzeug entnommen werden kann Der K hlschrank muss in eine Nische eingebaut werden damit er bei Bewegung des Fahrzeugs fest steht Beachten Sie hierzu die...

Страница 32: ...ng und Entl ftungs ffnung nicht eingehalten werden kann muss statt der Entl ftungs ffnung ein Dach entl fter verbaut werden DerDachentl ftersolltem glichstdirekt berderR ckseitedesK hlschranks angebra...

Страница 33: ...einer Anschlagleiste 2 hinter dem K hlschrank 3 Schieben Sie den K hlschrank gegen die Anschlagleisten mit den Dichtlippen Der Raum hinter dem K hlschrank ist zum Innenraum des Fahrzeugs abgedichtet...

Страница 34: ...den ein Eventuell austretendes Gas kann so nach unten abflie en Fertigen Sie hinter dem K hlschrank im Bereich des Gasbrenners eine Bel ftungs ffnung von mindestens 40 mm im Boden an Abb 8 1 Seite 7 S...

Страница 35: ...Boden ffnung die unter das Fahrzeug f hrt nach au en Variante 2 Bringen Sie den Kondenswasserschlauch direkt am L ftungsgitter an der daf r vorgesehenen Fixierung an Abb c 1 Seite 8 HINWEIS Verwenden...

Страница 36: ...Abb h 1 Seite 9 durch die sechs Kunststoff buchsen in den Seitenw nden des K hlschranks und weiter in die Nischenwand Setzen Sie die Abdeckkappen Abb h 2 Seite 9 auf die Schraubenk pfe Pos in Abb d S...

Страница 37: ...chranks darf nicht entfernt werden Verwenden Sie nur Propan oder Butangasflaschen kein Erdgas oder Stadtgas mit gepr ftem Druckreduzierventil und passendem Kopfst ck Vergleichen Sie die Druckangabe au...

Страница 38: ...erden HINWEIS Der Ger testecker darf nicht direkt hinter dem L ftungsgitter plat ziert sein um die Luftzirkulation nicht zu beeintr chtigen und den Ger testecker vor Spritzwasser zu sch tzen Der Ger t...

Страница 39: ...nschlussblock 12 Beleuchtung 13 Display 14 K hlventilator 2 falls Optionsmodul verf gbar ist 15 K hlventilator 1 falls Optionsmodul verf gbar ist 16 Optionsmodul 17 Gleichstrom Versorgung f r Ofen fal...

Страница 40: ...en Sie E mit dem CI BUS nur RML10 4 und RML10 4T Verbinden Sie 3 mit dem S Signal optional Sichern Sie die Zuleitung A mit 2 A in der Stromverteilerbox des Fahrzeugs ab Sichern Sie die Zuleitung C mit...

Страница 41: ...ibgas Lassen Sie das Ger t nur von einem Fachmann ausbauen und entsorgen RML10 4 RML10 4S RML10 4T Anschlussspannung 230 Vw 50 Hz 12 Vg Inhalt Bruttoinhalt K hlraum Frosterfach Nutzinhalt insgesamt Fr...

Страница 42: ...hr Ger t erhalten Sie auf der jeweiligen Produktseite auf dometic com oder direkt ber den Hersteller siehe R ckseite Gewicht 35 kg 32 kg 35 5 kg Pr fung Zertifikat RML10 4 RML10 4S RML10 4T 1 DometicR...

Страница 43: ...rsonnes d endommager votre produit ou d endommager d autres biens proximit Le pr sent manuel produit y compris les instructions directives et avertissements ainsi que la documentation associ e peuvent...

Страница 44: ...Utilisez uniquement du gaz propane ou butane pas de gaz naturel Risque pour la sant Si le r frig rateur pr sente des d g ts visibles vous ne devez pas le mettre en service Si le c ble de raccordement...

Страница 45: ...de flammes nues ou d autres sources de chaleur chauffage fours gaz etc Risque de surchauffe Veillez toujours ce que la chaleur produite lors du fonctionnement puisse se dissiper suffisamment Veillez c...

Страница 46: ...tions apport es au produit sans autorisation explicite du fabricant des usages diff rents de ceux d crits dans le manuel Dometic se r serve le droit de modifier l apparence et les sp cifications produ...

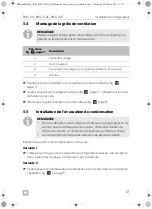
Страница 47: ...ns trop d effort du v hicule Le r frig rateur doit tre construit dans une alc ve afin qu il soit stable lorsque le v hicule se d place Notez les dimensions dans fig 1 page 3 cette fin ATTENTION Risque...

Страница 48: ...a ration et l ouverture de ventilation ne peut tre respect e un ventilateur de toit doit tre install la place de l ouverture de ventilation Le ventilateur de toit doit tre situ autant que possible dir...

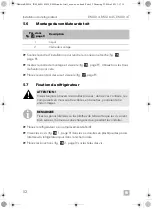
Страница 49: ...e de but e 2 derri re le r frig rateur 3 Poussez le r frig rateur four contre la barre de but e avecles l vres d tanch it flexibles L espace se trouvant derri re le r frig rateur est herm tiquement so...

Страница 50: ...dans le plancher du v hicule Toute fuite de gaz peut ainsi s couler vers le bas Pratiquez une ouverture d a ration d au moins 40 mm dans le plancher fig 8 1 page 7 derri re le r frig rateur dans la z...

Страница 51: ...le v hicule Variante 2 Fixez le tuyau de condensation directement sur le raccord pr vu sur la grille de ventilation fig c 1 page 8 REMARQUE Utilisez uniquement des grilles de ventilation Dometic d ori...

Страница 52: ...h 1 page 9 dans les six douilles en plastique des parois lat rales du r frig rateur puis dans la niche murale Placez les bouchons fig h 2 page 9 sur les t tes des vis Pos dans fig d page 8 Descriptio...

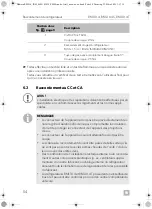
Страница 53: ...les de gaz propane ou butane pas de gaz naturel ou gaz de ville dont la vanne de r duction de pres sion a t contr l e et un embout correspondant V rifiez que les donn es inscrites sur le r gulateur de...

Страница 54: ...e l appareil ne doit pas tre plac directement der ri re la grille d a ration afin de ne pas compromettre la circulation d air et de prot ger le connecteur de l appareil des projections d eau Le connec...

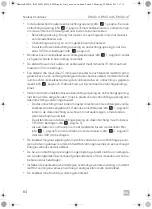
Страница 55: ...n option 7 Vanne du gaz 8 Raccordement au courant alternatif 9 l ment de chauffage CA 10 Br leur de gaz 11 Bloc de connexion 12 clairage 13 cran 14 Ventilateur 2 si le module d options est disponible...

Страница 56: ...ur ne fonctionne avec du courant continu que lorsque le moteur du v hicule est en marche Raccordez E au bus CI Raccordez 3 au signal S en option 23 l ment chauffant c ble alimentation CC 24 Alimentati...

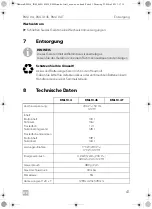
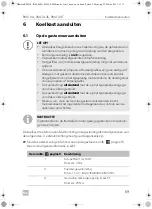
Страница 57: ...accidentellement Source d alimentation CA Connectez le r frig rateur une prise secteur l aide du connecteur de l appareil 7 Mise au rebut I Prot gez l environnement Les piles et les batteries usag es...

Страница 58: ...rute Compartiment r frig rateur Compartiment conservateur Capacit nette totale l exclusion du compartiment conservateur Capacit brute Capacit nette 133 l 116 l 12 l 128 l 139 l 134 l Puissance absorb...

Страница 59: ...uzelf en anderen schade aan uw product of schade aan andere eigendommen in de omgeving Deze gebruiksaanwijzing met inbegrip van de instructies richtlijnen en waarschuwingen en de bijbehorende documen...

Страница 60: ...ar voor de gezondheid Als de koelkast zichtbaar is beschadigd mag hij niet in gebruik worden genomen Als de wisselstroomaansluitkabel van deze koelkasten wordt bescha digd moet deze om gevaar uit te s...

Страница 61: ...an worden Zorg ervoor dat de koelkast op voldoende afstand tot wanden en voorwerpen staat zodat de lucht kan circuleren Vergelijk de spanning op het typeplaatje met de aanwezige energie voorziening Op...

Страница 62: ...uiting inclusief te hoge spanning Onjuist onderhoud of gebruik van andere dan door de fabrikant geleverde origi nele reserveonderdelen Wijzigingen van het product zonder uitdrukkelijke toestemming van...

Страница 63: ...udig uit het voertuig kan worden verwijderd De koelkast moet in een nis worden ingebouwd zodat hij bij beweging van het voertuig vast staat Noteer hiervoor de afmetingen in afb 1 pagina 3 VOORZICHTIG...

Страница 64: ...g en ontluchtingsopening niet kan worden aangehouden moet in plaats van de ontluchtingsopening een dakontluchting worden ingebouwd De dakontluchting moet indien mogelijk direct boven de achterzijde va...

Страница 65: ...verzegeld aan het voertuiginterieur Zijopening afstand van tot 5 mm tussen koelkast en meubilair B Lijm de afdichtlippen zie hoofdstuk Toebehoren op pagina 61 op de zijkant van het meubilair 4 Duw de...

Страница 66: ...brander een beluchtingsopening van min stens 40 mm in de ondergrond afb 8 1 pagina 7 Scherm de buitenzijde van de opening af met een bochtstuk zodat tijdens rijden geen modder of vuil kan binnendringe...

Страница 67: ...opening in de vloer uit het voertuig weg naar buiten Variant 2 Bevestig de condensslang direct aan de hiervoor bedoelde bevestiging van het ventilatierooster afb c 1 pagina 8 INSTRUCTIE Gebruik voor v...

Страница 68: ...oeven afb h 1 pagina 9 door de zes kunststof bussen in de zijwanden van de koelkast en verder in de wand Plaats de kappen afb h 2 pagina 9 op de schroefkoppen Nr in afb d pagina 8 Beschrijving 1 Kap 2...

Страница 69: ...f butaangasflessen geen aardgas of stadsgas met gekeurd drukreduceerventiel en passend kopstuk Vergelijk de druk op het typeplaatje met de druk op de drukregelaar van de propaan of butaangasfles De ko...

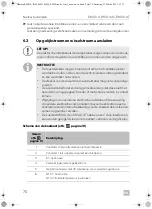
Страница 70: ...e sneden De aansluitkabel moet zodanig gemonteerd zijn dat deze niet met hetedelen van aggregaat brander of metscherpe randen in contact komen Wijzigingen van de interne elektrische installatie of de...

Страница 71: ...erbinding 20 Gelijkstroomvoedingskabel 21 12 V terminalbehuizing frontaanzicht AMP TE Tyco 180906 CS Colombo 63N025 22 Gelijkstroom voedingskabel elektronica 23 Gelijkstroom voedingskabel verwarmingse...

Страница 72: ...als de motor draait Verbind E met de CI BUS Verbind 3 met het S signaal optioneel Beveilig de voedingsleiding A met een 2 A zekering in de verdeelkast van het voertuig Beveilig de voedingsleiding C me...

Страница 73: ...afvoeren RML10 4 RML10 4S RML10 4T Aansluitspanning 230 Vw 50 Hz 12 Vg Capaciteit Bruto inhoud Koelvak Vriesvak Totale netto capaciteit Zonder vriesvak Bruto inhoud Netto inhoud 133 l 116 l 12 l 128...

Страница 74: ...de actuele EU conformiteitsverklaring voor uw toestel zie de desbetreffende productpagina op dometic com of raadpleeg de fabrikant direct zie achterzijde DometicRML10_INM_4445102838_EMEA en de fr nl...

Страница 75: ...DometicRML10_INM_4445102838_EMEA en de fr nl _xxxx xx xx book Seite 75 Dienstag 23 M rz 2021 3 17 15...

Страница 76: ...ometic com dealer YOUR LOCAL SUPPORT dometic com contact dometic com 1 01 1 0 4 0 1 1 2 2 1 2 9 0 DOMETIC GROUP AB 3E 0 1 4 4445102838 289075600 2021 03 23 DometicRML10_INM_4445102838_EMEA en de fr nl...

Отзывы: