background image

EN

DoorLock DM100, DP100

Fitting the door lock

33

9.3

Calibrate the card reader (DP100 only)

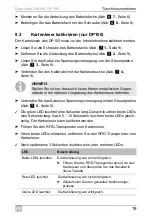
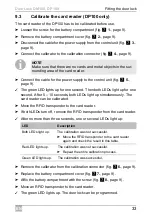
The card reader of the DP100 has to be calibrated before use.

Loosen the screw for the battery compartment (fig.

7

1.

, page 9).

Remove the battery compartment cover (fig.

7

2.

, page 9).

Disconnect the cable for the power supply from the control unit (fig.

7

3.

page 9).

Connect the calibrator to the calibration connector (fig.

7

4.

, page 9).

I

Connect the cable for the power supply to the control unit (fig.

7

5.

page 9).

The green LED lights up for one second. Then both LEDs light up for one 
second. After 5 – 10 seconds, both LEDs light up simultaneously. The 
card reader can be calibrated.

Move the RFID transponder to the card reader.

If both LEDs turn off, remove the RFID transponder from the card reader.

After no more than three seconds, one or several LEDs light up:

Remove the calibrator from the calibration connector (fig.

7

6.

, page 9).

Replace the battery compartment cover (fig.

7

7.

, page 9).

Affix the battery compartment with the screw (fig.

7

8.

, page 9).

Move an RFID transponder to the card reader.

The green LED lights up. The door lock can be programmed.

NOTE 

Make sure that there are no cards and metal objects in the sur-
rounding area of the card reader.

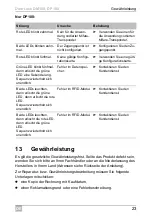
LED

Description

Both LEDs light up.

The calibration was not successful.

Move the RFID transponder to the card reader 
again and check the result in this table.

Red LED lights up.

The calibration was not successful.

Repeat the entire calibration process.

Green LED lights up.

The calibration was successful.

Содержание DoorLock DM100

Страница 1: ...ing Manual 26 Serrure de porte pour hôtels Instructions de montage et de service 40 Cerradura de puertas para hoteles Instrucciones de montaje y de uso 56 Serratura della porta Istruzioni di montaggio e d uso 71 Dörrlås för hotell Monterings och bruksanvisning 87 DE EN FR ES IT SV DoorLock DM100 DP100 ...

Страница 2: ......

Страница 3: ...DoorLock DM100 DP100 3 11 12 9 8 7 6 10 5 4 3 13 1 2 DM100 11 12 9 8 7 6 10 5 4 3 14 13 1 2 DP100 1 ...

Страница 4: ...DoorLock DM100 DP100 4 DM100 31 5 108 5 108 5 85 85 R9 R 1 1 5 120 120 188 60 95 3 31 5 31 5 66 87 5 80 Ø 46 Ø 17 R 1 0 2 ...

Страница 5: ...DoorLock DM100 DP100 5 108 5 108 5 85 85 R9 R 1 1 5 40 60 R5 Ø10 31 5 74 29 27 13 120 120 188 Ø 17 18 66 87 5 Ø 46 80 60 95 3 R 5 DP100 3 ...

Страница 6: ...DoorLock DM100 DP100 6 SIDE VIEW FRAME FRONT VIEW FRAME 177 200 55 5 11 36 16 5 14 R 11 5 R1 R4 R11 5 1 0 9 º 200 51 60 31 36 14 2 22 4 ...

Страница 7: ...DoorLock DM100 DP100 7 DM100 1 2 3 4 5 DP100 1 2 3 4 5 5 ...

Страница 8: ...DoorLock DM100 DP100 8 1 4 3 2 8 5 6 7 6 ...

Страница 9: ...DoorLock DM100 DP100 9 DP100 1 2 3 4 5 6 8 7 7 ...

Страница 10: ...DoorLock DM100 DP100 10 8 ...

Страница 11: ...DoorLock DM100 DP100 11 26 70 155 270 min 35 90 9 ...

Страница 12: ...utzer weiter Inhaltsverzeichnis 1 Erklärung der Symbole 13 2 Sicherheitshinweise 13 3 Zielgruppe dieser Anleitung 14 4 Lieferumfang 15 5 Zubehör 15 6 Bestimmungsgemäßer Gebrauch 16 7 Technische Beschreibung 16 8 Türschloss bedienen 17 9 Türschloss montieren 18 10 Türschloss warten 20 11 Batterie wechseln 21 12 Störungen beseitigen 22 13 Gewährleistung 23 14 Entsorgung 24 15 Technische Daten 24 ...

Страница 13: ...weise Der Hersteller übernimmt in folgenden Fällen keine Haftung für Schäden Montage oder Anschlussfehler Beschädigungen am Produkt durch mechanische Einflüsse Veränderungen am Produkt ohne ausdrückliche Genehmigung vom Hersteller Verwendung für andere als die in der Anleitung beschriebenen Zwecke WARNUNG Sicherheitshinweis Nichtbeachtung kann zu Tod oder schwerer Verletzung führen VORSICHT Sicher...

Страница 14: ...Einbau des Türschlosses die bauaufsichtlichen Vorschriften und die Vorgaben des Türherstellers ein VORSICHT Verletzungsgefahr durch Beschädigungen Beschädigun gen an Metallteilen können zu Verletzungen führen Ein be schädigtes Produkt ist ein Sicherheitsrisiko Prüfen Sie die Verpackung und das Türschloss auf Beschädigungen Ein be schädigtes Produkt darf nicht in Betrieb genommen werden Auch beschä...

Страница 15: ...Profilzylinder 7 3 Befestigungsschraube für Türbeschläge 8 1 Innentürbeschlag 9 1 Drückerstift für Innentürdrücker 10 1 Stulpschraube 11 1 Einsteckschloss 12 2 Befestigungsschraube für Einsteckschloss 13 1 Identmittel 14 1 nur DP100 Datenkabel Teilebezeichnung Artikelnummer Smart Card Energy saver 9106600715 Smart Card Access Control 9106600713 Smart Card encoder 9106600722 Smart Key Card 91066007...

Страница 16: ... Tür wird dauerhaft geöffnet wenn das Identmittel mindes tens 10 s gesteckt oder vorgehalten wird Nach erfolgreicher Anmeldung am Türschloss wird der äußere Türdrücker aufgekuppelt und die Tür kann geöffnet werden Von innen wird das Türschloss über den Knauf im Profilzylinder ver und ent riegelt Von außen wird das Türschloss über den Türschlüssel ver und entriegelt Von innen kann das Türschloss in...

Страница 17: ...die SmartCard aus dem Kartenleser Öffnen Sie die Tür über den Türdrücker 8 2 Türschloss von innen öffnen Öffnen Sie die Tür über den Türdrücker I LED Anzeige Wiederholungen Intervall Beschreibung Grüne LED blinkt Bis die Karte aus dem Kartenleser entfernt wird 0 25 s Zugang gewährt Rote LED blinkt dreimal 0 25 s Zugang nicht gewährt oder Lesefehler Rote und grüne LED blinken dreimal 0 25 s Karte f...

Страница 18: ... mit dem entsprechenden Drückerstift Abb 5 2 Seite 7 Nur DP100 Verbinden Sie das breite Datenkabel mit dem äußeren Tür beschlag Montieren Sie den inneren Türbeschlag mit dem entsprechenden Drückerstift und befestigen Sie ihn mit drei Schrauben Abb 5 3 Seite 7 Montieren Sie den Profilzylinder Abb 5 4 Seite 7 Fixieren Sie den Profilzylinder mit der Stulpschraube Abb 5 5 Seite 7 Verbinden Sie die erf...

Страница 19: ...ite 9 Die grüne LED leuchtet eine Sekunde lang Danach leuchten beide LEDs eine Sekunde lang Nach 5 10 Sekunden leuchten beide LEDs gleich zeitig Der Kartenleser kann kalibriert werden Führen Sie den RFID Transponder zum Kartenleser Wenn beide LEDs erlöschen entfernen Sie den RFID Transponder vom Kartenleser Nach spätestens 3 Sekunden leuchten eine oder mehrere LEDs HINWEIS Stellen Sie sicher dass ...

Страница 20: ... in jedem Ver riegelungszustand zurückgezogen werden können Über den äußeren Türdrücker darf die Falle nur nach erfolgreicher Anmeldung am Türschloss geöffnet werden können Die Türdrücker müssen leichtgängig betätigt werden können Prüfen Sie alle Funktionen des Türschlosses 9 6 Notentriegelungsfunktion überprüfen Verriegeln Sie die Tür durch zweifache Drehung des Türknaufs Drücken Sie den inneren ...

Страница 21: ...ite 8 Entfernen Sie die Abdeckung des Batteriefachs Abb 6 2 Seite 8 Lösen Sie das Kabel zur Spannungsversorgung von der Steuerplatine Abb 6 3 Seite 8 Entnehmen Sie die vier verbrauchten Batterien aus dem Batteriefach Abb 6 4 Seite 8 Setzen Sie vier neue AA Batterien in das Batteriefach ein Abb 6 5 Seite 8 Verbinden Sie das Kabel zur Spannungsversorgung mit der Steuerplatine Abb 6 6 Seite 8 Montier...

Страница 22: ...en Sie es erneut Wenn auch das fehl schlägt wenden Sie sich an den Zuständigen für das Schließsystem Rote LED und grüne LED blinken abwechselnd Batteriespannung niedrig Wechseln Sie die Batterien Rote LED leuchtet grüne LED blinkt fünfmal schnell dann leuchtet grüne LED und rote LED blinkt fünfmal schnell Es können keine weite ren Zutrittsberechtigun gen für Reinigungs und Zutrittskontroll Persona...

Страница 23: ...erwenden Sie einen für die Anwendung codierten Mifare Transponder Beide LEDs blinken zehn mal Der Zugangspunkt ist nicht konfiguriert Konfigurieren Sie den Zu gangspunkt Rote LED blinkt fünfmal Keine gültige Konfigu rationskarte Verwenden Sie eine gülti ge Konfigurationskarte Grüne LED blinkt fünfmal dann erlischt die grüne LED eine Sekunde lang Sequenz wiederholt sich unendlich Fehler im Datenspe...

Страница 24: ...nische Daten Beschreibung Art Nr DM 100 L Edelstahl Türgriff Areba 9106600697 DM 100 R Edelstahl Türgriff Areba 9106600698 DM 101 L Edelstahl Türgriff Omega 9106600701 DM 101 R Edelstahl Türgriff Omega 9106600702 DM 102 L Gold Türgriff Areba 9106600705 DM 102 R Gold Türgriff Areba 9106600706 DM 103 L Gold Türgriff Omega 9106600709 DM 103 R Gold Türgriff Omega 9106600710 DP 100 L Edelstahl Türgriff...

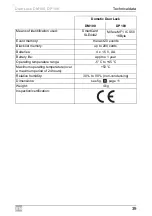
Страница 25: ...eicher die letzten 20 Ereignisse Black List Speicher bis zu 200 Karten Batterien 4 x 1 5 V Typ AA Laufzeit der Batterien ca 1 Jahr Betriebstemperaturbereich 5 C bis 45 C Maximale Betriebstemperatur über einen Zeitraum von maximal 24 h 50 C Luftfeuchtigkeit 30 bis 90 nicht kondensierend Abmessungen siehe Abb 9 Seite 11 Gewicht 4 kg Prüfung Zertifikat ...

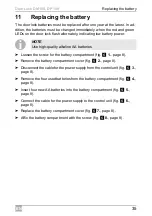
Страница 26: ...tion manual along with it Table of contents 1 Explanation of symbols 27 2 Safety instructions 27 3 Target group for this manual 28 4 Scope of delivery 29 5 Accessories 29 6 Intended use 30 7 Technical description 30 8 Operating the door lock 31 9 Fitting the door lock 32 10 Maintaining the door lock 34 11 Replacing the battery 35 12 Troubleshooting 36 13 Warranty 37 14 Disposal 38 15 Technical dat...

Страница 27: ...amage in the following cases Faulty assembly or connection Damage to the product resulting from mechanical influences Alterations to the product without express permission from the manu facturer Use for purposes other than those described in the operating manual WARNING Safety instruction Failure to observe this instruction can cause fatal or serious injury CAUTION Safety instruction Failure to ob...

Страница 28: ...Observe building regulations and the specifications of the door manufac turer when fitting the door lock CAUTION Risk of injury if product is damaged Damage to metal parts may lead to injury A damaged product is a risk to safety Check the packaging and door lock for damage A damaged product must not be used Damaged cables and plug connections also must not be used A NOTICE The door lock may become...

Страница 29: ...4 AA battery 6 1 Profile cylinder 7 3 Fastening screw for door handles 8 1 Inside door handle 9 1 Spindle for inside door handle 10 1 Faceplate screw 11 1 Mortice lock 12 2 Fastening screw for mortice lock 13 1 Means of identification 14 1 DP 100 only data cable Part designation Item number Smart Card Energy saver 9106600715 Smart Card Access Control 9106600713 Smart Card encoder 9106600722 Smart ...

Страница 30: ... of identifica tion is inserted into or held up to the card reader for at least 10 s After a successful sign in on the door lock the outer door handle is released and the door can be opened The door lock is locked and unlocked from the inside using the knob in the profile cylinder The door lock is locked and unlocked from the outside using the door key The door lock can be opened from the inside u...

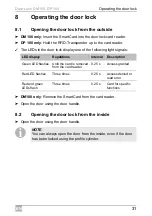
Страница 31: ...ve the SmartCard from the card reader Open the door using the door handle 8 2 Opening the door lock from the inside Open the door using the door handle I LED display Repetitions Interval Description Green LED flashes Until the card is removed from the card reader 0 25 s Access granted Red LED flashes Three times 0 25 s Access denied or read error Red and green LEDs flash Three times 0 25 s Card fo...

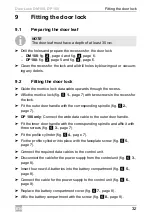
Страница 32: ...le fig 5 2 page 7 DP 100 only Connect the wide data cable to the outer door handle Fit the inner door handle with the corresponding spindle and affix it with three screws fig 5 3 page 7 Fit the profile cylinder fig 5 4 page 7 Fix the profile cylinder into place with the faceplate screw fig 5 5 page 7 Connect the required data cables to the control unit Disconnect the cable for the power supply fro...

Страница 33: ...e the RFID transponder to the card reader If both LEDs turn off remove the RFID transponder from the card reader After no more than three seconds one or several LEDs light up Remove the calibrator from the calibration connector fig 7 6 page 9 Replace the battery compartment cover fig 7 7 page 9 Affix the battery compartment with the screw fig 7 8 page 9 Move an RFID transponder to the card reader ...

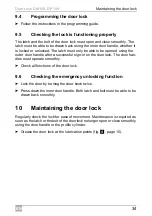
Страница 34: ... door handle after a successful sign in on the door lock The door han dles must operate smoothly Check all functions of the door lock 9 6 Checking the emergency unlocking function Lock the door by turning the door knob twice Press down the inner door handle Both latch and bolt must be able to be drawn back smoothly 10 Maintaining the door lock Regularly check the lock for ease of movement Maintena...

Страница 35: ...artment fig 6 1 page 8 Remove the battery compartment cover fig 6 2 page 8 Disconnect the cable for the power supply from the control unit fig 6 3 page 8 Remove the four used batteries from the battery compartment fig 6 4 page 8 Insert four new AA batteries into the battery compartment fig 6 5 page 8 Connect the cable for the power supply to the control unit fig 6 6 page 8 Replace the battery comp...

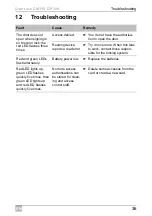
Страница 36: ...ce reports a read error Try it once more When this fails to work contact those respon sible for the locking system Red and green LEDs flash alternately Battery power low Replace the batteries Red LED lights up green LED flashes quickly five times then green LED lights up and red LED flashes quickly five times No more access authorisations can be stored for clean ing and access control staff Delete...

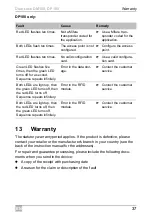
Страница 37: ...oded for the application Use a Mifare tran sponder coded for the application Both LEDs flash ten times The access point is not configured Configure the access point Red LED flashes ten times No valid configuration card Use a valid configura tion card Green LED flashes five times then the green LED turns off for a second Sequence repeats infinitely Error in the data stor age Contact the customer se...

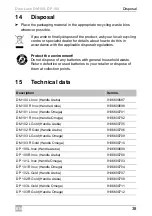
Страница 38: ... of them at collection points 15 Technical data Description Item no DM 100 L Inox Handle Areba 9106600697 DM 100 R Inox Handle Areba 9106600698 DM 101 L Inox Handle Omega 9106600701 DM 101 R Inox Handle Omega 9106600702 DM 102 L Gold Handle Areba 9106600705 DM 102 R Gold Handle Areba 9106600706 DM 103 L Gold Handle Omega 9106600709 DM 103 R Gold Handle Omega 9106600710 DP 100 L Inox Handle Areba 9...

Страница 39: ...KByte Event memory the last 20 events Black list memory up to 200 cards Batteries 4 x 1 5 V AA Battery life approx 1 year Operating temperature range 5 C to 45 C Maximum operating temperature over a maximum period of 24 hours 50 C Relative humidity 30 to 90 non condensing Dimensions see fig 9 page 11 Weight 4 kg Inspection certification ...

Страница 40: ...ire 1 Explication des symboles 41 2 Consignes de sécurité 41 3 Groupe cible de cette notice 43 4 Pièces fournies 43 5 Accessoires 44 6 Usage conforme 44 7 Description technique 45 8 Utilisation de la serrure de porte 46 9 Montage de la serrure de porte 47 10 Maintenance de la serrure de porte 49 11 Changement des piles 50 12 Guide de dépannage 51 13 Garantie 53 14 Retraitement 53 15 Caractéristiqu...

Страница 41: ...pour des dommages dans les cas suivants des défauts de montage ou de raccordement des influences mécaniques ayant endommagé le matériel des modifications apportées au produit sans autorisation explicite de la part du fabricant une utilisation différente de celle décrite dans la notice AVERTISSEMENT Consigne de sécurité le non respect de ces consignes peut entraîner la mort ou de graves blessures A...

Страница 42: ...ce Lors du mon tage de la serrure respectez les prescriptions en vigueur et les instructions du fabricant de la porte ATTENTION Risque de blessures en cas d endommagement Si cer taines pièces métalliques sont endommagées il y a risque de blessures Un produit endommagé représente un risque pour la sécurité Vérifiez que l emballage et la serrure de porte ne sont pas endommagés Si un produit présente...

Страница 43: ...ure côté extérieur 2 1 Tige du loquet de porte côté extérieur 3 1 Vis pour le cache du compartiment à piles 4 1 Cache pour compartiment à piles 5 4 Piles AA 6 1 Cylindre profilé 7 3 Vis de fixation pour ensembles de serrure 8 1 Ensemble de serrure côté intérieur 9 1 Tige du loquet de porte côté l intérieur 10 1 Vis emboutie 11 1 Serrure encastrée 12 2 Vis de fixation pour serrure encastrée 13 1 Mo...

Страница 44: ...DP100 sont conçues pour une utilisation de contrôle d accès pour les portes d hôtel Désignation des pièces Numéro de produit Smart Card Energy saver 9106600715 Smart Card Access Control 9106600713 Smart Card encoder 9106600722 Smart Key Card 9106600724 RFID Access Control 9106600714 RFID Energy saver 9106600716 RFID encoder 9106600723 RFID Key Card 9106600725 ...

Страница 45: ...rant au moins 10 s la porte reste ouverte Après identification réussie le loquet de porte extérieur est débloqué et la porte peut être ouverte De l intérieur la serrure de porte peut être verrouillée ou déverrouillée par le bouton du cylindre profilé De l extérieur la serrure de porte peut être verrouillée ou déverrouillée par la clé de la porte De l intérieur la serrure de porte peut être ouverte...

Страница 46: ... SmartCard du lecteur de carte Ouvrez la porte à l aide du loquet de porte 8 2 Ouverture de la serrure de l intérieur Ouvrez la porte à l aide du loquet de porte I Affichage LED Répétitions Intervalle Description La LED verte clignote jusqu à ce que la carte soit retirée du lecteur de carte 0 25 s Accès autorisé La LED rouge clignote trois fois 0 25 s Accès refusé ou erreur de lecture Les LED roug...

Страница 47: ...age 7 Montez l ensemble de serrure côté extérieur avec la tige du loquet de porte correspondante fig 5 2 page 7 Uniquement DP 100 raccordez le câble de données avec l ensemble de serrure côté extérieur Montez l ensemble de serrure côté intérieur avec la tige du loquet de porte correspondante et fixez le à l aide de trois vis fig 5 3 page 7 Montez le cylindre profilé fig 5 4 page 7 Fixez le cylindr...

Страница 48: ...le d alimentation électrique à la platine de commande fig 7 5 page 9 La LED verte brille durant une seconde Les deux LED brillent ensuite durant une seconde Au bout de 5 10 secondes les deux LED brillent en même temps Le lecteur de carte peut être calibré Amenez le transpondeur RFID au lecteur de carte Lorsque les deux LED s éteignent retirez le transpondeur RFID du lecteur de carte Au bout de 3 s...

Страница 49: ...érieur quel que soit le type de verrouillage La clenche peut être déblo quée par l actionnement du loquet extérieur uniquement si le lecteur de carte a reconnu la carte Les loquets de porte doivent pouvoir être actionnés facilement Contrôlez toutes les fonctions de la serrure de porte 9 6 Contrôle de la fonction de déverrouillage d urgence Verrouillez la porte en tournant deux fois le bouton de po...

Страница 50: ... fig 6 1 page 8 Enlevez le cache du compartiment à piles fig 6 2 page 8 Retirez le câble d alimentation électrique de la platine de commande fig 6 3 page 8 Enlevez les quatre piles usagées du compartiment à piles fig 6 4 page 8 Insérez les quatre nouvelles piles AA dans le compartiment à piles fig 6 5 page 8 Raccordez le câble d alimentation électrique à la platine de commande fig 6 6 page 8 Monte...

Страница 51: ...l opération Si cela échoue une nouvelle fois adressez vous au respon sable du système de verrouillage Les LED rouge et verte clignotent tour à tour Tension des piles trop faible Changez les piles La LED rouge s allume la LED verte clignote cinq fois rapidement ensuite la LED verte s allume et la LED rouge clignote cinq fois rapidement Il n est plus possible d enregistrer de nou veaux droits d accè...

Страница 52: ...de configura tion non valide Utilisez une carte de configuration valide La LED verte clignote cinq fois puis elle s éteint durant une seconde La séquence se répète à l infini Erreur dans la mémoire de don nées Contactez le service après vente Les deux LED s allument la LED verte s éteint puis la LED rouge s éteint La séquence se répète à l infini Erreur dans le module RFID Contactez le service apr...

Страница 53: ... d achat le motif de la réclamation ou une description du dysfonctionnement 14 Retraitement Jetez les emballages dans les conteneurs de déchets recyclables prévus à cet effet M Lorsque vous mettrez votre produit définitivement hors service informez vous auprès du centre de recyclage le plus proche ou auprès de votre revendeur spécialisé sur les prescriptions relatives au retraitement des déchets B...

Страница 54: ...e Areba 9106600705 DM 102 R or poignée de porte Areba 9106600706 DM 103 L or poignée de porte Omega 9106600709 DM 103 R or poignée de porte Omega 9106600710 DP 100 L acier inoxydable poignée de porte Areba 9106600699 DP 100 R acier inoxydable poignée de porte Areba 9106600700 DP 101 L acier inoxydable poignée de porte Omega 9106600703 DP 101 R acier inoxydable poignée de porte Omega 9106600704 DP ...

Страница 55: ...re d événements les 20 derniers événements Mémoire de liste noire jusqu à 200 cartes Piles 4 x 1 5 V type AA Durée de vie des piles env 1 an Plage de température de fonctionnement 5 C à 45 C Température de fonctionnement maxi male sur une durée de max 24 h 50 C Humidité de l air 30 à 90 sans condensation Dimensions voir fig 9 page 11 Poids 4 kg Contrôle certificat ...

Страница 56: ...as instrucciones Índice 1 Explicación de los símbolos 57 2 Indicaciones de seguridad 57 3 Destinatarios de estas instrucciones 58 4 Volumen de entrega 59 5 Accesorios 60 6 Uso adecuado 60 7 Descripción técnica 61 8 Manejo de la cerradura 62 9 Montar la cerradura de la puerta 63 10 Mantenimiento y cuidado de la cerradura 65 11 Cambiar las pilas 66 12 Solución de averías 67 13 Garantía legal 68 14 G...

Страница 57: ...a toda responsabilidad ante daños ocurridos en los siguientes casos errores de montaje o de conexión daños en el producto debido a influencias mecánicas modificaciones realizadas en el producto sin el expreso consentimiento del fabricante utilización del aparato para fines distintos a los descritos en las instruc ciones ADVERTENCIA Indicación de seguridad su incumplimiento puede acarrear la muerte...

Страница 58: ...tar la cerradura ATENCIÓN Peligro de sufrir lesiones debido a desperfectos Los desperfectos en piezas metálicas pueden provocar lesiones Un producto que presente desperfectos supone un riesgo para la seguridad Por ello compruebe si el embalaje y la cerradura de la puerta presentan algún desperfecto No se autoriza la puesta en funcionamiento de un producto que presente desper fectos Tampoco se auto...

Страница 59: ...ta 3 1 Tornillo para la tapa del portapilas 4 1 Tapa del portapilas 5 4 Pilas AA 6 1 Bombín 7 3 Tornillo de fijación para los escudos de la puerta 8 1 Escudo interior de la puerta 9 1 Cuadradillo del picaporte interior de la puerta 10 1 Tornillo fiador 11 1 Cerradura de embutir 12 2 Tornillo de fijación de la cerradura de embutir 13 1 Medio de identificación 14 1 Solo DP100 cable de datos ...

Страница 60: ...n concebidas para ser utili zadas como control de acceso para las puertas de habitaciones de hoteles Nombre de las piezas Número de artículo Smart Card Energy saver 9106600715 Smart Card Access Control 9106600713 Smart Card encoder 9106600722 Smart Key Card 9106600724 RFID Access Control 9106600714 RFID Energy saver 9106600716 RFID encoder 9106600723 RFID Key Card 9106600725 ...

Страница 61: ... de identificación permanece insertado o colocado delante del lector por lo menos durante 10 s Cuando se ha realizado correctamente la identificación en la cerradura de la puerta el picaporte exterior de la puerta se acopla y ésta se puede abrir Por dentro la cerradura se bloquea y desbloquea con el pomo y por fuera con la llave de la puerta Por dentro la cerradura se puede abrir con el picaporte ...

Страница 62: ...e la tarjeta SmartCard del lector de tarjetas Abra la puerta con el picaporte 8 2 Abrir la cerradura de la puerta desde dentro Abra la puerta con el picaporte I Indicador LED Repeticiones Intervalo Descripción LED verde inter mitente Hasta que se retire la tarjeta del lector 0 25 seg Se autoriza el acceso LED rojo intermi tente Tres veces 0 25 seg No se autoriza el acceso o hay un error de lectura...

Страница 63: ...s en el alojamiento fig 5 1 página 7 Monte el escudo exterior de la puerta con el correspondiente cuadradillo del picaporte fig 5 2 página 7 Solo DP100 Una el cable de datos ancho con el escudo exterior de la puerta Monte el escudo interior de la puerta con el correspondiente cuadradillo del picaporte y fíjelo con tres tornillos fig 5 3 página 7 Monte el bombín fig 5 4 página 7 Fije el bombín con ...

Страница 64: ...ontrol fig 7 5 página 9 El LED verde se ilumina durante un segundo y a continuación se ilumi nan los dos LED durante un segundo Tras un intervalo de entre 5 y 10 segundos se iluminan al mismo tiempo los dos LED y entonces se puede calibrar el lector de tarjetas Acerque el transpondedor RFID al lector de tarjetas Cuando se apaguen los dos LED retire el transpondedor RFID del lector Tras un máximo d...

Страница 65: ...llo desde cualquier posición de bloqueo Con el picaporte exterior solo se debe ser posible abrir el gatillo de la puerta cuando la identificación ha tenido lugar correctamente Ambos picaportes se deben poder manejar con facilidad Compruebe todas las funciones de la cerradura 9 6 Comprobar la función de desbloqueo de emergencia Bloquee la puerta girando dos veces el pomo Presione hacia abajo el pic...

Страница 66: ...s fig 6 1 página 8 Retire la tapa del portapilas fig 6 2 página 8 Desconecte el cable de alimentación de tensión de la placa de control fig 6 3 página 8 Extraiga del portapilas las cuatro pilas usadas fig 6 4 página 8 Coloque cuatro nuevas pilas AA en el portapilas fig 6 5 página 8 Conecte el cable de alimentación de tensión a la placa de control fig 6 6 página 8 Coloque la tapa del portapilas fig...

Страница 67: ...ror de lectura Inténtelo de nuevo Si vuelve a ocurrir lo mismo diríjase al responsable del sistema de cierre Los LED rojo y verde parpa dean alternativamente Tensión de batería baja Cambie las pilas El LED rojo se ilumina el verde parpadea rápida mente cinco veces y conti nuación se ilumina el LED verde y el rojo parpadea rápidamente cinco veces No es posible guar dar más autorizacio nes de acceso...

Страница 68: ...dor Mifare codificado para la aplicación Ambos LED parpadean diez veces El punto de acceso no está configurado Configure el punto de acceso El LED rojo parpadea cinco veces Tarjeta de configura ción no válida Utilice una tarjeta de configuración válida El LED verde parpadea cinco veces y a continuación se apaga durante un segundo Esta secuencia se repite inde finidamente Error en la memoria de dat...

Страница 69: ...de art DM 100 L en acero inoxidable tirador Areba 9106600697 DM 100 R en acero inoxidable tirador Areba 9106600698 DM 101 L en acero inoxidable tirador Omega 9106600701 DM 101 R en acero inoxidable tirador Omega 9106600702 DM 102 L en oro tirador Areba 9106600705 DM 102 R en oro tirador Areba 9106600706 DM 103 L en oro tirador Omega 9106600709 DM 103 R en oro tirador Omega 9106600710 DP 100 L en a...

Страница 70: ...0 operaciones realizadas Memoria de lista negra hasta 200 tarjetas Pilas 4 de 1 5 V tipo AA Tiempo de funcionamiento de las pilas aprox 1 año Rango de temperatura de funcionamiento de 5 C a 45 C Temperatura máxima de servicio durante un tiempo máximo de 24 horas 50 C Humedad del aire de 30 a 90 sin condensación Dimensiones Véase fig 9 página 11 Peso 4 kg Homologación Certificados ...

Страница 71: ...egazione dei simboli 72 2 Indicazioni di sicurezza 72 3 Destinatari di questo manuale di istruzioni 73 4 Dotazione 74 5 Accessori 75 6 Conformità d uso 75 7 Descrizione tecnica 76 8 Impiego della serratura della porta 77 9 Montaggio della serratura della porta 78 10 Manutenzione della serratura della porta 80 11 Sostituzione della batteria 81 12 Eliminazione dei guasti 82 13 Garanzia 83 14 Smaltim...

Страница 72: ...sume nessuna responsabilità per danni nei seguenti casi errori di montaggio o di allacciamento danni al prodotto dovuti a influenze meccaniche modifiche al prodotto senza esplicita autorizzazione del produttore impiego per altri fini rispetto a quelli descritti nel manuale di istruzioni AVVERTENZA Avviso di sicurezza la mancata osservanza di questo avviso può causare ferite gravi anche mortali ATT...

Страница 73: ... norme e direttive tecniche del produttore della serratura ATTENZIONE Rischio di lesioni dovute a danni Danni a componenti in metallo possono causare lesioni Un prodotto danneggiato è un rischio per la sicurezza Controllare che la confezione e la ser ratura della porta non siano state danneggiate Un prodotto danneggiato non deve essere messo in funzione Non utilizzare neppure cavi e collegamenti a...

Страница 74: ...e per la copertura del vano batteria 4 1 Copertura per il vano batteria 5 4 Batteria AA 6 1 Cilindro profilato 7 3 Vite di fissaggio per ferramenti porta 8 1 Ferramento esterno della porta 9 1 Perno della maniglia per maniglia interna porta 10 1 Vite a testa svasata 11 1 Serratura incassata 12 2 Vite di fissaggio per serratura incassata 13 1 Mezzi di identificazione 14 1 solo DP100 cavo dati ...

Страница 75: ...te per l utilizzo del sistema di controllo accessi per porte interne di hotel Denominazione pezzo Numero articolo Smart Card Energy saver 9106600715 Smart Card Access Control 9106600713 Smart Card encoder 9106600722 Smart Key Card 9106600724 RFID Access Control 9106600714 RFID Energy saver 9106600716 RFID encoder 9106600723 RFID Key Card 9106600725 ...

Страница 76: ...ettore per almeno 10 sec Se la registrazione è riuscita sulla serratura della porta viene accoppiata la maniglia esterna della porta e la porta può essere aperta Dall interno la serratura della porta viene bloccata e sbloccata dal pomello nel cilindro profilato Dall esterno la serratura della porta viene bloccata e sbloccata dalla chiave Dall interno la serratura della porta può essere aperta con ...

Страница 77: ...rre la smart card dal lettore Aprire la porta con la maniglia 8 2 Apertura della serratura della porta dall interno Aprire la porta con la maniglia I Indicazione LED Ripetizioni Intervallo Descrizione Il LED verde lam peggia Finché la scheda non è stata estratta dal lettore 0 25 sec Accesso accordato Il LED rosso lam peggia Tre volte 0 25 sec Accesso non accor dato o errore di lettura I LED rosso ...

Страница 78: ...tivo perno della maniglia fig 5 2 pagina 7 Solo DP100 collegare il cavo dati largo con il ferramento esterno della porta Montare il ferramento interno della porta con il rispettivo perno della maniglia e fissarlo con tre viti fig 5 3 pagina 7 Montare il cilindro profilato fig 5 4 pagina 7 Fissare il cilindro profilato con la vite a testa svasata fig 5 5 pagina 7 Collegare il cavo dati necessario c...

Страница 79: ...so per un secondo Poi entrambi i LED rimango no accesi per un secondo Dopo 5 10 secondi entrambi i LED rimango no accesi contemporaneamente Il lettore di schede può essere calibrato Portare il transponder RFID sul lettore di schede Se entrambi i LED si spengono rimuovere il transponder RFID dal lettore di schede Dopo almeno 3 secondi sono accesi uno o più LED NOTA Assicurarsi che non si trovino sc...

Страница 80: ...io Attraverso la maniglia esterna il saliscendi può essere aperto solo dopo che sulla serratura della porta la registrazione è riuscita La maniglia della porta deve poter essere attivata agevolmente Controllare tutte le funzioni della serratura della porta 9 6 Controllo del funzionamento del dispositivo di sbloccaggio di emergenza Bloccare la porta ruotando due volte il pomello della porta Premere...

Страница 81: ... vite del vano batteria fig 6 1 pagina 8 Rimuovere la copertura del vano batteria fig 6 2 pagina 8 Estrarre il cavo per l alimentazione di tensione dalla scheda di controllo fig 6 3 pagina 8 Rimuovere le quattro batterie usate dal vano batteria fig 6 4 pagina 8 Inserire quattro nuove batterie AA nel vano batteria fig 6 5 pagina 8 Collegare il cavo per l alimentazione di tensione alla scheda di con...

Страница 82: ...ovare Se anche in questo caso non è possibi le rivolgersi al responsabi le del sistema di chiusura I LED rosso e verde lam peggiano ad intermittenza Tensione batteria bassa Sostituire le batterie Il LED rosso è acceso il LED verde lampeggia velocemente cinque volte poi il LED verde è acceso e il LED rosso lampeggia velocemente cinque volte È impossibile memo rizzare altre autoriz zazioni d accesso...

Страница 83: ...o per l applicazione Usare un transponder Mifare codificato per l applicazione Entrambi i LED lampeggiano dieci volte Il punto di accesso non è configurato Configurare il punto di accesso Il LED rosso lampeggia cinque volte Nessuna scheda di configurazione valida Usare una scheda di configurazione valida Il LED verde lampeggia cinque volte poi il LED verde si spegne per un secondo La sequenza si r...

Страница 84: ...ervizio definitivamente informarsi al centro di riciclaggio più vicino oppure presso il proprio rivenditore specializzato sulle prescrizioni adeguate concernenti lo smaltimento B Proteggete l ambiente Gli accumulatori e le batterie non devono essere raccolti insieme ai rifiuti domestici Consegnare gli accumulatori difettosi o le batterie usate al rivendi tore o presso un centro di raccolta ...

Страница 85: ... oro maniglia della porta Areba 9106600706 DM 103 L oro maniglia della porta Omega 9106600709 DM 103 R oro maniglia della porta Omega 9106600710 DP 100 L acciaio inox maniglia della porta Areba 9106600699 DP 100 R acciaio inox maniglia della porta Areba 9106600700 DP 101 L acciaio inox maniglia della porta Omega 9106600703 DP 101 R acciaio inox maniglia della porta Omega 9106600704 DP 102 L oro ma...

Страница 86: ...timi 20 eventi Memoria blacklist fino a 200 schede Batterie 4 x 1 5 V tipo AA Periodo di funzionamento delle batterie circa 1 anno Intervallo della temperatura di esercizio Da 5 C a 45 C Temperatura di esercizio massima in un arco di tempo di massimo 24 h 50 C Umidità dell aria Da 30 a 90 non condensante Dimensioni vedi fig 9 pagina 11 Peso 4 kg Certificati di controllo ...

Страница 87: ...ya ägaren vid ev vidare försäljning Innehållsförteckning 1 Förklaring av symboler 88 2 Säkerhetsanvisningar 88 3 Målgrupp 89 4 Leveransomfattning 90 5 Tillbehör 90 6 Ändamålsenlig användning 91 7 Teknisk beskrivning 91 8 Använda dörrlåset 92 9 Montera dörrlåset 93 10 Underhåll av dörrlåset 95 11 Byta batteri 96 12 Felsökning 96 13 Garanti 97 14 Avfallshantering 98 15 Tekniska data 98 ...

Страница 88: ...vertar inget ansvar för skador i följande fall monterings eller anslutningsfel skador på produkten orsakade av mekanisk påverkan ändringar som utförts utan uttryckligt medgivande från tillverkaren ej ändamålsenlig användning VARNING Observera Beaktas anvisningen ej kan det leda till dödsfara eller svåra skador AKTA Observera Beaktas anvisningen ej kan det leda till kropps skador OBSERVERA Om anvis...

Страница 89: ... Följ dörrtillverkarens föreskrifter och bestämmelser vid montering av dörrlåset AKTA Materialskador kan ge upphov till personskador Skador på metalldelar kan orsaka personskador En skadad produkt utgör en säkerhetsrisk Kontrollera förpackningen och dörrlåset be träffande skador En skadad produkt får inte användas Skadade kablar och stickkontakter får inte heller användas A OBSERVERA Borrar spån o...

Страница 90: ... AA batteri 6 1 Profilcylinder 7 3 Fästskruv för dörrbeslag 8 1 Inre dörrbeslag 9 1 Tryckstift för inre dörrhandtag 10 1 Inre låsskruv 11 1 Instickslås 12 2 Fästskruv för instickslås 13 1 Identifieringshjälpmedel 14 1 Endast DP100 Datakabel Komponent Artikelnummer Smart Card Energy saver 9106600715 Smart Card Access Control 9106600713 Smart Card encoder 9106600722 Smart Key Card 9106600724 RFID Ac...

Страница 91: ...en om identifieringshjälpmedlet hålls vid kortläsaren minst 10 s Om identifieringshjälpmedlet stämmer överens med kortläsaren låses det yttre dörrhandtaget upp och dörren kan öppnas Inifrån kan man öppna och låsa dörrlåset med hjälp av knappen i profil cylindern Utifrån kan man öppna och låsa dörrlåset med hjälp av dörrnyckeln Oavsett om det är låst eller inte kan man öppna låset med det inre dörr...

Страница 92: ...tläsaren Öppna dörren med dörrhandtaget 8 2 Öppna dörrlåset inifrån Öppna dörren med dörrhandtaget I Lysdiod Upprepningar Intervall Beskrivning Den gröna lysdio den blinkar Tills kortet avlägsnas ur kortläsaren 0 25 s Dörren kan öppnas Den röda lysdio den blinkar Tre gånger 0 25 s Ogiltigt identifierings hjälpmedel eller läsfel Den röda och gröna lysdioden blinkar Tre gånger 0 25 s Kort för specia...

Страница 93: ...nde tryckstift bild 5 2 sida 7 Endast DP100 Anslut den breda datakabeln med det yttre dörrhand taget Montera det inre dörrhandtaget med motsvarande tryckstift och fäst det med tre skruvar bild 5 3 sida 7 Montera profilcylindern bild 5 4 sida 7 Fixera profilcylindern med den inre låsskruven bild 5 5 sida 7 Anslut de nödvändiga datakablarna till styrkretskortet Lossa strömkabeln från styrkretskortet...

Страница 94: ...transpondern till kortläsaren När båda lysdioderna slocknar avlägsna RFID transpondern från kortläsaren Efter max 3 sekunder tänds en eller flera lysdioder Avlägsna kalibratorn ur kalibreringsuttaget bild 7 6 sida 9 Montera batterifackets kåpa bild 7 7 sida 9 Fäst batterifacket med skruven bild 7 8 sida 9 För ett RFID kort till kortläsaren Den gröna lysdioden tänds Dörrlåset kan programmeras ANVIS...

Страница 95: ...ntifieringshjälpmedlet stämmer överens med dörrlåset Dörrhandtagen ska gå lätt och får inte kärva Kontrollera dörrlåsets samtliga funktioner 9 6 Kontrollera nödupplåsningsfunktionen Lås dörren genom att rotera dörrknoppen två gånger Tryck ner det inre dörrhandtaget Både dörrhake och regel måste lätt kunna dras tillbaka och får inte kärva 10 Underhåll av dörrlåset Kontrollera att dörrlåset inte kär...

Страница 96: ...kruven bild 6 8 sida 8 12 Felsökning ANVISNING Använd alkaliska AA batterier av hög kvalitet Fel Orsak Åtgärd Dörren kan inte öppnas med identifieringshjälp medlet den röda lysdio den blinkar tre gånger Ingen behörighet att öppna dörren Du kan inte öppna dörren med detta identifieringshjälpmedel Läsaren meddelar läsarfel Försök en gång till Om detta inte heller fungerar vänd dig till ansvarig för ...

Страница 97: ...vändningen Båda lysdioderna blinkar tio gånger Åtkomstpunkten är inte konfigurerad Konfigurera åtkomst punkten Den röda lysdioden blinkar fem gånger Inget giltigt konfigu rationskort Använd ett giltigt konfigurationskort Den gröna lysdioden blinkar fem gånger sedan slocknar den gröna lysdioden under en sekund Sekvensen upprepas utan slut Fel i datalagrings mediet Kontakta kundtjänst Båda lysdioder...

Страница 98: ...r DM 100 L rostfritt stål handtag Areba 9106600697 DM 100 R rostfritt stål handtag Areba 9106600698 DM 101 L rostfritt stål handtag Omega 9106600701 DM 101 R rostfritt stål handtag Omega 9106600702 DM 102 L guld handtag Areba 9106600705 DM 102 R guld handtag Areba 9106600706 DM 103 L guld handtag Omega 9106600709 DM 103 R guld handtag Omega 9106600710 DP 100 L rostfritt stål handtag Areba 91066006...

Страница 99: ...0 1kByte Lagringsmedium för händelser De senaste 20 händelserna Black List minne Upp till 200 kort Batterier 4 x 1 5 V Typ AA Batteriernas kapacitet ca 1 år Temperaturområde 5 C till 45 C Max drifttemperatur över en tid på max 24 h 50 C Luftfuktighet 30 till 90 ej kondenserande Mått se bild 9 sida 11 Vikt 4 kg Provning certifikat ...

Страница 100: ...0 48 22 414 32 01 Mail info dometic pl RUSSIA Dometic RUS LLC Komsomolskaya square 6 1 107140 Moscow Russia 7 495 780 79 39 7 495 916 56 53 Mail info dometic ru SLOVAKIA Dometic Slovakia s r o Tehelná 8 SK 98601 Fiľakovo 421 47 4319 107 421 47 4319 166 Mail info dometic sk SPAIN Dometic Spain S L Avda Sierra del Guadarrama 16 E 28691 Villanueva de la Cañada Madrid 34 902 111 042 34 900 100 245 Mai...

Отзывы: