INSTALLATION AND MAINTENANCE GUIDE
Revision October 2018
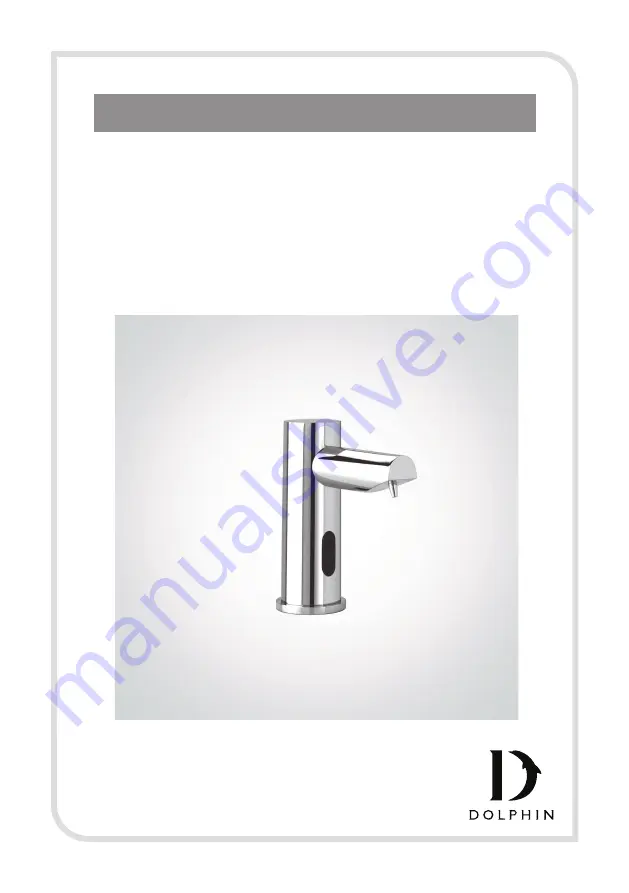
BC633F
E L E C T R O N I C F O A M S O A P D I S P E N S E R
Saving soap, saving power, promoting hygiene
Important:
Read carefully before installing product
Страница 1: ...TALLATION AND MAINTENANCE GUIDE Revision October 2018 BC633F E L E C T RO N I C F OA M S OA P D I S P E N S E R Saving soap saving power promoting hygiene Important Read carefully before installing product ...
Страница 2: ...phin BC 633F 3 Technical Data 4 Pre Installation Info 6 Pack Contents 7 9 Installation 10 FillingThe SoapTank 11 Settings Adjustment 12 Spare Parts List 13 Maintenance 14 Warranty 15 17 Troubleshooting INDEX ...
Страница 3: ...A Capacity 1 Litre 33 8 oz Power Supply 12V transformer Soap viscosity up to 100 cPs Standard discharge Varies according to viscosity and soap consistency Sensor range 30 100 mm 10 mm 1 18 3 94 customisable by optional remote control ...
Страница 4: ...electronic soap dispenser facing a mirror or any electronic system operated by an infrared sensor To prevent reflection problems it is recommended to keep a minimum distance of 5 1 5m between the soap dispenser sensor and any other directly facing objects and a minimum of 6 150 mm between the soap dispenser and the adjacent tap IMPORTANT Keep in mind that when using the tap installed next to the s...
Страница 5: ...e recommended range for foam soap viscosity is up to 100 cPs Thicker liquid soap flows slower and inhibits the pump valve causing strain and damage Dolphin foam soap dispensers are suitable for use with any generic liquid soap of the correct viscosity and pH The pH level of all soap used in Dolphin foam soap dispensers should be between 6 5 to 8 5 Lower levels will cause corrosion to the metal dis...
Страница 6: ...S Familiarise yourself with the part names and confirm that the parts are included 1 x foam dispenser body 12v transformer 1 x foam compressor with pipe 2 x screws and 2 x anchors 1 x pump assembly with bottle support and soap tank ...
Страница 7: ...ti rotation pin Disassemble the nut disk and gasket from the base of the soap dispenser body Step 2 installing the soap dispenser 1 Insert the soap dispenser body and the anti rotation pin along with the rosette into the holes drilled 2 Under the deck secure the gasket disk and nut over the soap dispenser body nipple diameter deep diameter deep Recommended hole size Ø ...
Страница 8: ... tube 4 Connect the quick connection fitting to the soap dispenser pump Make sure it is firmly plugged in 5 Connect the second soap tube provided in the packaging from the compressor to the quick connection fitting at the top of the soap dispenser pump assembly by snapping it in IMPORTANT Make sure to cut the soap tube to the minimum required length ...
Страница 9: ...ity socket and connect the transformer connector 4 Wait about 10 seconds before placing your hands in the sensor range to avoid adjustment mode O RING VISIBLE NOT CONNECTED PROPERLY L L ONLY L L THE GROOVES ARE VISIBLE CONNECTED PROPERLY L L SECONDS ABOUT FROM THE TRANSFORMER TO THE SOAP DISPENSER IMPORTANT the 4 contacts connector should be connected properly so that the white o ring is not visib...
Страница 10: ...ap tank back into the pump assembly Make sure the tank is firmly secured into place 5 Press and hold the refill button located at the back of the pump assembly until soap is dispensed from the soap dispenser spout Release the button once soap begins dispensing from the spout Alternately use the FILL function on the remote control if available see page 11 Note When the soap in the soap tank reaches...
Страница 11: ...on the AIR button to increase the air quantity and the to decrease it Indication 2 blinks of the blue light in the sensor eye 3 RES This function resets the sensor back to its factory settings 4 TEMPORARY OFF FUNCTION This function temporary disables the dispenser Use this function to preform maintenance in front of the sensor without activating the system for example cleaning The soap dispenser w...
Страница 12: ...nsor Kit Green 28 Foam BC07220332 Soap Dispenser Pump BC07222028 Pump Compressor Kit BC07222037 6 pack Soap Bottle 1L BC07100035 6 pack 1L Bottle Support KIt BC07100037 12VTransformer EU BC06522081 12VTransformer UK BC06522086 12VTransformer US BC06522080 12VTransformer AU BC06522085 Remote Control for Foam Dispenser Optional BC07100009 Soap Water Remote Control Optional BC01700014 ...
Страница 13: ...n It releases the open end of the soap pipe which can then be easily pulled out Filter cleaning instructions foam dispenser only This soap dispenser is provided with a foam filter It is recommended to clean the filter every six 6 months If the soap supply has decreased this may be caused by the clogged filter The filter can be cleaned as follows 1 Use a wrench to unscrew the quick connection fitti...
Страница 14: ... claim contact your Dolphin Distributor Dealer or Plumbing Contractor Please be sure to provide all pertinent information regarding your claim including a complete description of the problem the product model number the date the product was purchased from whom the product was purchased and the installation date Also include your original invoice DOLPHIN SOLUTIONS LTD AND OR SELLER DISCLAIM ANY LIA...
Страница 15: ...mote control Soap tank is empty Pump and compressor are making a sound when sensor is activated Foam not dispensing f Prime the soap dispenser by pressing the ill button on the remote or by pressing the reill button located at the bottom of the pump until foam exits the nozzle Soap dispenser has not been primed Replace the pump Damaged pump di h ge f Y L C ONNE T C NO ation r t s lu Il TED PROPERL...
Страница 16: ...RO C ONNE T C NO C The connector should be inserted fully until the white o ring is not visible Remove the o ring if necessary AUX connector not fully inserted Sensor is blinking when hand is placed in front Pump is not making sound when the sensor is activated Foam not dispensing P of Replace the Pump Rinse warm water through the pipe and the body f the soap dispenser all the way to the nozzle Re...
Страница 17: ...dispen sensor e c la p Re If f the above two solutions have not resolved this issue replace with appropriate sensor For part numbers see spare parts list Damaged sensor air in the f of f 1 Increase the air to soap ratio Liquid rather than fo oam is being dispensed out of the nozzle nsing 2 Verify that the ilter is clean 3 Replace compressor supplied with pump For part numbers see spare parts list ...
Страница 18: ... source female Counter hole Ø 28 34mm Min max thickness 2 27mm 3 8 BSP water supply connector Power Plug in 9 volt transformers or 9 volt battery with low battery warning for other power source options see page 190 191 Product Codes Polished chrome finish Powered by 6 x AAA 9v PP3 battery DB 200C Powered by 9v plug in transformer DB 225C Brushed nickel finish designed to match brushed stainless st...