


MPT-250B SPECIFICATIONS AND
OPERATING INSTRUCTIONS
DATASHEET
______________________________________________________________________
Daniels Manufacturing Corporation, 526 Thorpe Road, Orlando, FL 32824, U.S.A.
Phone: (407) 855-6161 • Fax (407) 855-6884 •
• Email:
Copyright©2013 All Rights Reserved Page 5 of 6
Rev. M 10/13 MPT-250B-DS
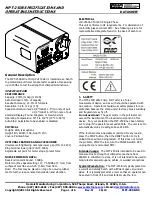
3.6 REAR PANEL
FUSE
–
If the main fuse requires replacement install a .3 Amp 125/250V slow blow fuse. The fuse compartment is
located on the back of the unit and labeled as FUSE.
ON/OFF –
Depress the rocker switch in order to turn the unit ON or OFF.
AC POWER –
Insert the proper end of the supplied power cord into the male receptacle.
4. OPERATION
In the instructions that follow operation of both standard and optional features will be covered.
4.1 POWER
4.1.1
Check the operating voltage of the unit. The correct operating voltage is on the identification label on the back
of the unit. Be sure that this voltage is the same as the voltage available at your location before you plug in the
MPT-250B.
4.1.2
Turn the power switch in the center of the back plate OFF.
4.1.3
Plug the power cord into its receptacle on the back of the MPT-250B, and into the incoming power receptacle.
4.1.4
Startup Sequence
NOTE: Please read this section in its entirety prior to performing the startup sequence.
1.
PRIOR
to turning on the unit, turn the zero adjustment knob to the maximum clockwise position.
2.
Turn the power switch ON (Rear Panel). The display will turn on and the motor control stop switch will illuminate.
3.
The unit will warm up for approximately 60 seconds.
4.
The unit will then display the serial number.
5.
The unit will need to be adjusted to zero.
NOTE: It is imperative to move the zero adjustment knob accurately and slowly for proper operation of the
Alphatron unit. If the adjustment knob is turned too quickly, the value may extend beyond the zero mark
into the negative value range and cause an error message to be displayed. As a general rule, it is
suggested to begin turning the adjustment knob slowly once the “+002.0” display value is reached so as
to not pass zero.
a.
Turn the zero adjustment knob counterclockwise slowly until zero is displayed.
b.
Once zero is reached the unit will automatically perform an internal calibration sequence.
c.
If the calibration is OK the unit will be ready for operation.
d.
If the Alphatron does not zero calibrate properly, an error message will display prompting the end user to contact
DMC. Prior to contacting DMC the following steps should be taken:
i.
Turn the power to the unit OFF (Rear Panel).
ii.
Turn the zero adjustment knob clockwise one complete turn.
iii.
Follow section 4.1.4. steps 1 through 5.
iv.
If the calibration is OK the unit will be ready for use.
If the Alphatron still does not zero calibrate properly, an error message will display prompting the end user to
contact DMC. Contact DMC.
4.2 LOWER GRIP
4.2.1
(Standard Grip) Rotate the lower grip to place the correct slot for the wire/terminal under test in the uppermost
position. Select a slot that is the same width as the wire diameter, or one size larger.
4.2.2
Self Tightening Cam Type Lower Grip (optional). Depress the operating lever of the self-tightening cam type
lower grip to open it far enough to accept the sample under test. When you release the lever, the cam wheels
will grip the sample.
NOTE: DO NOT POSITION THE GRIP PRESSURE ONTO THE CRIMP BARREL OF THE TEST SAMPLE.
4.2.3
Ring Terminal Lower Grip (Optional). Rotate the grip to place the correct stud in the uppermost position, and
place the terminal over the stud.
4.3 UPPER GRIP
4.3.1
If the upper grip is not positioned in the home position, as shown in the diagram on page 2, press the RESET
button.