background image


DLI 9200 PRODUCT MANUAL 

PAGE 34/39 

Rev. 3 

Data Ltd. Inc., Inc. extends these warranties only to the first end users of the products. These 
warranties are non-transferable. 


The limited duration of the warranty for the DLI 9200 is as follows: 


DLI 9200 terminal with the integrated modules are covered by a one-year 
limited warranty. 


Touch screens are covered by a one-year limited warranty. 


The limited duration of the warranty for batteries is one year. Use of any battery 
not sold/ manufactured by Data Ltd. Inc. may damage the terminal and/or the 
battery and will void the warranty. Batteries returned to Data Ltd. Inc. in a 
reduced state may or may not be replaced under this warranty. Battery life will 
be greatly increased when following the battery instructions in the DLI 9200 
User’s Guide. 


Use of any peripheral not manufactured/sold by Data Ltd. Inc. will void the 
warranty. This includes but is not limited to: cables, power supplies. 


Regulatory and Safety Approvals for the DLI 9200


DLI 9200 terminal meets or exceeds the requirements of all applicable standards organizations 
for safe operation. However, as with any electrical equipment, the best way to ensure safe 
operation is to operate them according to the agency guidelines that follow. Please read these 
guidelines carefully before using your DLI 9200 terminal. 


Embedded Safety Information Text


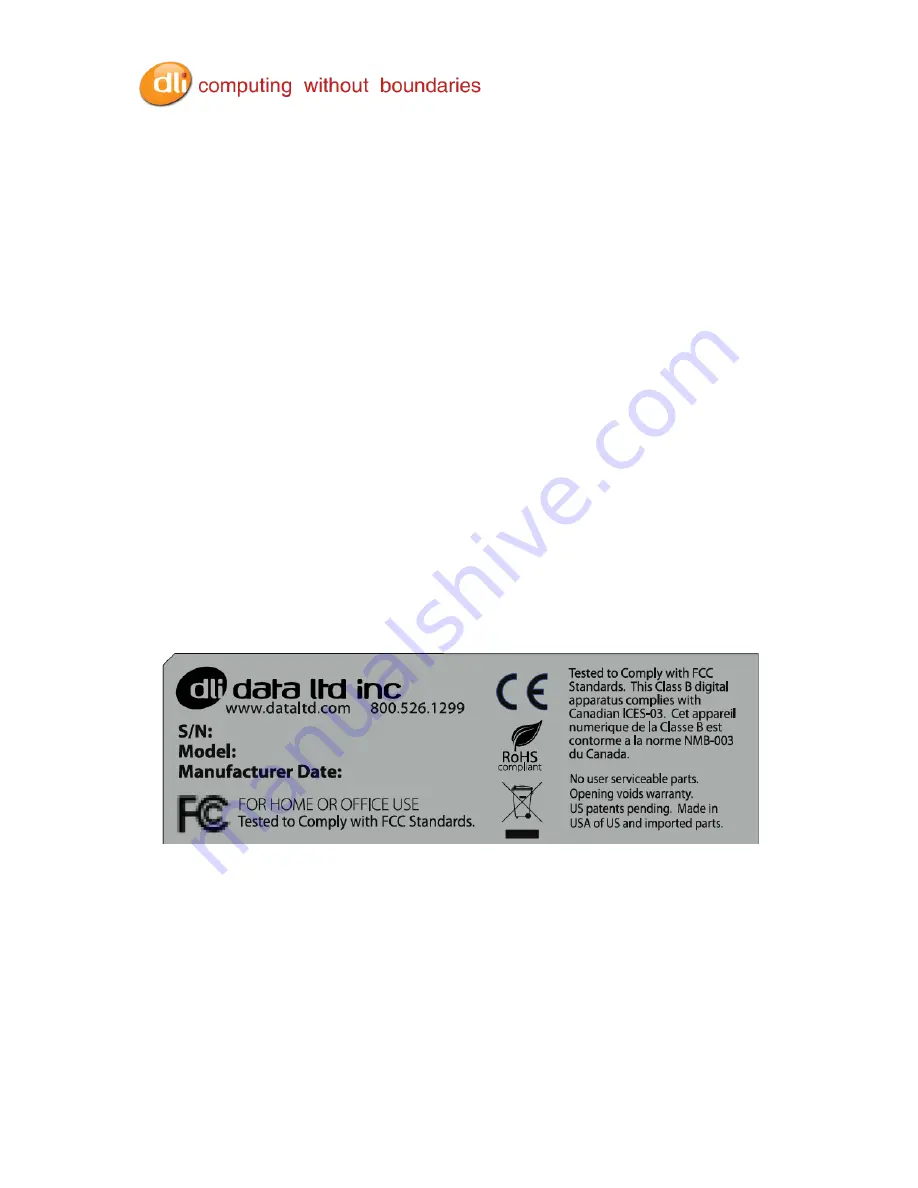
The DLI 9200 has the following safety information on the back label of the terminal 


DLI 9200 RF terminal is designed to comply with the most current applicable standards on safe 
levels of RF energy developed by the Institute of Electrical and Electronics Engineers (IEEE) and 
the American National Standards Institute (ANSI) and has been recommended for adoption by 
the Federal Communications Commission (FCC). 


Содержание 9200

Страница 1: ...Rev 3 Product Manual ...

Страница 2: ... that is protected by copyright All rights are reserved No part of this document may be photocopied reproduced or translated into another language without the prior written consent of DLI 2011 Data Ltd Inc All rights reserved Web Address www dataltd com Trademarks DLI 9200 is a trademark or registered trademark of Data Ltd Inc Windows and Windows logos are trademarks or registered trademarks of Mi...

Страница 3: ...rging the Battery in the DLI 9200 10 Power Management Utility 11 Optional Auto Power On Off Setup 11 Adjusting the Backlight 11 Using the Stylus 13 Using the Programmable Keys 16 Using the Wi Fi Radio 19 Using the Bluetooth Radio 22 SIM Card Insertion 26 Using the RS 232 DB9M 26 Using the GPS 27 Installation Clearance Airflow 29 Technical Assistance 30 Product Service and Repair 30 Shipping Your D...

Страница 4: ...p Battery with 10 60V DC DC Converter Integrated four radio technology WiFi Bluetooth GPS and Cellular 12 or 15 Industrial rated touchscreen Dual external WiFi antennas and external Bluetooth antenna Boot media via SSD Solid State Drive DLI 9200 Peripherals and Accessories 5421112020900P AC Adapter with Line Cord not included 6708260000000P Cigarette Lighter Adapter for charging the unit in a vehi...

Страница 5: ...DLI 9200 PRODUCT MANUAL PAGE 5 39 Rev 3 Hardware Overview Front Panel Battery LED WiFi LED Bluetooth LED Power LED Impact Resistant Metal Case Programmable Keyboard LCD with Touch Panel ...

Страница 6: ... On Bluetooth Blinking Blue Enabled No Light Disabled or Not Available WiFi Green Light Connected No Light No Connection Battery Status Refer to Battery Status LED section Page 9 Top Panel Bottom Panel Bottom Panel Features Master Reset AC Power Ethernet Port Locking USB Ports SMA Connector FME Connector Serial Port Speaker Port VGA Port Microphone Port WiFi Antenna Connector RPTNC WiFi Antenna Co...

Страница 7: ...io Ports Speaker and Microphone Port VGA Port Video Out Optional SMA Connector for External GPS Optional External FME Antenna Connector Standard locking USB industrial grade connectors Only DLI authorized peripherals should be attached to these USB ports The USB port power is rated to 1A USB Port 1 2 3 4 Side Panel Pin Description 1 5V 2 Data 3 Data 4 GND On Off Button ...

Страница 8: ...ack the carton and verify its contents Page 9 3 Charge the main battery for 2hrs 4 Power on the terminal via the power button on the left side of the terminal 5 Let the device load and end on the Desktop screen Default BIOS password is qwerty Speaker Speaker Mount Screw Posts SIM Slot Door ...

Страница 9: ...Source No Charger Battery Indicator Light Status Description Power Solid Green Powered On Battery Solid Green Capacity level 70 Solid Yellow Capacity level 70 20 Solid Red Capacity level 20 10 Blinking red Capacity level 10 For charging use only Data Ltd Inc DLI 9200 peripherals and the power cables Use of peripherals or cables not sold manufactured by Data Ltd will void the warranty and may damag...

Страница 10: ... check the battery power on the DLI 9200 is to use the battery icon It provides a graphical representation of the remaining battery power Tap on the battery icon in the system task bar Tapping the battery icon once will show the battery life percentage and default premade Power Plans ...

Страница 11: ...ontrol Center application as well as from the control panel within Windows Optional Auto Power On Off Setup Your device can be set to power on when external power is detected via the BIOS and powered off at a certain battery percentage via the Operating System To enable the Auto Power On feature please contact DLI Technical Support 800 526 1299 x774 To enable the Auto Power Off feature based on ba...

Страница 12: ... a forklift or a vehicle is turned off the device will run off the internal battery until it reaches the Low battery level set above and perform the set action Adjusting the Backlight Brightness levels of the liquid crystal display LCD are adjustable based on the lighting conditions By default the level is set to 7 0 being the lowest and 7 being the highest level To adjust the level of backlight S...

Страница 13: ...generally a tap is the same as a mouse click Tap Tap the touch screen once to open menu items and select options Drag Hold the stylus on the screen and drag across the screen to select text and images Drag in a list to select multiple items Right Mouse Click Holding down the stylus for 3 seconds will activate the right mouse click Calibration 1 Right tap on the PenMount icon in the system stray 2 ...

Страница 14: ...button will prompt the user to tap multiple points on the screen 5 Hold the stylus naturally as if you were writing with a ball point pen holding the stylus down on each red point as they appear During calibration position the terminal as close to the way you would use it ...

Страница 15: ...will start the process again 7 The calibration is now complete and the PenMount Control Panel window is displayed Select OK to close the application down The PM icon will still be present in the system tray for quick configuration should your touch screen need recalibration Do not write on the terminal display with ink pens or use other sharp objects that may damage the display ...

Страница 16: ...aunched from the system tray or from the Start Programs DLI DLI KeyMon The procedure below will assist you in defining the keys 1 Double tap on the DLI KeyMon icon in the system tray 2 The DLI KeyMon screen is presented Choose a key that requires a definition by tapping on the orange keys or by highlighting the key in the button assignment area and then double tapping 3 There are 5 options for key...

Страница 17: ...Browser Icon 5 The user is returned to the assign menu once the selection has been chosen from the browser icon Selecting the apply button saves the change to the key The path to the application will appear in blue below the Current Assignment ...

Страница 18: ...troke choose Command and tap the down arrow to display a drop menu 7 The drop menu has a list of various actions and keystrokes to choose from Once you have selected the command tap the apply button to save 8 To Close the DLI KeyMon tap on the X on the top right of the Main Window ...

Страница 19: ...nect or disconnect View Available Networks and network mapping Setup a new connection or network Wireless Wired VPN connection or set up a router or access point Connect and set up to a domain or workgroup View Signal Quality and Speed Troubleshoot problems Diagnose and repair network programs or get troubleshooting information Intel PCIe Integrated Radio The Network icon can be found in the task ...

Страница 20: ...rk Map your Active Networks your Connection types and info You can also set up new connections or networks Enter a domain or workgroup and edit sharing options Selecting Set Up a Connection or Network brings up an easy to use wizard that helps create a connection to your network and or the Internet Choose the option that fits what you need to do ...

Страница 21: ...GE 21 39 Rev 3 If the SSID is not broadcasted you will need to select Manually connect to a wireless network This option will allow to you create a profile to add the SSID Security type and Encryption type Select Next to connect ...

Страница 22: ...3 Pair 4 Connect Discover Making a Bluetooth device discoverable makes it visible to other Bluetooth devices Each Bluetooth device uses a different method pressing a button or key combination to make it discoverable This is generally described in the device s documentation When you activate Bluetooth on your Tablet PC it is the signal for the Tablet PC to look for or discover any Bluetooth devices...

Страница 23: ...uetooth Device Wizard 4 Place the Bluetooth device headset keyboard printer etc in discoverable mode Each Bluetooth device may have a different way to make it discoverable Some have a small button on the headset or keyboard others may require that you press a key sequence to invoke discovery Look at the documentation that came with the Bluetooth device or visit the manufacturer s website for infor...

Страница 24: ...ks for you Bluetooth device This option will vary per device You have a limited time after selecting Enter the device s pairing code to input the code Select Next If a pairing code is required please read documentation that came with your Bluetooth device or contact the manufacturer ...

Страница 25: ...DLI 9200 PRODUCT MANUAL PAGE 25 39 Rev 3 7 When the device has been successfully paired and added the wizard is complete and the device is ready to use Select Close to finish ...

Страница 26: ...SIM card Failure to do so may result in harm to the unit and the SIM Back Panel Using the RS 232 DB9M The integrated RS 232 Port can be configured to work with many peripherals including Barcode Scanners Printers ODBII Vehicle Interface and Remote Monitoring apparatuses To configure the RS 232 port so that the data is sent to the keyboard buffer the following procedure is required This procedure i...

Страница 27: ... switching technology provides you with the functionality of switching between external and internal antennas without software requirements Data Ltd has included in the DLI 9200 a GPS software tool to verify that all functions of the GPS module are working properly 1 To launch the application tap on the GPS icon on the DLI 9200 desktop Connectec GPS Monitor can also be found under C Program Files ...

Страница 28: ...ected you can verify the Signal Quality Satellite Location Latitude Longitude and Altitude You can also view the Streaming NMEA data You must be outside a building as GPS antennas do not work inside buildings The green bars indicate a lock to a satellite ...

Страница 29: ...evice is mounted at all times and not laid down on the back panel Make sure the device is given a minimum of 1 5 inches of clearance to allow for proper airflow Vehicle Installation IMPORTANT Vehicle Power Connection DLI devices must be installed pre ignition directly to battery terminals with a 5 AMP in line fuse Failure to connect to battery terminals could damage the power conversion circuitry ...

Страница 30: ... ticket html Product Service and Repair Data Ltd Inc provides service for all its products through service centers throughout North America To obtain warranty or non warranty service return the unit to Data Ltd Inc postage paid with a copy of the dated purchase record attached Contact the appropriate location below to obtain a Return Material Authorization number RMA before returning the product T...

Страница 31: ...y to pack your DLI device DO NOT ship any DLI Device without a proper UPS or FedEx container The DLI Container is not meant for stand alone shipping Place device in foam cover as shown Place the wrapped DLI device in the correct position in the spacer inside the DLI Container ...

Страница 32: ...bble Wrap Air Pillows Packing Foam etc The dimensions of the box shown are 27x17x10 Place the closed DLI container inside the lined Shipping Container Fill the rest of the Shipping Container with packing material Seal the Shipping Container and ship to DLI 5570 Lee Street Suite 12 Lehigh Acres FL 33971 ...

Страница 33: ...rranty Period and Data Ltd Inc determines to its satisfaction that the product is defective due to defects in materials or workmanship Data Ltd Inc at its sole option will either repair or replace the product without charge except for return shipping to Data Ltd Inc EXCEPT AS MAY BE OTHERWISE PROVIDED BY APPLICABLE LAW THE FOREGOING WARRANTY IS IN LIEU OF ALL OTHER COVENANTS OR WARRANTIES EITHER E...

Страница 34: ...r s Guide Use of any peripheral not manufactured sold by Data Ltd Inc will void the warranty This includes but is not limited to cables power supplies Regulatory and Safety Approvals for the DLI 9200 DLI 9200 terminal meets or exceeds the requirements of all applicable standards organizations for safe operation However as with any electrical equipment the best way to ensure safe operation is to op...

Страница 35: ...00 DLI 9200 WPAN Bluetooth DLI 9200 WWAN CDMA Sierra Wireless Radio Verizon DLI 9200 802 11 A B G N Radio DLI 9200 GPRS Bluetooth FCC ID RUJ QB7M400 Model QB7M400 Sierra Wireless FCC ID N7NMC5725 Model 512AH_MMW FCC ID PD9512ANMU Model 62205ANHMW FCC ID PD962205ANH GPRS FCC ID N7NMC8790 FCC ID CB10006161 ...

Страница 36: ...separation between the equipment and receiver Connect the equipment into an outlet on a circuit different from that to which the receiver is connected Consult the dealer or an experienced radio TV technician for help If necessary the user should consult the dealer or an experienced radio television technician for additional suggestions The user may find the following booklet helpful Something Abou...

Страница 37: ...ts production It may contain hazardous substances that could impact health and the environment if not properly disposed In order to avoid the dissemination of those substances in our environment and to diminish the pressure on the natural resources we encourage you to use the appropriate take back systems for product disposal Those systems will reuse or recycle most of the materials of the product...

Страница 38: ...DLI 9200 PRODUCT MANUAL PAGE 38 39 Rev 3 ...

Отзывы: