background image

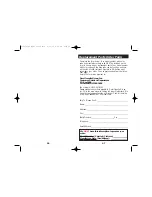
Replacement Parts Order Form

Complete the form below. Your model number with color
code and manufacturer date code MUST be included on the
form to ensure proper replacement parts. Your model number
with color code and the date code can be found on a sticker
on the side of child restraint. Payment in U.S. dollars must
accompany your order. Choose parts needed from the list on
next page.
Return the form with payment to:

Dorel Juvenile Group, Inc.
Consumer Relations Department
P.O. Box 2609
Columbus, IN 47202-2609

Fax orders to: 1-800-207-8182
Please make money orders payable to Dorel Juvenile Group,
Inc. Fill in the area below to charge to Visa or Mastercard. We
do not accept personal checks or Discover Card. All outside
of U.S. and Canada MUST use credit card.

We

MUST

have this information to process your

order:
Model Number (5 digits & 3 letters): ______________
Manufacture Date (mm/dd/yyyy):

________________

Ship To (Please Print): ________________________________

Name: ____________________________________________

Address: __________________________________________

City:______________________________________________

State/Province: ________________________Zip __________

Telephone: ________________________________________

Email Address: ______________________________________

57

56

4358-4582 Alpha Omega 50lb  8/15/08  9:48 AM  Page 59

Содержание Alpha Omega All in One

Страница 1: ...stercard Card Exp Date ______________________________ Cardholder s Name __________________________ Card Number ______________________________ Signature____________________________________ Up to 25 00 5 95 25 01 to 50 00 6 95 50 01 to 75 00 8 95 75 01 to 100 00 9 95 100 01 to 150 00 10 95 150 01 to 200 00 11 95 200 01 and up 13 95 Outside Continental USA 10 00 CUT ON DOTTED LINE Eng 4358 4582 www d...

Страница 2: ...lephone 1 800 544 1108 7 A M to 6 P M EST M TH 7 A M to 4 30 P M EST FRI Before You Begin Table of Contents Warnings 2 4 General and Warm Weather Use 4 Registration and Recall 5 Aircraft Installation 5 Understanding Your Vehicle 6 7 Child Restraint Parts 8 9 Choosing Restraint and Position 10 Preparing Child Restraint to Fit Your Child 11 Check Harness Headrest Height 12 13 Accessories on select m...

Страница 3: ...e vehicle or LATCH belt must stay tight at the belt path When you switch from one mode to the next review the sections of this instruction manual that apply to that mode If you don t your child could be seriously injured or killed Never take your child out of the child restraint or try to tend to your child s needs while the vehicle is moving Never leave child unattended Do not use a child restrai...

Страница 4: ...tration carseat us Please do not send in your registration card if you registered your child restraint online For recall information call the U S Government s Vehicle Safety Hotline at 1 888 327 4236 TTY 1 800 424 9153 or go to http www NHTSA gov Registration and Recall Information This child restraint is certified for aircraft use only when used with the internal harness Do not use as a belt posi...

Страница 5: ...our vehicle s specific features Understanding Your Vehicle A B C E 7 D A Anchor Bracket For Top Anchorage Strap Forward facing only B LATCH Anchors In seat bight C Seat Buckles D Air Bag Consult your vehicle owner s manual for all air bag locations E Seat Bight Where seat cushions meet 4358 4582 Alpha Omega 50lb 8 15 08 9 48 AM Page 9 ...

Страница 6: ...er flap J Recline Lever K Harness Adjustment Strap L Removable Base Front G H A B C D F I J K L Back N O P Q R S M Base Attachment Bar N Top Anchorage Tether Strap Hook O Harness Headrest Adjuster P Locking Clip behind harness Q Splitter Plate R Instructions in recline stand S LATCH Belt may be between pad and shell T Cup Holder on select models U Recline Stand B T T B L M E U 4358 4582 Alpha Omeg...

Страница 7: ...elt Positioning Booster using vehicle lap shoulder belt combination Child and child restraint face the front of the vehicle and are placed in the back seat 5 point harness and base are removed 11 2 Preparing Child Restraint to Fit Your Child You MUST make these adjustments with your child before you install the child restraint in the vehicle Make sure LATCH belt packaging is pulled free of child r...

Страница 8: ...ss guide must be even with or just above the shoulders If the harness guide is below the child s shoulders with the headrest in the highest position and the child weighs at least 40 lbs 18 1 kg and is over 1 year old you must convert the seat to a belt positioning booster Check Harness Headrest Height WARNING Make sure metal bar is locked into position Failure to do this can result in serious inju...

Страница 9: ...illow Pull out both locking tabs out of the headrest Cup Holder on select models Pull pad off corner Hook bottom of cup holder to edge of shell Rotate cup holder up until tab on cup holder snaps into hole on shell Replace pad 14 Infant Pillow on select models The pillow provides extra comfort for your child To install the pillow Locate the holes in headrest to insert the locking tabs 1 2 3 Remove ...

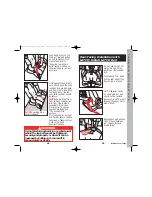
Страница 10: ...w any slack It lies in a relatively straight line without sagging It does not press on the child s flesh or push the child s body into an unnatural position 17 WARNING Failure to fasten and tighten the harness system correctly can result in serious injury or death Position the harness retainer at mid chest even with armpits away from the child s neck 3 Snap the harness retainer together 5 NOTE Har...

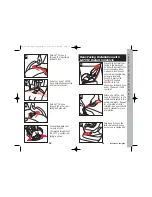
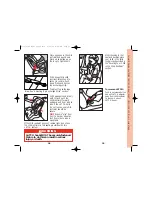
Страница 11: ... Must be fully upright 19 Removing Your Child from the Child Restraint 2 1 18 Reclining the Child Restraint To fully recline pull out on handle and push top of child restraint back For upright position pull out on handle and pull child restraint up 1 2 Press on release button and pull apart Loosen harness by pushing down on the harness release lever that is under the flap while pulling out on the ...

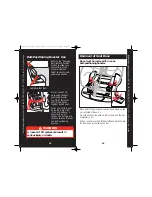
Страница 12: ...es freely it is an ELR belt and the child restraint could work loose during normal driving Refer to your vehicle owner s manual Some ELR belts will convert to Automatic Locking Retractor ALR belts if you pull the belt all the way out Refer to your vehicle owner s manual ELR shoulder belts either require a locking clip or cannot be used with any child restraint Note You may use an ELR lap and shoul...

Страница 13: ...manual 1 2 3 Thread both vehicle lap and shoulder belts through the slot as shown and out other side Buckle Pull up on shoulder belt until all slack is out and lap belt is tight Grasp both vehicle belts together just behind the buckle plate and unbuckle NOTE If the buckle plate ends up behind the child restraint grasp the belts to the outside of the child restraint as close to the buckle plate as ...

Страница 14: ...on with an active frontal airbag This can result in serious injury or death Lap Belt Rear Facing Use 5 35 lbs 2 3 16 kg 19 36 48 91 cm Refer to the Choosing Restraint and Position section to determine if your child should be in the rear facing position 25 5 Rebuckle belt Lap belt portion should now be tight If not remove locking clip and repeat all steps 24 Position locking clip about 1 in 2 5 cm ...

Страница 15: ...rap tether in the rear facing position The top anchorage strap and hook should be placed under the child restraint WARNING Rear Facing Use 5 35 lbs 2 3 16 kg 19 36 48 91 cm 3 Rear Facing Installation with Vehicle Belt 27 continued on next page Thread the vehicle lap or lap shoulder belt combination through the rear facing belt slot Thread UNDER seat pad between buckle strap and rear slots and out ...

Страница 16: ...ulling on it can result in serious injury or death 4 Push down firmly on the child restraint and pull up on belt to tighten For a manual belt refer to KnowingYourVehicle Belts section Pull up on shoulder strap to remove any slack 29 Rear Facing Use 5 35 lbs 2 3 16 kg 19 36 48 91 cm 1 2 3 Rear Facing Installation with LATCH Install LATCH Belt continued on next page Do not use the LATCH system along...

Страница 17: ...t hook to the anchor in the vehicle seat located in the vehicle seat bight Repeat for other side of child restraint See your vehicle owner s manual for more information Push down firmly on the child restraint and pull up on the loop to tighten belt 31 continued on next page LEVEL TO GROUND Place child restraint rear facing in the back seat With child restraint in the most reclined position make su...

Страница 18: ...e tightened securely and properly or where it can be loosened by pulling on it can result in serious injury or death For vehicles with an airbag but without a back seat refer to your vehicle owner s manual Refer to the Choosing Restraint and Position section to make sure your child is at the proper weight and height to face forward 33 4 With weakest hand at belt path tilt and push the child restra...

Страница 19: ...e rotate recline stand down and out then push up to lock A loose LATCH system can result in serious injury or death When LATCH is not being used fasten belt hooks together behind the child restraint as shown Forward Facing Use 22 50 lbs 10 1 22 6 kg 34 45 85 1 114 3 cm Over 1 year of age Forward Facing Installation with Vehicle Belts 1 2 3 Place one knee in the child restraint and push down firmly...

Страница 20: ...1 22 6 kg 34 45 85 1 114 3 cm Over 1 year of age Forward Facing Installation with LATCH Belt Install LATCH Belts 1 2 4 NOTE Do not use LATCH system along with the adult lap or lap shoulder belt Route LATCH belt through upper slot in side of shell Pull one LATCH hook across the back and out the other side The LATCH adjuster can be on either side but the belt should not be twisted NOTE Locking clip ...

Страница 21: ...t use the child restraint in this seating location with this LATCH system 38 5 Place one knee in the child restraint and push down firmly while pulling up on the loop to tighten belt 6 7 WARNING LATCH hooks MUST be securely fastened Failure to do this can result in serious injury or death 39 Forward Facing Use 22 50 lbs 10 1 22 6 kg 34 45 85 1 114 3 cm Over 1 year of age To remove LATCH Push in on...

Страница 22: ...hese steps could cause the strap to loosen in a crash which can result in serious injury or death To AttachTop Anchorage Strap Put knee in child restraint and push down attach hook to anchor in vehicle To AdjustTop Anchorage Strap To tighten pull on free end of top anchorage strap To loosen lift up on top anchorage lock and push lock toward top anchorage hook To AdjustTop Anchorage Strap Loosen to...

Страница 23: ...her behind seat When your child is over 50 lbs 22 6 kg or 45 114 3 cm and over 1 year old you must remove the harness and the base and use this seat as a belt positioning booster 43 Belt Positioning Booster Use 40 80 lbs 18 1 36 3 kg 43 52 110 1 132 1 cm Over 1 year of age Removal of Seat Base Move seat to fully reclined position Push down on tab on right side of base A From the other side push on...

Страница 24: ...ad harness from the buckle plates Pull harness out of shell 3 Harness must be removed for use as a belt positioning booster 45 Belt Positioning Booster Use 40 80 lbs 18 1 36 3 kg 43 52 110 1 132 1 cm Over 1 year of age 4 5 From bottom of seat locate buckle s metal clip Insert metal clip up through the shell and pad From the front pull buckle free from shell and pad Lock buckle plates into buckle f...

Страница 25: ...ust always be adjusted snugly across the child s chest NEVER place the shoulder belt under the child s arms Use only the vehicle s lap and shoulder belt system when restraining the child in this booster seat Failure to follow these warnings can result in serious injury or death to your child Secure the shoulder belt through one of the notches in the shoulder belt positioning guide The belt should ...

Страница 26: ... 6 1 2 3 4 5 6 49 5 4 Fit loops on harness ends onto the splitter plate Pull harness through the back Make sure the harness goes OVER the metal bar BETWEEN metal bar and plastic handle of the harness headrest adjuster Reinstall Base Remove bar from base Line up shell with base Begin with the rounded end and push bar completely through slot until it locks in place Refer to Removal of Seat Base sect...

Страница 27: ...ront with the other A 1A 2 51 Work pad off shoulder belt positioning guides and off of headrest Pull pad out from under buckle cover and work it off the shell 3 4 1B Remove base and harness as described in the Belt Positioning Booster section WARNING Do not use this child restraint without the seat pad Failure to do this can result in serious injury 4358 4582 Alpha Omega 50lb 8 15 08 9 48 AM Page ...

Страница 28: ...upright in the rear facing position If your vehicle seat slopes so much that your infant is sitting upright you may place a rolled towel under the front of the child restraint so that the level line on the shoulder belt positioning guide is level horizontal Check often to be sure padding is still in place and the vehicle belt is tight WARNING Using padding that tilts the base of the child restrain...

Страница 29: ...are exclusive and in lieu of all others oral or written expressed or implied In no event will DJG or the dealer selling this product be liable to you for any damages including incidental or consequential damages arising out of the use or inability to use this product Limitation of warranties and other warranty terms and state law rights Any implied warranties including implied warranties of the me...

Страница 30: ...rs payable to Dorel Juvenile Group Inc Fill in the area below to charge toVisa or Mastercard We do not accept personal checks or Discover Card All outside of U S and Canada MUST use credit card We MUST have this information to process your order Model Number 5 digits 3 letters ______________ Manufacture Date mm dd yyyy ________________ Ship To Please Print ________________________________ Name ___...

Отзывы: