

4.4
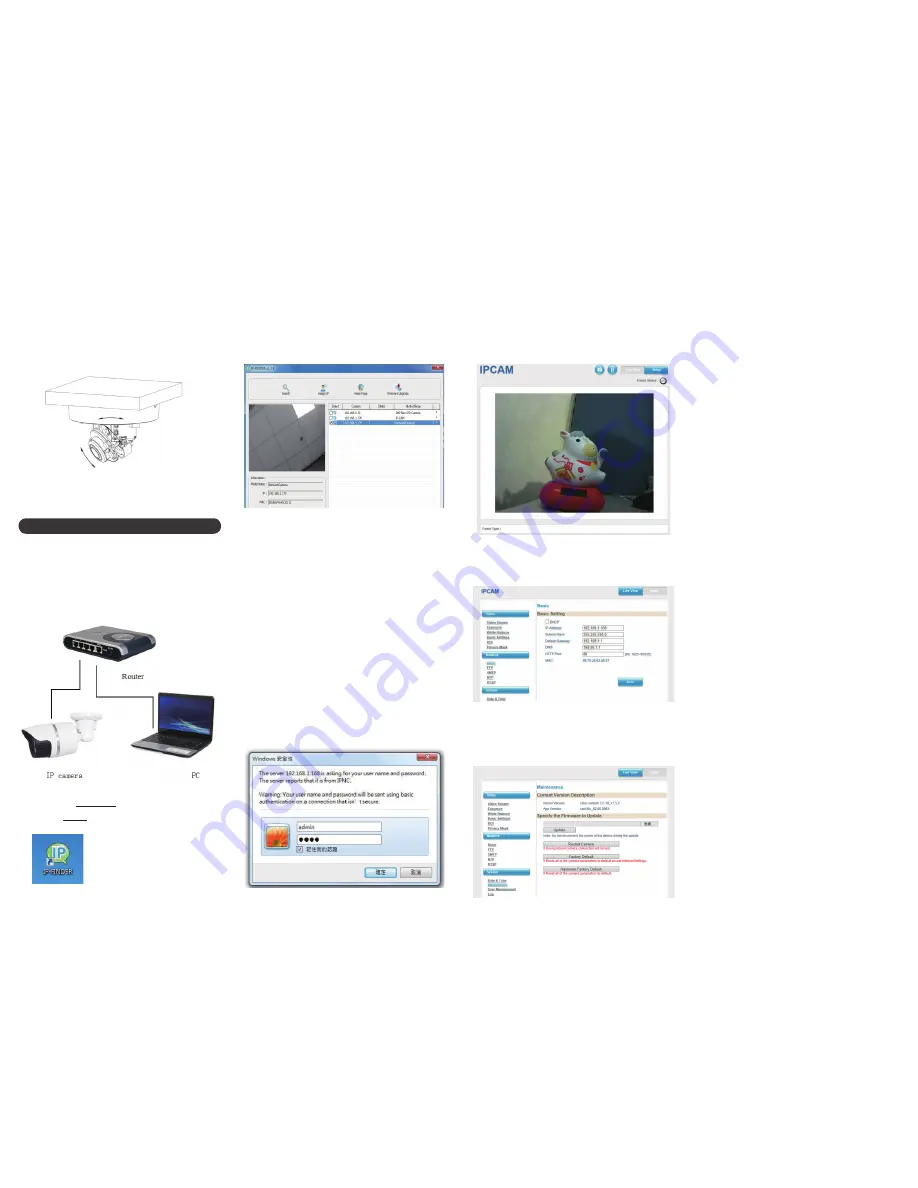
Run CAM Finder, Click “Search”, you will find
the device IP, make sure default IP address is
192.168.0.250, and see as below picture.
4.8
WEB GUI After login, enter into below user interface
“Live View”, and also if you want more setting, you
can click the “Setup”.
4.9
Network Basic Settings:
Displays the current IP address, Subnet Mask, Default Gateway,
DNS, HTTP Port and MAC of the camera, see below picture 9.
4.10
System Maintenance Settings:
If you need update your camera default, you can choose Restart
Camera or Factory Default or Hardware Factory Default, see
below picture 10.
4.5
Default IP setting:
IP address: 192.168.0.250
Subnet Mask: 255.255.255.0
Gateway: 192.168.1.1
User name: Admin
Password: 1234
4.6
Open IE Browser, type 192.168.0.250 (default IP
address) in the address bar, and then press the Enter
button.
4.7
You will be prompted with a pop-up window asking for
login information, type in “Admin” (default login name)
and “1234” (default password), see below picture.
Picture 6 CAM Finder
Picture 8 WEB GUI Live view
Picture 7 enter WEB GUI pop-up window
Picture 5 Network structure
4. NETWORK OPERATION
4.1
Use correct power supply and need PC OS Windows 7.
4.2
After startup, connect the device with switch or router,
see below picture.
4.3
Go to install CAM Finder and you can find your camera.
Please get IP Finder software from sales.
3.6
Loose screws on the camera to remove cover and
glasses. Adjust direction of camera to watch a place
where you want to monitor.
3.7
Put cover and glasses back and screw to lock camera.
The direction of camera is fixed as your requirement.
Picture 4 Equipment installation diagram (2)


