www.ditting.com
S
ERVING THE
W
HOLE
-B
EAN
C
OFFEE
M
ARKET
S
INCE
1968 [email protected]
Page 4 of 4
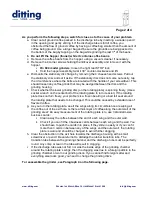
g. Pull out the adjusting knob and, while in the pulled position, place the #1 against the
red arrow and release the knob. The knob will engage the internal gear.
h. Position the aluminum cover on the adjusting knob to fit in the groove, and tighten the
center screw.
i. Your grinder should now be adjusted properly, and all settings should match the
proper grinds.
Testing the grind
: Place 10-15 beans in the hopper and grind on the #1 setting. The
output must be pulverized (powder).
Notes
: If on the #1 setting the coffee comes out slowly or in small balls, the setting is too
close. Repeat the above procedure. If the grinding is still too slow, replace the grinding
discs.
6.
Uneven Grinding or Excessive Dust Particles
:
a. Indication of badly worn grinding discs. Replace the grinding discs as soon as
possible.
7.
Coffee Grinds Very Slowly
, and the grinding housing heats up.
a. The grinding discs are worn out. Instead of grinding the coffee, they are chewing the
beans. Replace the grinding to return the quality back into your grinder and prolong the
life of the motor.
8.
Metal Noise After Stopping the Grinder
on #1 Turkish setting:
a. The discs are not adjusted properly and are too close. Follow the Adjusting instructions
in Paragraph #5 above. If you continue to use your machine with the grinding discs
adjusted too close together so that they are touching, you will wear your discs down
very quickly, and they will not be resharpenable.
CAUTION: If coffee beans have fallen inside the grinder, you MUST clean out the base of
the grinder to prevent future problems, including the possibility of fire
. You need the airflow
to keep the motor cool. Accumulation of beans at the base can restrict airflow and overheat the
motor and/or cause a fire.
a.
UNPLUG THE GRINDER
.
b. Place the grinder on its back on the table. Make sure the grinder is forward enough so
that the cable is not crimped and can hang freely.
c. Remove the 4 corner screws holding the base onto the grinder. Be sure to have a firm
hold on the base so that it does not fall away from the machine.
d. Gently pull the base away from the housing, making sure not to pull out any of the
wires from the base terminals.
e. Vacuum the fallen beans at the base.
f. Replace the screws to hold the base in place.
g. Stand the grinder upright, plug in, and test.
Additional Troubleshooting Notes for 1403 220 Volt / 3 Phase Grinders are Available.
Visit our website at
www.ditting.com
for this and other service tips.


