background image


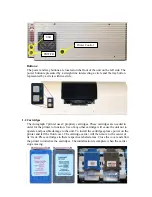
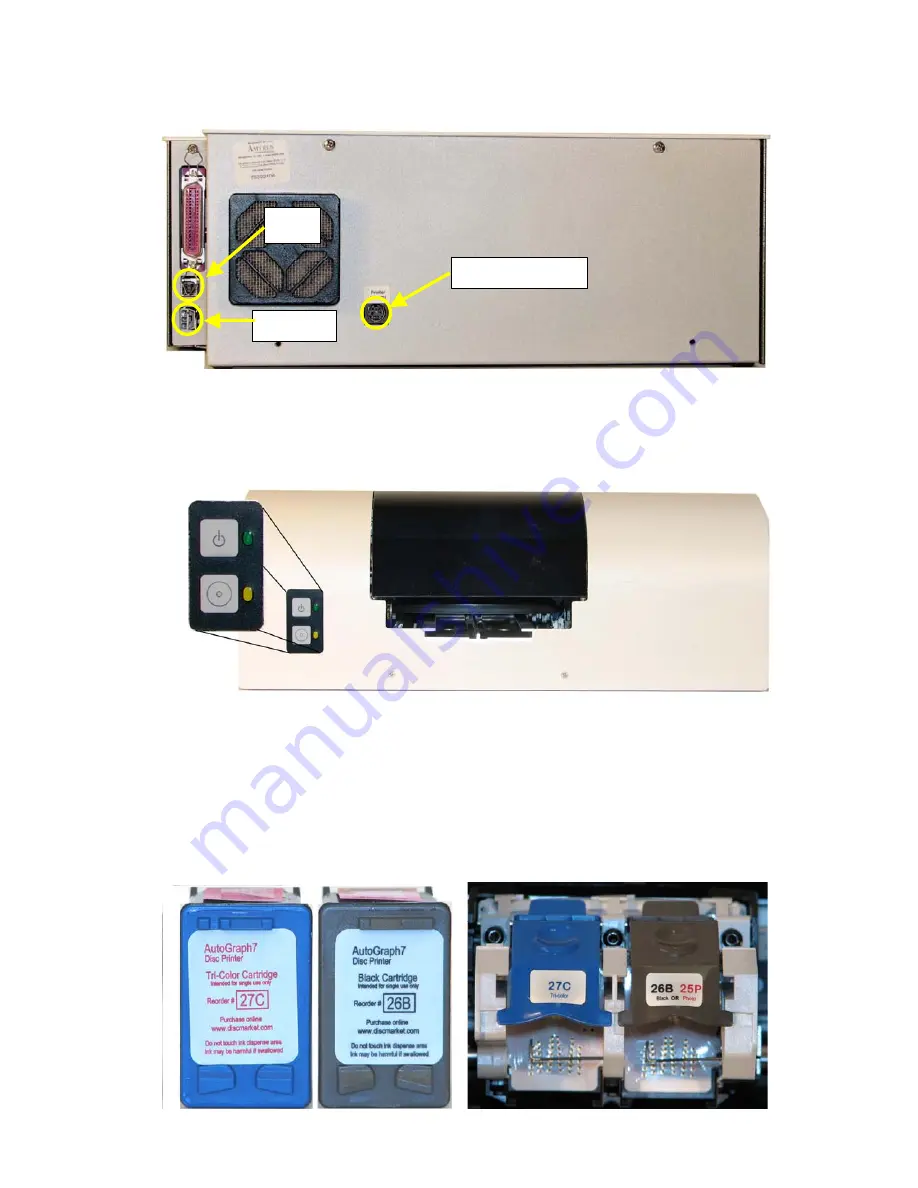
POWER 

USB 

Printer Control 


Buttons: 

The power and tray buttons are located on the front of the unit on the left side. The 
power button represented by a straight line intersecting a circle and the tray button 
represented by a circle within a circle. 


1.2 Cartridges 

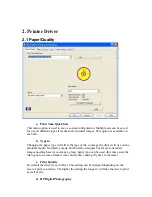
The Autograph 7 printer uses 2 propriety cartridges. These cartridges are needed in 
order for the printer to function. Use of any other cartridge will cause the unit not to 
operate and possible damage to the unit. To install the cartridges please power on the 
printer and left the front cover. The cartridge carrier will then move to the center of 
its’ track. Place cartridges in there respective labeled areas. Close the cover and allow 
the printer to initialize the cartridges. The initialization is complete when the carrier 
stops moving. 


Содержание Autograph 7

Страница 1: ...Autograph 7...

Страница 2: ...Basic 4 1 Copies 4 2 Print Preview 4 3 Advanced Features 4 3 1 Ink Volume 4 3 2 Dry Time 4 3 3 Low Memory Mode 5 Color 5 1 Color Options 5 2 Color Attributes 5 3 Color Space 6 Mask Settings 6 1 Mask...

Страница 3: ...sc Printer icon located under the Printer and Faxes control panel Left click on Printing Preferences This will open the dialogue boxes in the following sections 1 1 Printer connections and Buttons The...

Страница 4: ...iety cartridges These cartridges are needed in order for the printer to function Use of any other cartridge will cause the unit not to operate and possible damage to the unit To install the cartridges...

Страница 5: ...erage the driver will use on the printable media Normally a matte finish will be adequate but for more detailed images needing heavier coverage a glossy paper type can be used this may cause the ink t...

Страница 6: ...Activating this option will scale any document sent to the printer to 5 x 5 printable area the approximate size of a 120mm disc We recommend to leave this option disabled and to use Discus for proper...

Страница 7: ...into the print queue causing errors when used with the Elite systems 4 2 Print Preview This setting should not be changed Changing this option will cause a dialogue box showing the submitted print jo...

Страница 8: ...tting unless otherwise instructed Changing this will cause the tray to exit printer at a slower rate allowing longer dry time but slowing the duplication process when attached to an Elite system 4 3 3...

Страница 9: ...left or right will adjust print qualities 5 3 Color Space This will define the range of colors that can be printed Once the job is submitted these settings will translate the colors from their current...

Страница 10: ...on will clip the image to the proper disc dimensions 6 2 Enable Masking Activating this setting will allow custom print alignment 6 2 1 Standard Area Settings This will refine the printable area dimen...

Страница 11: ...iles and FlexWare 7 1 Print Test When performing a print test load a printable disc into the printer by first pressing the tray button on the printer Place a disc on the tray and press the tray button...

Страница 12: ...nd follow on the onscreen instructions The following image demonstrates a typical print 7 3 Calibrate Cartridges Using this utility will assure proper printing of images on to the printable media When...

Страница 13: ...7 4 Get Ink Levels Shows an easy to read usage chart of ink in the cartridges This number represents average as calculated by the driver dependant on images and settings used...

Страница 14: ...lear each job in the queue by clicking each individually and from the Document drop down select Cancel Cancel all jobs iii Once all jobs are cleared power off your printer and then power on using the...

Отзывы: