P a g e
|
3
DSEFO144-12 Rev 8/19
ASSEMBLY INSTRUCTIONS
1)
The antenna components should be removed carefully from the shipping container and
the individual parts counted and checked for completeness. Be careful to check all tubing
pieces for elements and hardware that may be packed inside.
In the following steps, apply a small amount of the supplied Anti-Seize to the boom joints:
2)
The boom consists of three pieces of tubing. The rear boom section has the large hole
for the driven element in it. The larger diameter center boom section (1 3/8" dia.) must be
connected to the rear section. Insert rear section where marked with like colors, align the #8
hardware mounting holes and slide the stainless steel worm clamp over the slotted portion of
the center boom piece. An 8-32 X1 3/4" machine screw, lock washer and hex nut complete the
process. Tighten all hardware then proceed with the front boom piece. That connection with
the mid boom piece is also marked with like colors. Similarly attach the front boom section as
you did the rear.
3)
The element bundle contains all of the elements needed for assembly. Take time to
inventory each one and check off each dimension with Table 1. Some elements vary by 1 or
2mm in overall length, so extreme care in measuring is called for here. Arrange elements in
order of descending size and mark each element with a scribe for proper location of the
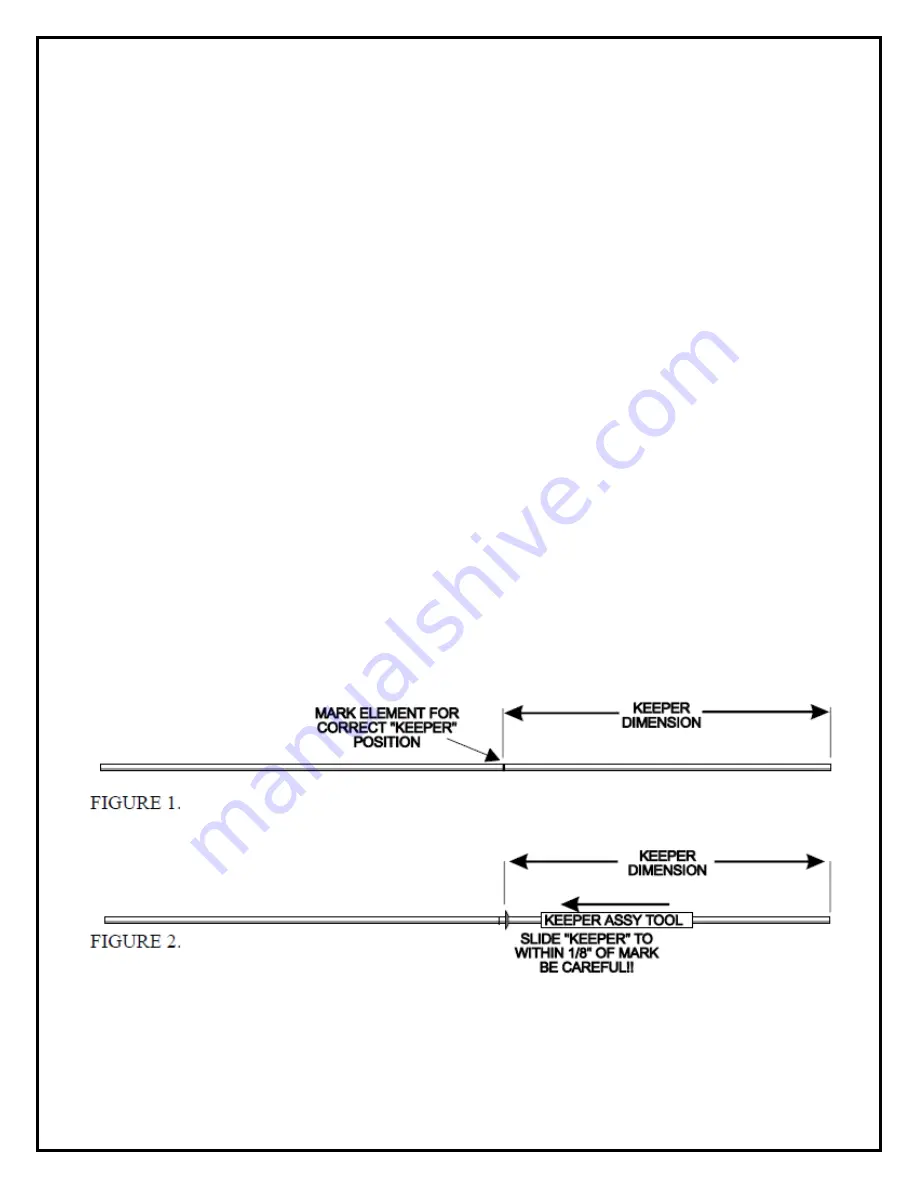
“keeper” (See Table 1 and Figure 1). The reflector is the longest element, and each
succeeding director is slightly shorter. DIR # 10 is the shortest. The keeper must be installed
as shown in Fig. 2. Using the aluminum tubing tool supplied, slide the keeper to within 1/8
” or
3mm of the scribed line. Final adjustment will be done on the antenna. Note that the keeper is
a one-way device only. If you go past the scribed line, you must continue to the element end
and start the process over. Place the first keeper on all elements.
4)
You are now ready to install the elements on the boom. You must start at one end and
work your way, in order, to the far end of the boom. Lay out the elements in ascending or
descending order as appropriate. Install a black insulator in each side of the boom piece at
the starting end, and slide the correct element through the two insulators. Obtain a second
keeper and install that keeper on the opposite end of element #1 from the pre-installed keeper.
Содержание DSEFO144-12
Страница 5: ...P a g e 5 DSEFO144 12 Rev 8 19 FIGURE 4...
Страница 6: ...P a g e 6 DSEFO144 12 Rev 8 19...


