background image

4

© 2001 Directed Electronics, Inc.  

9.

Unit Placement

- The unit should be posi-

tioned on a flat, sturdy surface and
secured in such a way that it cannot move
freely about the passenger compartment or
hinder operation of the vehicle in any way.

10.

Object and Liquid Entry

- Never insert

objects (other than video cassette tapes,
as instructed) into this product. Electric
shock, fire, or electric short can occur.
Never spill/pour liquid of any kind
onto/into this product.

11.

Servicing

- Do not attempt to service this

product yourself; opening or removing the
covers may expose you to dangerous elec-
tric voltage or other hazards. Refer all
servicing to qualified service personnel.

12.

Damage Requiring Service

- Unplug this

product from the power source and refer to
qualified service personnel for the following:

a.

Liquid has spilled into or objects
have been dropped onto the product.

b.

The product has been exposed to rain
or water.

c.

The product does not operate
normally according to the operating
instructions. Adjust only those
controls covered by the operating
instructions, as improper adjustment
of other controls can cause damage
and can require extensive repair work
by a qualified technician to restore
normal operation.

d.

The product has been dropped or
damaged in any way.

e.

The product exhibits a distinct
change in performance.

13.

Repairs

- If the unit stops working for any

reason, discontinue use immediately and
consult with your Directed retailer about
any necessary repairs.

14.

Heat

- The product should be located away

from heat source devices such as radiators,
heater vents, or other products (including
amplifiers) that produce heat.

Important Information

FCC NOTICE

This device complies with Part 15 of FCC rules.

Operation is subject to the following two condi-

tions: (1) This device may not cause harmful

interference, and (2) this device must accept

any interference received, including interfer-

ence that may cause undesired operation.

Changes or modifications not expressly

approved by the party responsible for compli-

ance could void the user's authority to operate

this device.

YOUR WARRANTY

Your warranty registration must be completely

filled out and returned within 10 days of pur-

chase. Your product warranty will not be vali-

dated if your warranty registration is not

returned. Make sure you receive the warranty

registration from your dealer. It is also neces-

sary to keep your proof of purchase, which

reflects that the product was installed by an au-

thorized dealer. 

Содержание VC2010

Страница 1: ...O W N E R S G U I D E INSTALLATION GUIDE Video Cassette Recorder MODEL VC2010...

Страница 2: ...e removal diagnosis troubleshooting or reinstallation of the unit For service on an out of warranty product a flat fate fee by model is charged Contact your author ized dealer to obtain the service ch...

Страница 3: ...of these rights To prevent damage that may result in fire or electric shock hazard do not expose this appliance to rain or moisture Important Safeguards 1 Read Instructions Read all safety and operat...

Страница 4: ...re extensive repair work by a qualified technician to restore normal operation d The product has been dropped or damaged in any way e The product exhibits a distinct change in performance 13 Repairs I...

Страница 5: ...Control 9 Remote Control Battery Install Replace 9 Playing a Tape 10 Manual Tracking 10 Recording 10 Videocassette Tapes 11 About Videocassettes 11 Using Special Features 12 Forward and Reverse Pictur...

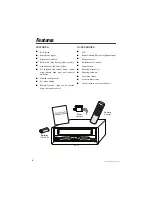
Страница 6: ...screen display Remote Ejection tape can be ejected using the remote control ACCESSORIES VCR Remote infrared IR sensor Optional part Remote control AA Batteries for remote Power harness Mounting bracke...

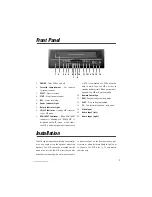
Страница 7: ...will turn to standby and dry itself When moisture dis appears the VCR will work normally 10 Remote Sensor Eye 11 REW Rewinds tape from stop mode 12 PLAY Press to begin playback 13 FF Fast forwards tap...

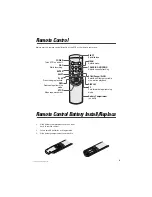
Страница 8: ...T The optional remote infrared IR sensor eye allows you to access all the features on the remote control when the VCR is mounted in anoth er location away from the remote To install the remote IR sens...

Страница 9: ...on and off REC Starts recording ENTER SHIFT PLAY Press to begin playback REW Rewinds tape from stop mode STOP Stops tape movement EJECT Ejectsthetape MENU Selects menu TRACKING UP DOWN Adjusts casset...

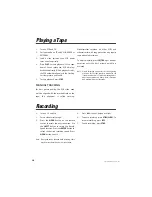
Страница 10: ...djust manually press CH TRK up or down as necessary until the best picture possible is achieved NOTE Picture distortion often occurs at the beginning of a tape Let the tape play for a moment to see if...

Страница 11: ...utes at SLP Tape SP standard play SLP super longplay T 120 2 hrs 6 hrs T 160 2 hrs 40 minutes 8 hrs T 180 3 hrs 9 hrs VHS Videocassette Tapes ABOUT VIDEOCASSETTES In general high quality brand name vi...

Страница 12: ...SLOTS CONTACT WITH A VOLTAGE POINT INSIDE THE VCR CAN CAUSE DANGEROUS SHOCK OR MAY SHORT OUT PARTS AND CAUSE FIRE OR ELECTRIC SHOCK FORWARD AND REVERSE PICTURE SEARCH While in Play mode press REW or F...

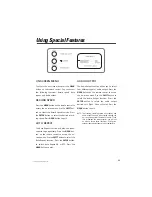
Страница 13: ...nu Use the SHIFT button to select the Auto Repeat function Press the ENTER button to switch Auto Repeat ON or OFF Press the MENU button to exit AUDIO OUTPUT The Audio Output function allows you to sel...

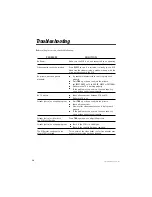
Страница 14: ...Make sure the TV is working properly If the problem occurs on more than one tape try using a video head cleaner cassette No TV picture Check all connections between VCR and TV Make sure TV is on Stre...

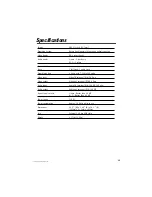
Страница 15: ...ecord play time 6 hours with T 120 in SLP mode Video input Video IN terminal RCA 1 0 Vp p Video output Video out terminal RCA 1 0 Vp p Audio input Audio IN terminal RCA 300 MV 50K ohm Audio output Aud...

Страница 16: ...nest vehicle security car stereo products rear seat entertainment and accessories available The recipient of more than 20 patents in the field of advanced electronic technology Directed is ISO 9001 re...

Отзывы: