background image

Assembly

1.  The fan body is ready assembled, however the feet need to be attached to the 

fan base.

2. 

Attach the 2 x feet to the base of the fan by aligning the holes, and securing with 

the (4) screws provided. Stand the fan upright to begin using. 

IMPORTANT: 

Ensure the feet are properly secured before placing upright on a firm 

stable surface. 

1.  Connect the plug to a power outlet and switch on. 

2. 

Once the feet are assembled, stand the unit upright on a firm stable surface.

3.  Turn the fan 

ON

 by rotating the speed control switch at the top of the unit in a 

clockwise direction. This switch is also used to adjust the fan 

SPEED

.

4.  To adjust the fan 

SPEED

 turn the speed control switch from LOW  "1” - MEDIUM 

“2”- HIGH “3” in sequence. 

5. 

Turn the switch anti-clockwise to the "0" position to turn the fan 

OFF

Operation

7

Содержание DCBOX50MB

Страница 1: ...For domestic household use only INSTRUCTION MANUAL 50cm Box Fan Model DCBOX50MB...

Страница 2: ...e for their safety Children should be supervised to ensure they do not play with the appliance Never immerse the appliance in water or other liquids Operate this unit only on a firm flat surface Do no...

Страница 3: ...se remove all packaging materials particularly plastic and EPS and keep these away from vulnerable people children and babies NEVER drop or insert any object or fingers into any openings Do not use th...

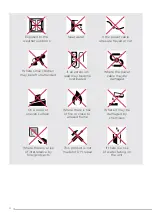
Страница 4: ...tension lead may become overloaded Where there is risk of fire or close to a naked flame Where the power cable may be damaged On a slope or uneven surface Where it may be damaged by chemicals If there...

Страница 5: ...ed settings 3 Modes Timer Air volume 50m min Adjustable height N A Tilt adjustable head N A Oscillation N A Noise level MAX 70dB A Weight net 3 14kg Dimensions w x d x h 500 x 110 x 560mm Specificatio...

Страница 6: ...Parts Controls Feet Carry handle Fan blade Front grille Speed control switch 6...

Страница 7: ...cing upright on a firm stable surface 1 Connect the plug to a power outlet and switch on 2 Once the feet are assembled stand the unit upright on a firm stable surface 3 Turn the fan ON by rotating the...

Страница 8: ...be removed and doing so may void your warranty It is recommended to regularly clean the appliance to avoid hard to remove dust build up Do not use abrasive sponges scouring pads or a stiff brush to cl...

Страница 9: ...tion regarding the collection systems available If electrical appliances are disposed of in landfills or dumps hazardous substances can leak into the ground water polluting the food chain and damaging...

Страница 10: ...au Supplied by Glen Dimplex Australia 1340 Ferntree Gully Road Scoresby Victoria 3179 Glen Dimplex Australia All rights reserved Material contained in this publication may not be reproduced in whole...

Отзывы: