Package Contents
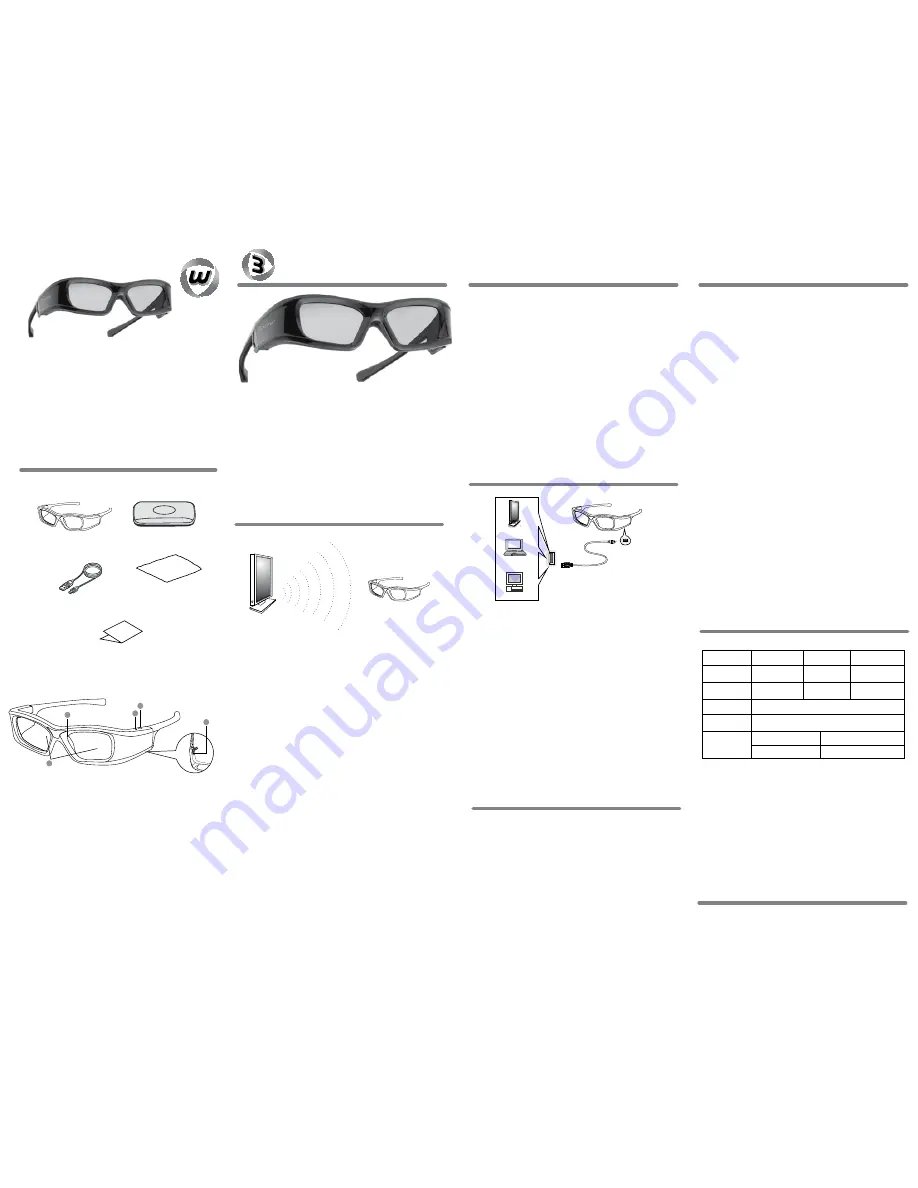
Following items are included in the package
1
Overview
Product Features
2
3
2
,
Cleaning Cloth (1)
3
,
Protective Case (1)
4
,
User’s Guide (1)
The high quality LCD lenses will bring you unbelievable 3D effect;
1
,
Liquid Crystal Lenses
Application Guide
Active 3D Glasses
User ’s Guide
Model
:
UTLG
Active 3D
Glasses
2
,
IR Signal Receiver
1
,
Active 3D Glasses (1)
5
,
USB Charge Cable (1)
5
,
Folding Earpiece
3
,
Indicator
LED
Power ON: green LED is on for 3 seconds;
Power OFF: green LED blinks three times;
Low Battery: green LED blinks once every seconds;
In Charging: red LED is on;
4
,
Power Button
Turn ON: Press the button once;
Turn OFF: Hold the button for about 3 seconds.
6
,
Mini-USB Charge Port Cover
7
,
Mini-USB Charge Port
Full Charged: red LED goes out;
Auto OFF: The glasses will automatically turn off after 1.5
is no IR SYNC signal
minutes when there
The stylish and lightweight active 3D glasses are designed to
®
Hisense 3D TV with build-in IR emitter, allow your family and friends to join your 3D experience.
®
view 3D content on LG and
Blu-ray Player
®
®
LG and Hisense 3D TV
®
®
Model No.: UTLG( 3D Glasses for LG and Hisense 3D TV)
1
3
4
5
2
Active 3D Glasses
3D
SYNC
Signal
Television
Laptop PC
Desktop PC
USB Connection
Standard-USB
Connection
2.
Protective Case (1)
3.
USB Charge Cable (1)
1. Active 3D Glasses (1)
4.
Cleaning Cloth (1)
5.
User’s Guide (1)
Following items are included in the package
•
Insert a 3D DVD into a 3D Blu-Ray Player and/or select
a 3D channel from your cable or satellite provider.
If using 3D channels, make sure that you have an
upgraded cable box that can support 3D signals.
•
Once the DVD loads, you will be prompted to select 2D
or 3D. Select 3D. If viewing a 3D channel, select it now.
•
Depress the power button on the left temple.
•
The LED indicator light will illuminate briefly and then
go out to preserve the battery.
•
The glasses will synchronize with the TV and the
lenses will darken slightly.
•
The glasses are now ready for use.
© 2012 Dimensional Optics
®
UCGDLP
www.DimensionalOptics.com
A
C
T
IV
E
®
Glasses, Parts & Accessories
Using your 3D Glasses
For Technical Support
Synchronizing your 3D Glasses
•
Your 3D glasses operate by receiving a radio
frequency signal from a 3D television.
•
In preparation for initial use, charge your 3D
glasses for two (2) hours and/or until the LED
indicator light goes out.
•
Eliminate all objects blocking the 3D signal
between the TV and the glasses - stay within 25’
of the TV.
Glasses
A
CTIVE
®
USE & CARE GUIDE
PREMIUM 3D GLASSES
•
Under normal use, your 3D glasses will operate for
approx. 20-30 hours between charges.
•
When the glasses require charging, the LED
indicator light will blink. It is not necessary to
charge the glasses after every use.
•
During the charge cycle, the LED indicator light will
illuminate - when the charge is complete, the light
will go out.
•
If you attempt to charge a pair of glasses that
already has a full charge, the LED indicator light
will not illuminate.
•
Charging the glasses should take approx. 1-3 hours
depending on battery condition.
Automatic
In order to extend battery life, your 3D glasses are
designed to automatically shut down as soon as they
stop receiving a 3D signal from the TV.
Manual
Press and hold the power button for approx. 4-6 seconds
– you will see several quick flashes of the LED indicator
light – the glasses are now off.
Recharging your 3D Glasses
•
Use this product only for watching 3D video
images on a 3D-ready television.
•
This product is powered by a rechargeable
battery. Do not damage or destroy battery.
•
When not in use, protect your 3D Glasses by
placing it in the 3ACTIVE® case provided.
•
When cleaning lenses, only use a clean soft fabric
cloth. Any chemical cleaning agent may damage
product or cause product malfunction.
•
Do not drop or modify these 3D Glasses.
•
Magnetic fluorescent lights may cause flicker to
your 3D Glasses.
•
Some people may experience eye strain, fatigue,
nausea, or other discomfort when using this
product. Dimensional Optics recommends all
viewers take regular breaks while watching 3D
images.
•
If you experience discomfort, please stop using
this product until discomfort ends; consult a
physician if you believe necessary.
•
The vision of young children is under
development. Consult your doctor before allowing
young children to watch 3D video images.
Safety Precautions
Specifications
Shutter:
Contrast Ratio:
Battery Type:
Battery Operating
Life:
Operating
Condition:
Liquid Crystal
120Hz
Rechargeable Lithium/Polymer Battery
Up to 20-30 hours of battery charge per full charge
Battery usage will vary based on activity
Working Temperature
Storage Temperature
SYNC Operation:
Luminous
Transmittance:
32˚ - 122˚F
14˚ - 122˚F
Field of Sync:
Weight:
1000:1 +/-200
38+/-2%
41 g
White light DLP-Link
This device complies with the limits for a Class B
digital device, pursuant to Part 15 of the FCC Rules.
These limits are designed to provide reasonable
protection from harmful interference in a residential
installation. This device generates, uses and can
radiate radio frequency energy and, if not used in
accordance with the instructions, may cause harmful
interference to radio communications.
➊
LCD lenses
➋
Radio Frequency Signal Receiver
➌
LED Indicator Light
➍
On/Off Power Button
➎
USB Charging Port
Prior to use, you must first synchronize your 3D
glasses with your 3D TV.
1. Turn on the TV and set to 3D Mode.
2. Insert a 3D DVD into a 3D Blu-Ray Player and/or select a
3D channel from your cable or satellite provider. If using
3D channels, make sure that you have an upgraded
cable box that can support 3D signals.
3. Once the DVD loads, you will be prompted to select 2D
or 3D. Select 3D. If viewing a 3D channel, select it now.
4. You should now see a slightly blurred image on screen.
5. With 3D content appearing on-screen, hold the glasses
approx. one (1) foot away from the TV.
6. Press and hold the power button until the LED indicator
light flashes once.
7. When the LED indicator light stops flashing and turns solid
blue, the glasses are synchronized and ready for use.
8. Put the glasses on – the lenses will noticeably darken;
images on the TV will now be in 3D.
9. If synchronization fails, repeat steps 1-8 above.
Email: [email protected]
Powering Off your 3D Glasses


