Digitus DS-43110 Скачать руководство пользователя страница 5


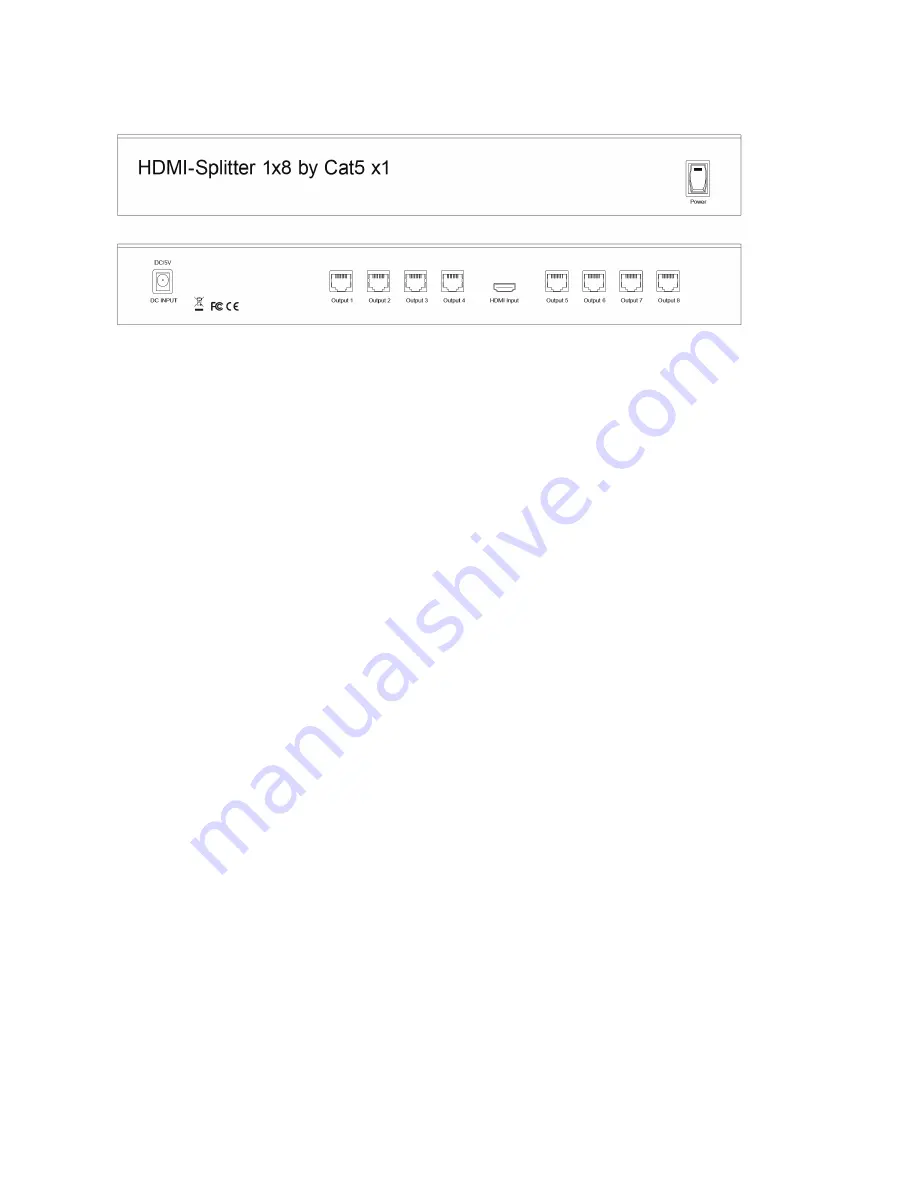
4.0 Panel Descriptions 


5.0 ConnectION and OperatION 


1) 

Connect the single HDMI source (such as HD-DVD, PS3, STB ) to the main HDMI input   
using a piece of HDMI cable. 

2) 

Connect each piece of CAT-5e/6 cable to both of the output of the HDMI 8-Ports Splitter 
Amplifier and input of the Receiver.   

3) 

Connect outputs of Receivers to displays ( such as HD-LCD, HD-DLP)   

4) 

Plug the 5V@ 4A power supply into the HDMI 8Ports Splitter Amplifier and the   
5V@2A power suppliers to each Receiver individually.   


Attention: Insert / Extract cable gently.   


Содержание DS-43110

Страница 1: ...8 PORT HDMI VIDEO SPLITTER User Manual DS 43110 ...

Страница 2: ...2 Table of Contents 1 0 Introduction 2 2 0 Specifications 2 3 0 Package Contents 3 4 0 Panel Descriptions 4 5 0 Connection and Operation 4 ...

Страница 3: ...he HDTV display up to 50 meters for 1080p This HDMI Splitter offers solutions for HDTV retail and show site HDTV STB DVD and Projector factory noise space and security concerns data center control information distribution conference room presentation school and corporate training environments 1 1 Features This HDMI Splitter has many features that enable it to perform in a superior manner Among tho...

Страница 4: ...70 C Operating Humidity 10 to 85 RH no condensation Storage Temperature 10 C to 80 C Storage Humidity 5 to 90 RH no condensation Power Requirement Power Supply for HDMI 8Ports Splitter Amplifier 5V DC 4A 15W Power Supply for Receiver 5V DC 2A 5W Regulatory Approvals Converter Unit FCC CE UL Power Supply UL CE FCC Accessories Adapter AC Power Adapter US standard UK standard and so on User Manual En...

Страница 5: ... 2 Connect each piece of CAT 5e 6 cable to both of the output of the HDMI 8 Ports Splitter Amplifier and input of the Receiver 3 Connect outputs of Receivers to displays such as HD LCD HD DLP 4 Plug the 5V 4A power supply into the HDMI 8Ports Splitter Amplifier and the 5V 2A power suppliers to each Receiver individually Attention Insert Extract cable gently ...

Страница 6: ...6 5 1 CONNECTION DIAGRAM ...

Отзывы: