background image

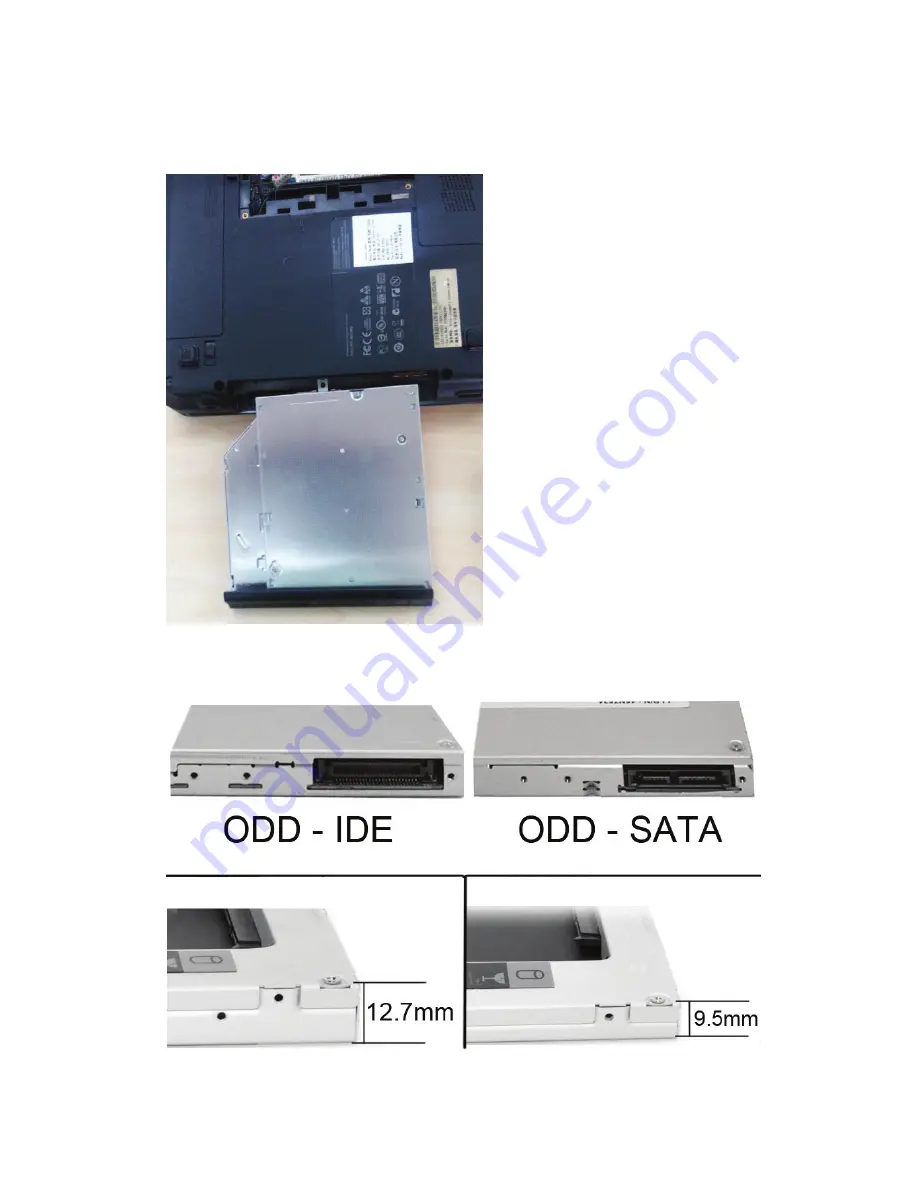
Once remove the CD-ROM driver, please check the thickness of the driver 
which is 12.7mm or 9.5 mm. In order to pick up the suitable 2nd HDD Caddy, it 
has to make sure the connector of CD-ROM driver is for SATA or IDE. 


DA-71101: 9.5mm, IDE 

 DA-71103: 9.5mm, SATA 

DA-71100: 12.7mm, IDE 

 DA-71102: 12.7mm, SATA 

Содержание DA-71100

Страница 1: ...SATA TO IDE SATA TO SATA SSD HDD MOUNTING FRAME Quick Installation Guide DA 71101 9 5mm IDE DA 71103 9 5mm SATA DA 71100 12 7mm IDE DA 71102 12 7mm SATA...

Страница 2: ...roduct Size 129 128 12 7mm DA 71101 IDE to SATA 9 5mm Product Size 129 128 9 5mm DA 71102 SATA to STATA III 12 7mm Product Size 129 128 12 7mm Real highest 6 0Gps SATAIII transfer speed compatible to...

Страница 3: ...First unscrew the cover on the bottom of the notebook laptop...

Страница 4: ...Remove the cover Uninstall the CD ROM driver inside the notebook laptop...

Страница 5: ...thickness of the driver which is 12 7mm or 9 5 mm In order to pick up the suitable 2nd HDD Caddy it has to make sure the connector of CD ROM driver is for SATA or IDE DA 71101 9 5mm IDE DA 71103 9 5mm...

Страница 6: ...Please remove the front panel of the driver And then unscrew the buckle on the other side of the driver...

Страница 7: ...Installation Method Unpack the hard drive Lift the hard drive caddy retaining latch Install the screws to the hard drive 1 Insert the hard drive into the hard drive caddy...

Страница 8: ...2 Slide the hard drive into the connector until it locks into place 3 Lower the hard drive caddy retaining latch until it snaps closed...

Страница 9: ...Please assemble the panel and buckle along with the 2nd HDD Caddy which have been chosen previously Insert the 2nd HDD Caddy back into the notebook...

Страница 10: ...Finally install the screws to the cover on the bottom of laptop again...

Отзывы: