


D
IGITAL
C
ONTROL
I
NCORPORATED
12
DigiTrak Falcon F1™ Operator's Manual
Receiver Menus
I am already familiar with DigiTrak receiver menus; can I skip this?
Page 29
If you have used a DigiTrak SE
®
or F2
®
receiver, you are well on your way to mastering a
Falcon. Read the next section on the Frequency Optimizer, then skip ahead to
Come back and visit later as needed for reference. If this is your first DigiTrak, keep reading.
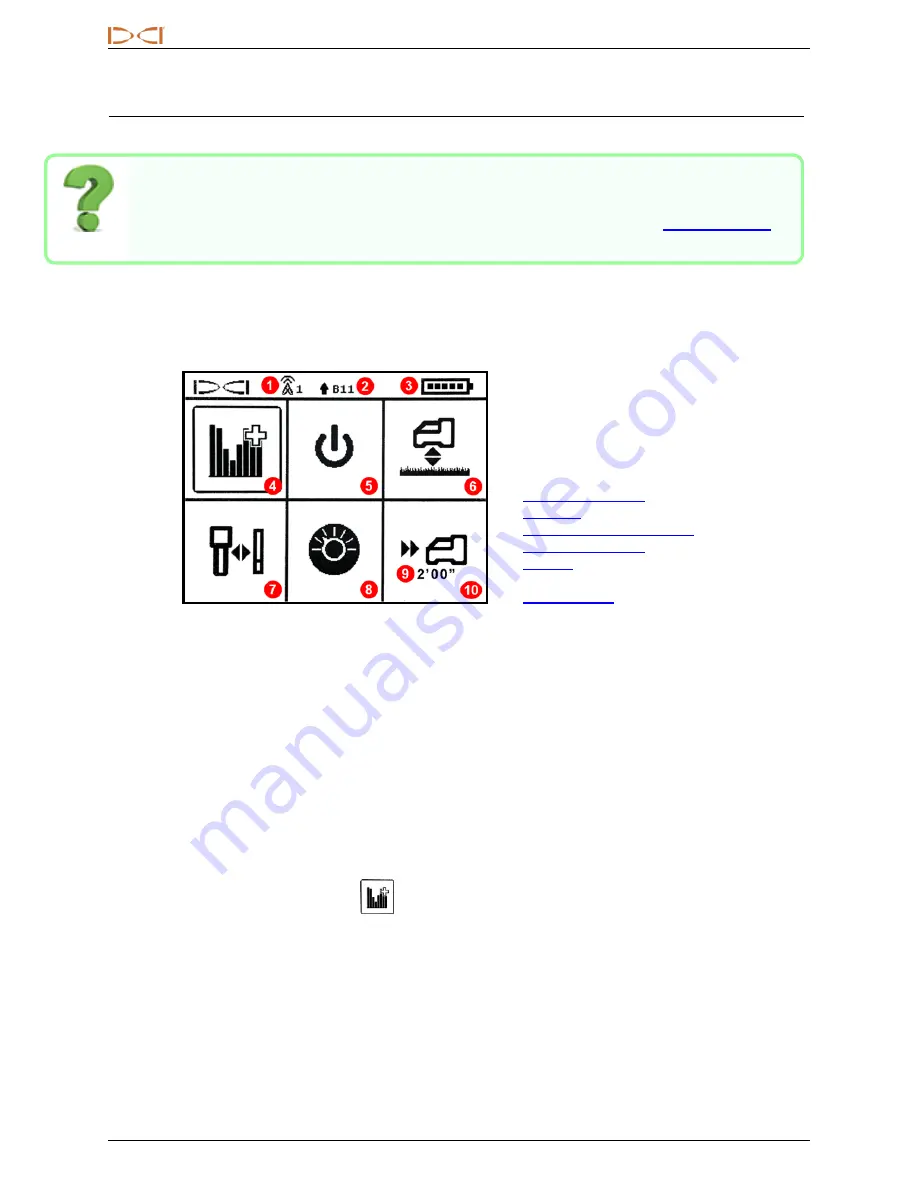
To access the Main menu from the Locate screen, click the trigger. Click repeatedly to move through the
menu, then hold the trigger briefly and release to make a selection. The Frequency Optimizer icon is shown
selected below; holding the trigger briefly would start this feature.
1.
Telemetry channel
2.
Transmitter band
3.
Receiver battery strength
4.
5.
6.
7.
8.
9.
Target depth
10.
Receiver Main Menu
The top of the Main menu displays the telemetry channel, transmitter frequency band, and receiver battery
strength.
The following sections describe the Main menu items in order. Use the links above to jump straight to a
section.
If the Target Steering menu has been programmed with a target depth, it displays below the Target Steering
icon as shown.
If you open the Main menu accidentally, either click through all the options to return to the Locate screen or
wait a few seconds for the menu to time out and return automatically.
Frequency Optimizer
This section addresses Falcon technology's ground-breaking frequency optimizer (FO) feature, which finds
the lowest-noise (optimal) group of frequencies available in Band 11. When the results display in graph form
showing the levels of active interference in each band, choose Band 11, pair, and you're ready to calibrate
and start drilling.


