background image

12

Quick Start Guide

STEP 7 -

 Setting Up AIS

All of the SmarterChart 500 range can be connected to AIS Transponders and

Receivers and the SC500 AIS Combo features it’s own built-in AIS receiver. Once

the AIS is connected, a series of powerful AIS functions and features become

activated.

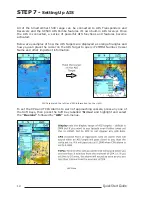
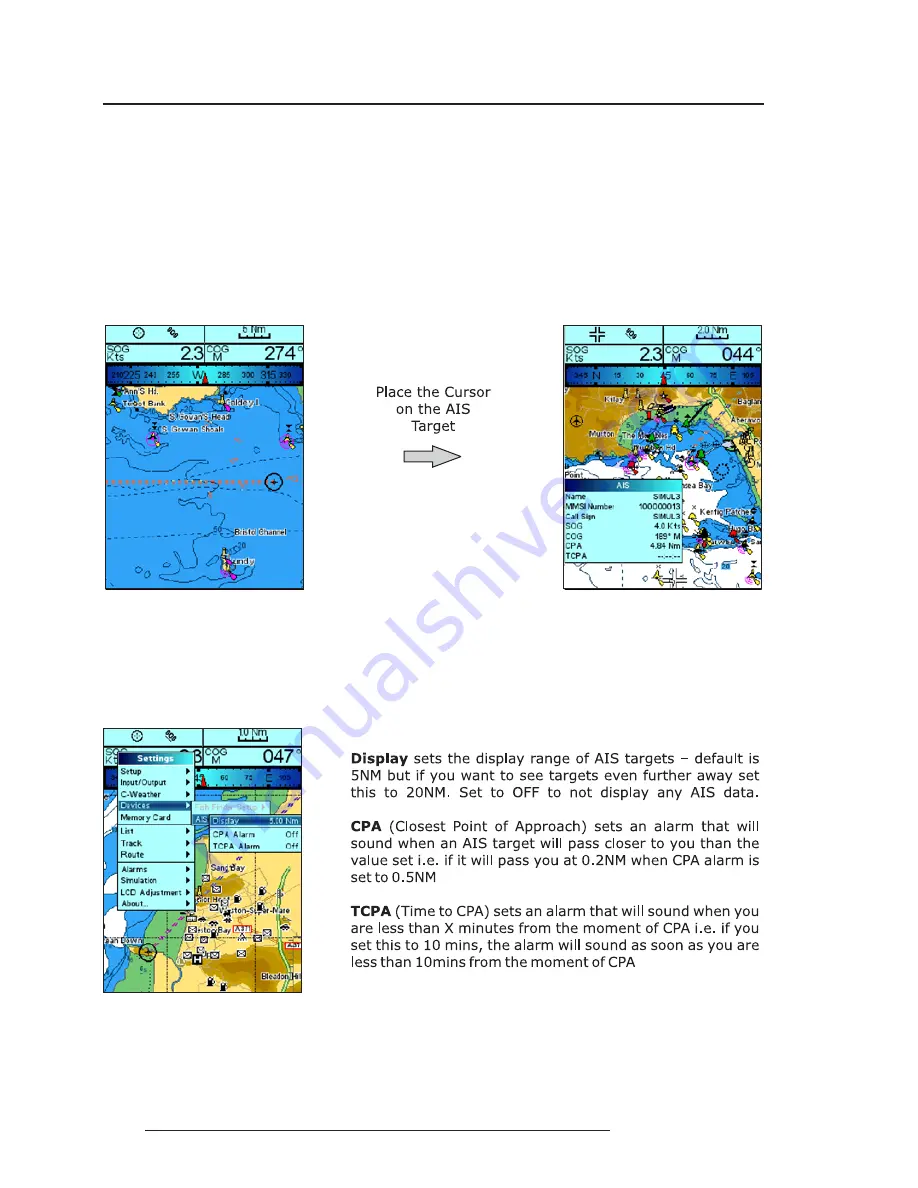
Below are examples of how the AIS Targets are displayed as orange triangles and

how you can place the cursor on the AIS Target to query it’s MMSI Number, Vessel

Name and other important information.

AIS Targets (on the left) and AIS information (on the right)

To set the CPA and TCPA Alarms to warn of approaching vessels, press any one of

the Soft Keys, then press the Soft Key labelled 'S

ETTING

' and highlight and select

the ''Devices'' followed by "AIS" sub-menus.

AIS Menu

Содержание SmarterChart 500 SERIES

Страница 1: ......

Страница 2: ... Fish Finder AIS COMBO 5 Sunlight Readeable Color Display S4xgNS5vc Internal GPS Receiver Internal AIS SmarterChart 500 SERIES Quick Start Guide code c1620 290410e Copyright 2010 Digital Yacht LTD United Kingdom Printed in Italy All rights reserved No part of this publication may be reproduced or distributed in any form or by any means or stored in a database or retrieval system without prior writ...

Страница 3: ...500 can be bracket or flush mounted 45m m 1 08 74mm 2 9 150mm 5 9 156mm 6 1 Bracket mounting on the left and Flush mounting on the right M4 threaded M4 threaded 20 mm 4 mm 27 mm Mounting Screws Available as an option is the custom SmarterChart500 waterproof Marine Pod ...

Страница 4: ... POWER I O CONNECTOR CABLE EXTERNAL WIRING FOR SOUNDER COMBO CABLE COLOR BLACK RED WHITE GREEN GRAY YELLOW BROWN BLUE FUNCTION PWR GND COMMON PWR 10 35 Vdc INPUT 1 COMMON OUTPUT 1 EXT ALARM SIGNAL to GND when ON 1 2 3 4 5 6 7 8 PIN POWER I O CONNECTOR CABLE PIN 1 2 3 4 5 6 7 8 FUNCTION TRANSDUCER Connector DEPTH GND TEMP1 POWER SUPPLY 5Vdc 1A max SENSE DEPTH SHIELD DEPTH SPEED EXTERNAL WIRING FOR ...

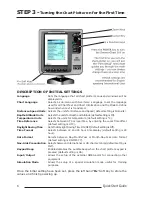
Страница 5: ...between UTC or local time by entering the Local Time offset default setting is UTC Daylight Saving Time Sets the Daylight Saving Time ON OFF default setting is Off Time Format Selects between 12 and 24 hour time display default setting is 24 hour Date Format Selects between Day Month Year or Month Day Year date format default setting is DD MM YY Nav Aids Presentation Selects between International ...

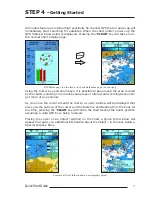
Страница 6: ...around the area covered by the charts zooming in on marinas and areas or interest and zooming back out to get more of an overview As you move the cursor around the charts a cursor window will be displayed that gives you the Lat Lon of the cursor and the Distance and Bearing from the boat At any time pressing the CLEAR key will centre the chart back at the boat s position assuming a valid GPS fix i...

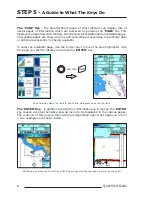
Страница 7: ...ories not being available To select an available page use the Cursor key to move the blue highlighter onto the page you wish to display and press the ENTER key and then Page Selection Menu on the left and Chart Databoxes page on the right The ENTER Key in addition to being the confirmation key in menus the ENTER key causes a context sensitive pop up menu to be displayed in the various pages The co...

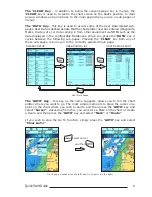
Страница 8: ...ATA key it cycles between the following sub pages Pressing the CLEAR key from any of these sub pages returns you to the currently selected main page DATABOX SETUP USER POINTS LIST ROUTE DATA REPORT User Data pages The GOTO Key this key as the name suggests allows you to tell the chart plotter where you want to go The most simple method is to place the cursor on a point on the chart where you wish ...

Страница 9: ...y the LCD Adjustment Menu shown below Pressing and holding the POWER key for three seconds turns the chart plotter off LCD Adjustment Menu The Soft Keys along the bottom of the LCD are four Soft Keys whose function changes depending upon what you are doing Whenever you need to use these keys a function label above the key will be displayed on the LCD to tell you what pressing the key will do An ex...

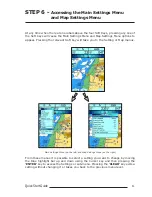
Страница 10: ...ear Pressing the relevant Soft Key will take you to the Setting or Map menus Main Settings Menu on the left and Map Settings Menu on the right From these menus it is possible to select a setting you want to change by moving the Blue highlight bar up and down using the Cursor key and then pressing the ENTER key to access the Settings or sub menu Pressing the CLEAR key exits a setting without changi...

Страница 11: ...me activated Below are examples of how the AIS Targets are displayed as orange triangles and how you can place the cursor on the AIS Target to query it s MMSI Number Vessel Name and other important information AIS Targets on the left and AIS information on the right To set the CPA and TCPA Alarms to warn of approaching vessels press any one of the Soft Keys then press the Soft Key labelled SETTING...

Страница 12: ...of the Full User Manual for the complete SmarterChart range is available on the Digital Yacht website www digitalyacht co uk As you become more experienced in using your chart plotter the Full User Manual will provide all of the detail you need to use the advanced and powerful features of these chart plotters If you require further Technical Support on any Digital Yacht products please e mail supp...

Страница 13: ...14 Quick Start Guide ...

Отзывы: