Ó
2007 Digital Spectrum Solutions, Inc. All rights reserved. Specifications and items shown subject to change
without notice. MemoryFrame
Ô
is a registered trademark, and the Digital Spectrum logo, and Digital Spectrum
Ò
TM
are trademarks of Digital Spectrum, Inc. Microsoft , Windows Vista and the Windows Vista logo are registered
trademarks of the Microsoft Corporation. All other trademarks are the property of their respective owners.
* Protected by United States Patent No: 6,826,863 B1
Assembled in China.
Ò
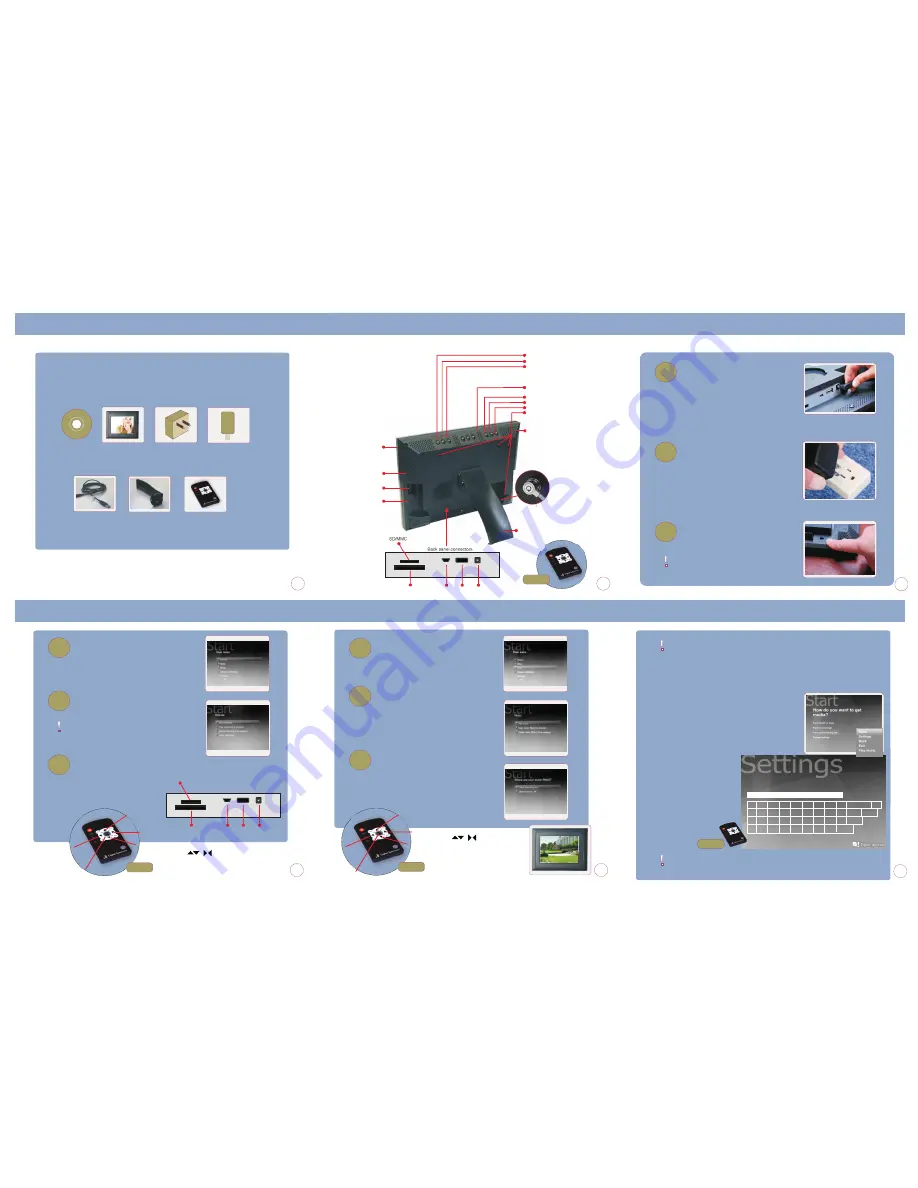
What’s in the box?
Before setting up your
frame check the contents of the box
Before setting up your
frame check the contents of the box
Software CD
MemoryFrame
Power Supply
USB card reader
USB Cable Stand
Remote
Back panel connectors
SD/MMC
CF Slot
USB
to PC
USB
device
Power
supply
Play/Pause/Enter
Right
Left
Built-in Wireless Antenna
Down
Up
Menu
Mounting Holes
Built-in Stereo Speaker
Built-in Stereo Speaker
Frame Lock
Adjustable Stand
(Landscape/Portrait)
Ilustration for information only.
Actual product and frame may vary slightly
Removable frame
Getting to know your memoryFrame
Security Lock
(not included)
Connecting the frame
1
Plug in the power cable to the back
of the unit
2
Plug the power adapter into a power
outlet
3
Turn on the power switch
After a few moments the unit will
automatically begin playing a photo
slideshow.
Playing a slide show
1
MemoryFrame automatically plays your
previous slideshow. If you insert a new
media device, MemoryFrame will
automatically play from that device if
pictures are present.
2
To specify a different s urce for your pictures
o
- Press MENU
- Select Picture and pr ss ENTER
e
.
- Se ect Play Slides
w and press ENTE
l
ho
R
- Specify source l cation of picture fi es
o
l
and p ess ENTER
r
- Select Play all pict es and press ENTER
ur
3
Note: For
Compact Flash, SD/MMC
insert the memory card into the
slot as shown in the diagram. For
USB storage insert the USB card
reader or thumb drive into the
“USB device”
slot. Press
“ENTER”
To confirm selection.
Use the / buttons to navigate
the menu bar press the
“ENTER”
button
once you have made your selection
Up
Right
Left
Down
Remote
Back panel connectors
SD/MMC
CF Slot
USB
client
USB
host
Power
supply
Enter
4
MemoryFrame allows you to easily play
background music with your slideshow.
To play background music,
- Press MENU
- Select Music and press ENTER
5
- Select Play music and press Enter
- Select Previous or New song list and
press ENTER
-If Previous song list selected, music
playback will begin.
- If New song list selected, specify source
location and press ENTER
6
While music is playing, you can restart
your previous picture slideshow by
pressing PLAY on the remote.
Use the Mute/Vol+/Vol- buttons on the
remote to adjust music volume.
Refer to the User Guide to disable
background music.
Up
Right
Left
Down
Use the / buttons to navigate
the menu bar press the
“PLAY”
button
once you have made your selection
Remote
Playing a slide show with music
Network requirement:
To enable wireless network connectivity, an 802.11b/g
wireless router/access point must be available and accessible. Please refer to
the manufacturer’s information on the router/ access point to ensure that a
connection is permissible and that the wireless settings match those of your
MemoryFrame. For Internet access, make sure your access point is online.
To access an Internet photo sharing site or a Windows PC*
1- Follow the previous steps to play picture slideshow.
2- When prompted to specify a source location, select
Photosharing or Windows.
3- MemoryFrame will display all the available wireless
networks. Select the preferred network.**
*Photo sharing with Windows requires Media Player 11 with
media sharing enabled.
**Once a network connection has been made, MemoryFrame
will remember the connection preference.
Security Key
Type security access key for: MYSERVEREXAMPLE
1 2
3 4 5 6 7
8 9
0 - BS
Q
w
e
r
t
y
u
i
o
p Space
A
s
d
f
g
h
j
k
l Enter
Z
x
c
v
b
n
m
. Shift
1234xvsaaexample
If the access point is configured
for encryption, MemoryFrame will
display an onscreen keyboard so
you can enter the security key. Use
the remote to navigate the
characters, and press the
"ENTER"
button to select the character.
Select
"BS"
key to backspace a
character.
Configuring wireless photo sharing
2
1
3
4
5
6
Remote
Enter
Remote
dsicentral.com
Power switch
MENU
Picture
Video
Music
Setting
Pictures
Play slideshow
Copy picture(s)
Delete picture(s)
Some routers allow users to enter a “passphrase” to generate
a security key. MemoryFrame requires the actual security key
rather than the passphrase. Please refer to your router
User manual to determine the required security key.


