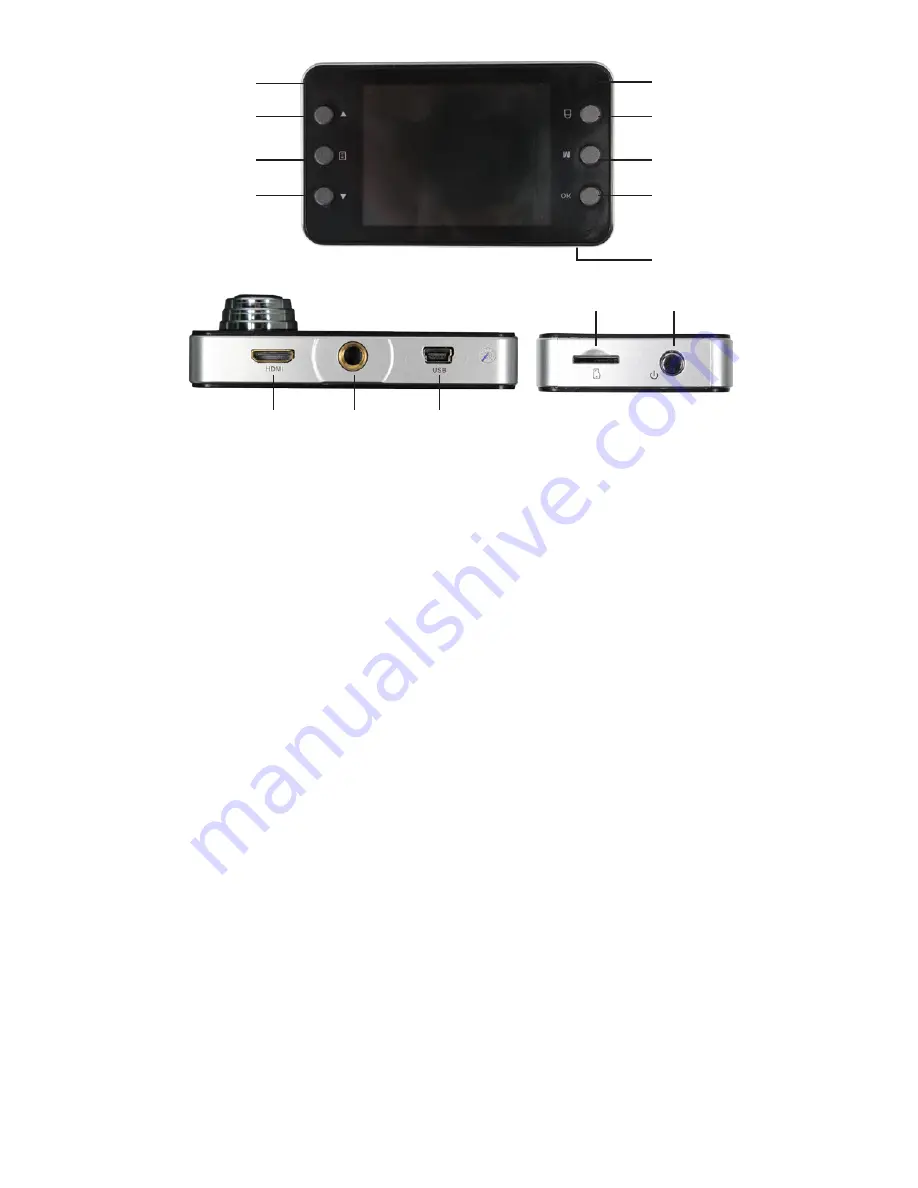
Digital reasures Power now! Скачать руководство пользователя страница 2

2

Function Keys:

1.  On Light (blue light)

     This light is illuminated when your Dash Cam is on. 

2.  Menu Option Up

     Highlights menu options.

3. Menu

     Press once to access camera features, press again to access settings.

4.  Menu Select Down

     Highlights menu options.

5.  Charging Light (red light)

     This light is illuminated when your Dash Cam is charging.

6.  OK

     Selects a highlighted option when in the Menu.

7.  Mode Selection

     Press to switch between video mode, picture mode, and playback.

8.  Protect Button

     Saves the current video file and protects it from accidental deletion.

9.  Reset Button (on bottom of camera)

     If your PowerNow! Dash Cam stops functioning, use a paperclip to press this 

     button to reset it. Your Dash Cam will turn off briefly and then turn back on.

10. HDMI Output

      Use with an HDMI cable (not included) to view your Dash Cam video on 

      high-definition devices. 

11. Threaded Mounting Hole

      Use to attach your Dash Cam to the included suction cup mounting bracket.

12. Mini-USB Port

      Used for charging of your Dash Cam and downloading video from your Dash      

      Cam to your PC (using the included charging cables). 

13. MicroSD Card Slot 

      Insert a MicroSD card (not included) to store your Dash Cam video.

14. Power Button 

      Press to turn your Dash Cam on and off.

2

6

5

3

7

4

8

10

11

12

1

13

14

Содержание Power now!

Страница 1: ...USER GUIDE...

Страница 2: ...om accidental deletion 9 Reset Button on bottom of camera If your PowerNow Dash Cam stops functioning use a paperclip to press this button to reset it Your Dash Cam will turn off briefly and then turn...

Страница 3: ...r PowerNow Dash Cam turned off insert the MicroSD Card into MicroSD Card slot on your Dash Cam and gently press it fully into place When your MicroSD Card is installed your dash cam will show a MicroS...

Страница 4: ...d video loops will begin overwriting the earliest video loop unless you choose to protect your video Use the Menu Select Buttons to choose your video loop length and press the OK Button to accept Expo...

Страница 5: ...his option by using the Menu Select and OK Buttons Quallity Allows you to set image quality between fine normal and economic which offers a lower quality image but has a smaller file size Use the Menu...

Страница 6: ...ing the Menu Select and OK Buttons Flash Use the Menu Select and OK Buttons to turn the flash off and on when taking photos in camera mode Format This will erase all videos and still photos on the ins...

Страница 7: ...ll the video loops will record over the earliest clip You can protect your video from being erased or over written by pressing the Protect Button Protect mode is indicated by the letter P on the displ...

Страница 8: ...he initial period of coverage should any repairs or replacements be made or performed This warranty does not extend to any product not purchased from PC Treasures LLC or an authorized PC Treasures LLC...

Отзывы: