Digital Projection TITAN XG-500 Скачать руководство пользователя страница 77

Rev C  March 2008 

Page 4.35

Digital Projection 

TITAN XG-500 

User Manual 

4. Controlling the projector

Notes

 Read the notes on Colour and 

Global Colourimetry earlier 
in this section before making 
any settings in the Colour 
menus.

 The 

Colour Temperature 

slider is available  only if 

Temperature 

Mode is selected.

 The 

RGB Lift and Gain 

sliders 

are available  only if 

User 

Mode 

is selected.

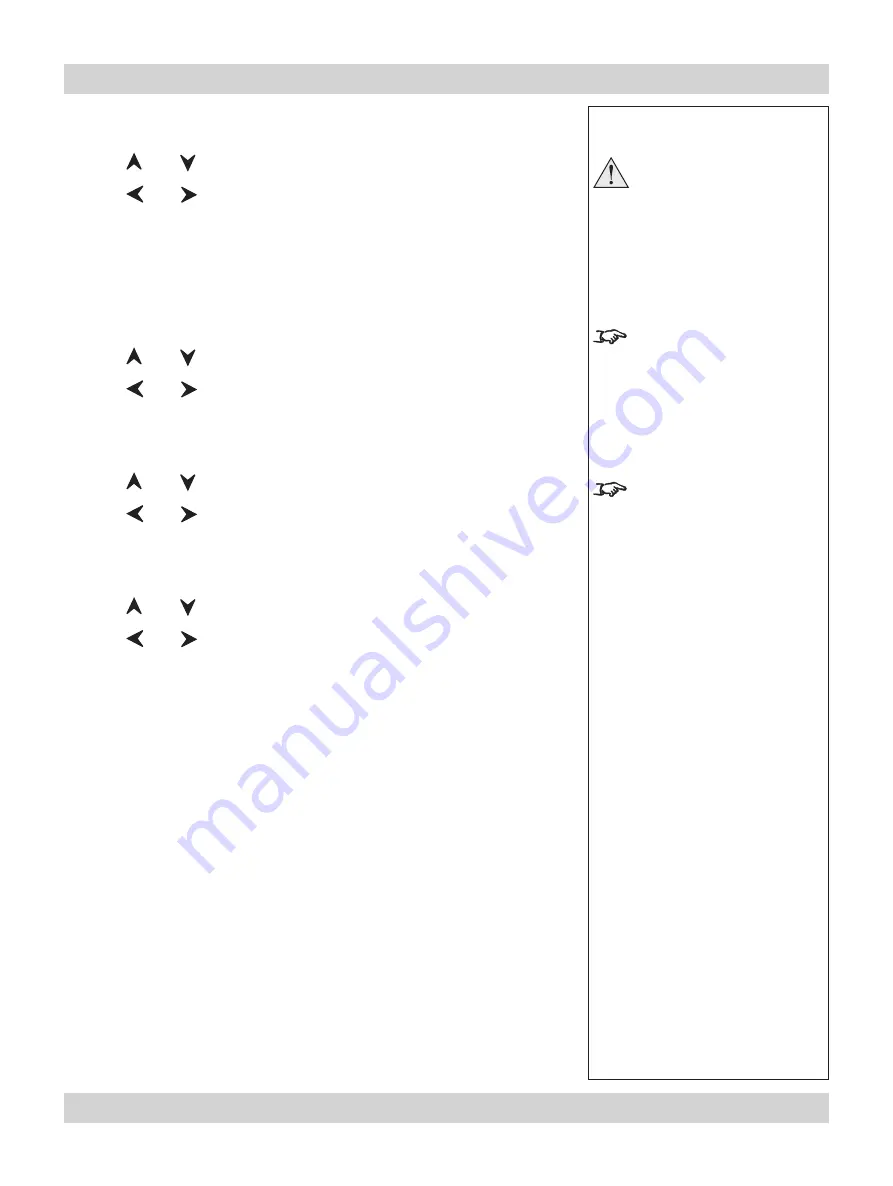
Colour Mode

Press 

 and  

 to select Colour Mode.

 Press 

 and  

 to select from:

Temperature

User

Peak

Colour Temperature

Press 

 and  

 to select Temperature.

 Press 

 and  

 to adjust the slider (3,000K to 10,000K. in 100 steps).

RGB Lift

Press 

 and  

 to select the parameter to be adjusted.

 Press 

 and  

 to adjust the slider.

RGB Gain

Press 

 and  

 to select the parameter to be adjusted.

 Press 

 and  

 to adjust the slider.

Setup menu, Global Colourimetry continued

Содержание TITAN XG-500

Страница 1: ...TITAN XG 500 High Brightness Digital Video Projector 4 3 widescreen display User Manual 106 615C...

Страница 2: ...nology Equipment EN 55103 1997 Product family Standard for Audio Video Audio Visual and Entertainment Lighting Control apparatus for Professional Use EN 60950 2000 Specification for Safety of Informat...

Страница 3: ...is some important information that you should read Trademarks IBM is a registered trademark of International Business Machines Corporation Macintosh and PowerBook are registered trademarks of Apple C...

Страница 4: ...p module The whole module should be replaced Take care when removing the lamp module NEVER touch the lamp or reflector Take care not to touch the glass surface of the lamp module If you do accidentall...

Страница 5: ...projector is capable of supporting the combined weight of the projector and lens see specification for exact weights Separate backup safety chains or wires should always be used for each projector Do...

Страница 6: ...gainst harmful interference when the equipment is operated in a commercial environment This equipment generates uses and can radiate radio frequency energy and if not installed and used in accordance...

Страница 7: ...istered in England No 2207264 Registered Office as above Tel 44 0 161 947 3300 Fax 44 0 161 684 7674 Email enquiries digitalprojection co uk service digitalprojection co uk Web Site www digitalproject...

Страница 8: ...Page viii Rev C March 2008 Important Information Digital Projection TITAN XG 500 User Manual...

Страница 9: ...ation precautions v Operation and configuration precautions v Compliance with international standards vi Noise vi RF Interference vi European Waste Electrical and Electronic Equipment WEEE Directive v...

Страница 10: ...lens 2 11 Shifting the image 2 12 Mounting the projector 2 13 Chassis adjustment 2 13 Fitting the optional rigging frame 2 13 Stacking projectors 2 15 Connecting the projector 2 16 Signal Inputs 2 16...

Страница 11: ...4 9 Layout 4 9 Timeout 4 9 Using the control keys 4 10 Power 4 10 Shutter 4 10 On Screen Display 4 10 Focus 4 10 Zoom 4 10 Shift 4 10 Auto detect input mode 4 11 Source information 4 11 Input 4 11 Inp...

Страница 12: ...24 Aspect Ratio 4 24 User Horizontal Aspect Ratio 4 25 User Vertical Aspect Ratio 4 25 Keystone 4 25 Phase 4 25 Resolution 4 26 Blanking 4 27 Colour menu 4 28 Colour Mode 4 29 Colour Temperature 4 29...

Страница 13: ...ptical 7 4 Electrical 7 5 Physical 7 5 Lens Data 7 6 Dimensions 7 8 Input modes supported 7 9 Input connections 7 10 1 RGB1 input 7 10 2 RGB2 input 7 10 3 DVI D input 7 11 4 not used in this projector...

Страница 14: ...Page xiv Rev C March 2008 Table of Contents Digital Projection TITAN XG 500 User Manual...

Страница 15: ...1 1 1 Introduction Contents What s in the box 1 2 Key features of the projector 1 3 Getting to know the projector 1 4 Front panel lens and power 1 4 Rear panel lamp and air filter 1 4 Side panel conne...

Страница 16: ...es are optional Order lenses from your Digital Projection dealer For more detailed information about lenses see Choosing a lens in section 2 Installation Only one power cable dependent on the destinat...

Страница 17: ...inspiring brightness of 4500 lumens the Titan XG is unmatched for applications as diverse as world class staged events commercial entertainment major outdoor venues large scale simulation gaming home...

Страница 18: ...led information about lenses see section 2 Installation For information about how to change the lamp or the filter see section 6 Maintenance Rear panel lamp and air filter Power connection Lens Air ou...

Страница 19: ...onnect the projector see Connecting the projector in section 2 Installation and Connections in section 7 Appendix For information about how to use the control panel see section 4 Controlling the proje...

Страница 20: ...Page 1 6 Rev C March 2008 1 Introduction Digital Projection TITAN XG 500 User Manual...

Страница 21: ...including 2 35 1 1 85 1 16 9 1 66 1 4 3 2 7 example 2 7 Full height image 5 4 2 8 Choosing a lens by calculation 2 9 example 2 9 Useful lens calculations 2 10 Lens extension 2 10 Fitting the lens 2 1...

Страница 22: ...s 4 3 1 33 1 1024 pixels native resolution Screen requirements Aspect ratio Fitting the image to the DMD If the source image supplied to the projector is smaller than 1024 x 768 pixels then the image...

Страница 23: ...ght H The example calculations below show how to convert diagonal sizes in inches into width and height at various aspect ratios 2 35 1 Scope W D x 0 92in D x 023m H D x 0 39in D x 01m 1 85 1 W D x 0...

Страница 24: ...are able to display the full image on your screen If you have insufficient height or width you will have to reduce the overall image size in order to display the full image on your screen Notes 1 2 3...

Страница 25: ...of the screen Notes The projector should be installed as close to the power outlet as possible The power connection should be easily accessible so that it can be disconnected in an emergency Ensure th...

Страница 26: ...n the image size in pixels may well be fixed If however you are using commercially available image processing equipment such as the Digital Projection VIP1000 you may be able to resize the image to fi...

Страница 27: ...e of 13m the 1 8 2 4 1 zoom lens would be best suited For the same screen size at a distance of 18m the 2 4 3 6 1 zoom lens would be best suited if you need to be more precise then use the calculation...

Страница 28: ...which lens best suits your application if you need to be more precise then use the calculations on the page immediately following the lens charts feet metres Screen width 5 10 15 20 25 30 metres 16 3...

Страница 29: ...the calculations below Identify actual width of the image in pixels Calculate the Throw Ratio Factor TRF DMD width 1024 Image width in pixels Identify the screen width required Identify the throw dis...

Страница 30: ...e Screen width Throw ratio factor TRF DMD width in pixels 1024 image width in pixels image width in pixels Therefore Screen width Throw distance Throw ratio x TRF Throw distance Screen width x Throw r...

Страница 31: ...e lens surfaces If you do accidentally touch a lens then clean the surface using a lens paper Fixing screws Fitting the lens Remove the rear lens cap from the lens Insert the lens into the lens mount...

Страница 32: ...rs of the image due to the image passing through the periphery of the lens optics If the lens is to be shifted in two directions combined the maximum range without distortion will be somewhat less as...

Страница 33: ...tan XG 500 projectors make sure that all the frame adjusters are set midway Secure the rigging frame to the projector using the screws supplied as shown in the pictures below Three screws secure each...

Страница 34: ...amount To tilt the projector from side to side roll adjustment turn either the left pair or the right pair of vertical adjusters taking care to turn both adjusters by the same amount To rotate the pr...

Страница 35: ...rate backup safety chains or wires should always be used for each projector Stacking projectors The rigging frame is capable of supporting the weight of up to two other projectors using the built in f...

Страница 36: ...Signal Inputs The following inputs are available EDID handshaking on the DVI and RGB2 inputs If you are using a computer DVI card or other source that obeys the EDID handshaking protocol then the car...

Страница 37: ...browser to control the projector see section 4 Using the menus Computer Null modem cable TITAN Control connection examples LAN connection All of the projector s features can be controlled via a LAN co...

Страница 38: ...this equipment MUST be earthed Handle the power cable carefully and avoid sharp bends Do not use a damaged power cable Power connection When mains power is first applied the projector will perform a...

Страница 39: ...itching the projector on 3 2 Selecting an input or test pattern 3 2 Input 3 2 Test pattern 3 2 Adjusting the lens 3 3 Focus 3 3 Zoom 3 3 Shift 3 3 Adjusting the projected image 3 4 Picture settings 3...

Страница 40: ...ower cable between the mains supply and the projector Wait until the self test has completed and the power indicator on the control panel shows amber The lamp will be off the shutter closed and the pr...

Страница 41: ...onds after 10 seconds if no adjustment has been made the indicator will go out and the Lens adjustment key must be pressed again to resume adjustment to end the adjustment before 10 seconds has elapse...

Страница 42: ...ad and hold for 3 seconds to switch the projector OFF Notes The Saturation control is available for Composite S Video and Component inputs only The Phase control is available for RGB inputs only For m...

Страница 43: ...Projector status indicators 4 8 The remote control 4 9 Layout 4 9 Timeout 4 9 Using the control keys 4 10 Power 4 10 Shutter 4 10 On Screen Display 4 10 Focus 4 10 Zoom 4 10 Shift 4 10 Auto detect in...

Страница 44: ...mma Correction 4 22 Parametric Gamma 4 22 Phase 4 22 Aspect Ratio 4 23 Sharpness 4 23 Geometry menu 4 24 Horizontal Position 4 24 Vertical Position 4 24 Aspect Ratio 4 24 User Horizontal Aspect Ratio...

Страница 45: ...35 RGB Gain 4 35 Lamp 4 36 Change Lamp Setting 4 36 Lamp Power 4 37 Lamp Mode 4 37 OK 4 37 Cancel 4 37 On Screen Display 4 38 OSD Position 4 38 OSD Size 4 38 OSD Timeout 4 38 Password 4 39 Communicat...

Страница 46: ...n 2 Installation and Connections in section 7 Appendix Many features are controlled from the menus using the menu navigation keys on the remote control or keypad For more information about using the m...

Страница 47: ...r will flash and the searching message will be displayed When the input mode has been detected the LED will show continuously and the auto detect message will be displayed for example If the input mod...

Страница 48: ...or recall when the same input source is used again When you recell a preset the projector switches to the saved input source and redetects the input mode before applying the saved modal settings Notes...

Страница 49: ...on the input panel will light as follows off input not selected green input selected signal detected and in range flashing green input selected but signal not detected or out of range Notes There are...

Страница 50: ...P ERROR green ON 100 amber 80 99 flashing green amber LAMP COOL DOWN or WARM UP Lamp 2 off OFF flashing red LAMP ERROR green ON 100 amber 80 99 flashing green amber LAMP COOL DOWN or WARM UP Notes Man...

Страница 51: ...menus see later in this section Using the menus Some of the menu features for example brightness contrast and input preset operations can be accessed directly using the control keys at the bottom of...

Страница 52: ...d the adjustment before 10 seconds has elapsed press the key all other adjustments will be locked out until the Lens adjustment is ended For more information about the amount of lens shift available s...

Страница 53: ...urce information Press to display the source information screen Input Press or to change to the next input up or down the following list 1 RGB1 2 RGB2 3 DVI 4 not used in this projector 5 Composite Vi...

Страница 54: ...in this section Input Presets Recall To recall a set of modal settings that have been saved press and hold whilst pressing the lettered key A S The projector will switch to the saved input source and...

Страница 55: ...d press a different adjustment key or press the key When the OSD is OFF the keys will still function but the controls will not be visible on screen Red Green and Blue Press or to switch the red green...

Страница 56: ...can be controlled from one remote control provided they are connected by cable or in range of the infra red Magnify and pan Press Magnify MAGNIFY followed by and to adjust the size of the picture Pres...

Страница 57: ...see On Screen Display in Setup Menu later in this section Main menu Input Input 4 is not used on this projector Main menu Setup Using the menus Navigating menus and submenus When the menus are in use...

Страница 58: ...Projector Setup submenu To select a submenu press and for example the Lamp submenu Press to open the submenu The submenu opens with the title at the top To close the submenu and return to the previou...

Страница 59: ...t a time to the right press and These two items are greyed out and the values are blank showing that they are not available due to the effect of settings made in other menus or due to the type of inpu...

Страница 60: ...t used in this projector 5 Composite Video 6 S Video 7 Component Press to confirm your selection Notes Some menu controls can be accessed directly using the control keys see earlier in this section Wh...

Страница 61: ...e Picture menu all settings from the Input menu 1 7 all settings from the Geometry menu except Keystone all settings from the Colour menu except Global Press and to select Presets Press to open the Pr...

Страница 62: ...ave the current set of parameters press and to select one of the Presets For Presets J to S select Save Preset J S then press to open the J S submenu Press and to select the Preset Press to confirm yo...

Страница 63: ...ly The Hue slider is available for NTSC inputs only Picture menu To return to the main menu press up to three times From the main menu Press and until Picture is highlighted Press to open the Picture...

Страница 64: ...and to select from Parametric Enables the gamma slider User download Applies the gamma settings made externally using the DP Userware on a personal computer default gamma of 2 2 Graphics Enhanced hig...

Страница 65: ...Composite S Video and Component SD inputs only Aspect Ratio Press and to select Aspect Ratio Press and to select from Fill This will best fit the incoming source to fill either the height or width wit...

Страница 66: ...menu The blue highlight moves to the first item in the menu Horizontal Position Press and to select H Position Press and to adjust the slider Vertical Position Press and to select V Position Press and...

Страница 67: ...atio Press and to select User H Aspect Press and to adjust the slider internal number adjust to fit User Vertical Aspect Ratio Press and to select User V Aspect Press and to adjust the slider internal...

Страница 68: ...en the Resolution submenu Input Detection Press and to select from Automatic Allows the projector to automatically detect an appropriate input mode for the signal Manual Allows the user to select an a...

Страница 69: ...elect the edge to be Blanked Press and to adjust the slider 0 to 200 Geometry menu continued Notes The adjustment sliders are available only if Input Detection is set to Custom Total H Samples is avai...

Страница 70: ...al Colourimetry menu see later in this section in Setup menu After a calibration check on the projector or venue a set of Global colour settings can be made in the Global Colourimetry menu These setti...

Страница 71: ...The Component Type selection is available for RGB1 RGB2 and Component inputs only Colour Mode Press and to select Colour Mode Press and to select from Global Temperature User Peak Colour Temperature...

Страница 72: ...ection before making any settings in the Colour menus Trim Press and to select Trim Press to open the Trim submenu Trim RGB Lift and Gain Press and to select the parameter to be adjusted Press and to...

Страница 73: ...or Notes When using the menus press OSD or to hide or reveal the On Screen Display Setup Menu Setup menu To return to the main menu press up to three times From the main menu Press and until Setup is...

Страница 74: ...enu Orientation Press and to select Orientation Press and to select from Desktop Front Desktop Rear Ceiling Front Ceiling Rear Control Panel Backlight Press and to select Backlight Press and to select...

Страница 75: ...e Press and to adjust the slider 128 to 127 Test Pattern Press and to select Test Pattern Press to open the Test Pattern submenu Press and to select from Off Alignment Grid Screen Layout shows outline...

Страница 76: ...ck on the projector or venue a set of Global colour settings can be made in the Global Colourimetry menu These settings are then available to be copied at any time using the Colour Mode setting in the...

Страница 77: ...ted The RGB Lift and Gain sliders are available only if User Mode is selected Colour Mode Press and to select Colour Mode Press and to select from Temperature User Peak Colour Temperature Press and to...

Страница 78: ...G 500 User Manual Lamp Press and to select Lamp Press to open the Lamp submenu The middle row shows the current lamp setting Change Lamp Setting Press and to select Change Lamp Setting Press to open t...

Страница 79: ...from 80 to 100 in 1 steps Lamp Mode Press and to select Lamp Mode Press and to select from single lamp modes Lamp 1 lamp 1 only Lamp 2 lamp 2 only Alternate on power up selects the lamp with the leas...

Страница 80: ...in the menus will reopen at the same point they were last viewed On Screen Display Press and to select On Screen Display Press to open the On Screen Display submenu OSD Position Press and to select OS...

Страница 81: ...uthorised service personel only Press and to select Password Press to open the Password control box Press and to select each digit in turn Press and to adjust the digit from 0 to 9 then move to the ne...

Страница 82: ...ation Press and to select Comunication Press to open the Comunication submenu Projector Address The projector and the remote control need to be set to matching addresses Read the note to the right on...

Страница 83: ...continued Network Press and to select Network Press to open the Network submenu LAN MAC Address Projector s unique ID for information only cannot be changed Connection Press and to select Connection P...

Страница 84: ...continued DHCP Press and to select DHCP Press to open the DHCP control box Press and to select from On Off Press to apply the new DHCP setting LAN IP Address Press and to select LAN IP Address Press t...

Страница 85: ...5 255 255 248 255 255 255 240 255 255 255 224 255 255 255 192 255 255 255 128 255 255 255 0 selected when setting is Automatic and IP class is C Class B Masks 255 255 254 0 255 255 252 0 255 255 248 0...

Страница 86: ...rol box Use and to select each number in turn Use and to adjust the number then move to the next number Use and to select from Apply Cancel Press to apply the new LAN Gateway Mask or to exit without m...

Страница 87: ...ontrol box Press and to select the channel number Use and to adjust the channel number from 0 to 14 Use and to select from Apply Press to apply the new Channel number or Cancel Press or to exit withou...

Страница 88: ...mode This process will take up to 10 seconds During this time the projector will not respond to any commands When complete all settings will be restored to factory condition and all user settings will...

Страница 89: ...u press up to three times From the main menu Press and until Information is highlighted Press to open the Information menu The blue highlight moves to the first item in the menu Projector Information...

Страница 90: ...AN XG 500 User Manual Digital Projection Information Press and to select Digital Projection Press to see the DP Information screen Information menu continued Notes When using the menus press OSD or to...

Страница 91: ...Rev C March 2008 Page 5 1 5 Userware Contents...

Страница 92: ...Page 5 2 Rev C March 2008 5 Userware Digital Projection TITAN XG 500 User Manual...

Страница 93: ...Rev C March 2008 Page 6 1 6 Maintenance Contents Changing the lamp module 6 2 Changing the air filter 6 3 Cleaning 6 4 Projector 6 4 Lens 6 4 Lamp module 6 4...

Страница 94: ...d and tighten the four screws Notes Always allow the lamp to cool for 5 minutes before disconnecting the power moving the projector changing the lamp There are no user serviceable parts inside the lam...

Страница 95: ...t trapped and tighten the three screws Notes Always allow the lamp to cool for 5 minutes before disconnecting the power moving the projector changing the lamp The air filter should be changed regularl...

Страница 96: ...nd lens NEVER touch the lamp or reflector Cleaning Turn the projector off before cleaning Projector Clean the cabinet periodically with a damp cloth If heavily soiled use a mild detergent Lens Use a b...

Страница 97: ...this projector 7 12 5 Composite video input 7 12 6 S Video input 7 12 7 Component video input 7 12 Control connections 7 13 LAN connection 7 13 Crossed cable 7 13 Serial control input 7 14 Null modem...

Страница 98: ...hat the input source is switched on and connected to the projector correctly Check that the correct image source is selected See section 4 Controlling the projector Using the control keys and Input me...

Страница 99: ...tal Projection Projector does not respond to control commands from the remote control If you are using a cable check that the cable is connected properly at both ends that the cable is not damaged and...

Страница 100: ...amp module 001 742 Air filter 102 064 Lenses 0 8 1 fixed lens 001 734 1 2 1 fixed lens 001 735 1 5 1 8 1 zoom lens 001 736 1 8 2 25 1 zoom lens 001 737 2 25 3 0 1 zoom lens 001 738 3 0 4 5 1 zoom lens...

Страница 101: ...ontrol Mains voltage 100 240 VAC 10 48 62Hz single phase Power consumption 750 W International Regulations Meets FCC Class A requirements Meets EMC Directives EN 50081 1 EN 50082 1 EN 55022 MeetsLow V...

Страница 102: ...nfirmed 26 36mm 1 04in 26 36mm 1 04in Effective focal length to be confirmed to be confirmed 21 2 25 8mm 0 83 1 02in 25 5 32 mm 1 0 1 26in Distortion 0 3 0 3 0 5 0 5 Transmission 85 85 85 85 Mechanica...

Страница 103: ...t field size 26 36mm 1 04in 26 36mm 1 04in 26 36mm 1 04in Effective focal length to be confirmed to be confirmed 62 1 97 8mm 2 44 3 85in Distortion 0 5 0 5 0 5 Transmission 85 85 85 Mechanical Lens ex...

Страница 104: ...Page 7 8 Rev C March 2008 7 Appendix Digital Projection TITAN XG 500 User Manual Dimensions All dimensions in mm unless otherwise stated...

Страница 105: ...25 33 75 9 1080p30 1920 x 1080 30 1125 33 75 9 1080p50 1920 x 1080 50 1125 56 24 9 9 1080p60 1920 x 1080 60 1125 67 48 9 9 COMPUTER 480p 640 x 480 60 525 31 51 9 9 VGA72 640 x 480 72 520 37 86 9 9 VGA...

Страница 106: ...mputer progressive video and analog HD video RGsB RGBS RGBHV YCrCb R R R Pr Cr G Sync G G Y B B B Pb Cb Sync H Sync V Sync 2 RGB2 input 15 way D type connector 1 R 2 G 3 B 4 unused 5 Digital Ground H...

Страница 107: ...19 TMDS Data 0 20 TMDS Data 0 Shield 21 unused 22 unused 23 TMDS Clock Shield 24 TMDS Clock Hot plug detect HPD is fully DVI compliant DVI sources detect the presence of a display device by providing...

Страница 108: ...omposite video input 1 x 75 ohm BNC PAL or NTSC video 6 S Video input 4 pin mini DIN 1 L Ground 2 C Ground 3 Lumunance Y 4 Chrominance C 7 Component video input 4 x 75 ohm BNC Used for standard defini...

Страница 109: ...to a computer with no hub or network Note that only the green and orange pairs are crossed 1 White Orange stripe White Green stripe 1 2 Orange Green 2 3 White Green stripe White Orange stripe 3 4 Blu...

Страница 110: ...unused 9 unused Null modem cable used to connect the projector to a computer RX 2 3 TX TX 3 2 RX GND 5 5 GND Serial port settings Baud rate 19 200 bps Data length 8 bits Stop bits one Parity none Flow...

Страница 111: ...data type for all data is raw hexadecimal and all data larger than 1 byte is formatted little endian i e LSB first There are currently two supported message types Operation Messages message type 03h...

Страница 112: ...h byte 4 19h and byte 5 00h i e 25 bytes after CRC CRC can be set to 5858h if you want the CRC to be ignored However the CRC should ideally be calculated as described in the Titan Projector Series Ext...

Страница 113: ...ed messages are constructed using the following format Header Type Size CRC Data type Data length n 2 bytes 1 byte 2 bytes 2 bytes 2 bytes 2 bytes Data BE EF 10 XX XX 58 58 00 00 00 00 Byte 1 2 3 4 5...

Страница 114: ...Projector Standby BEEF 03 1900 5858 01 0102 0000 00000000 04000000 00000000 00000000 00000000 Response 1E BEEF 03 1900 5858 01 0102 0000 00000000 04000000 00000000 00000000 00000000 Get Projector Powe...

Страница 115: ...01 3702 0000 00000000 05000000 00000000 00000000 00000000 Response 1E BEEF 03 1900 5858 01 3702 0000 00000000 05000000 00000000 00000000 00000000 Get Source BEEF 03 1900 5858 02 3702 0000 00000000 00...

Страница 116: ...00000 E1000000 00000000 00000000 00000000 Increment Brightness BEEF 03 1900 5858 03 E502 0000 00000000 00000000 00000000 00000000 00000000 Response 1E BEEF 03 1900 5858 03 E502 0000 00000000 00000000...

Страница 117: ...000 E1000000 00000000 00000000 00000000 Increment Contrast BEEF 03 1900 5858 03 E602 0000 00000000 00000000 00000000 00000000 00000000 Response 1E BEEF 03 1900 5858 03 E602 0000 00000000 00000000 0000...

Страница 118: ...3 1900 5858 01 CF02 0000 01000000 00000000 00000000 00000000 00000000 Caution The Set and Get parameters are different Get Shutter BEEF 03 1900 5858 02 CF02 0000 00000000 00000000 00000000 00000000 00...

Страница 119: ...eld test pattern BE EF 03 19 00 58 58 01 7D 02 00 00 00 00 00 00 07 00 00 00 00 00 00 00 00 00 00 00 00 00 00 00 Select 80 fi eld test pattern BE EF 03 19 00 58 58 01 7D 02 00 00 00 00 00 00 08 00 00...

Страница 120: ...Digital Projection TITAN XG 500 User Manual...

Отзывы: