background image

9

NOTE

: It is assumed that you have already installed the bundled software into your

computer. If not, install software as instructed in the section on “Utility Software
Installation” of this manual.

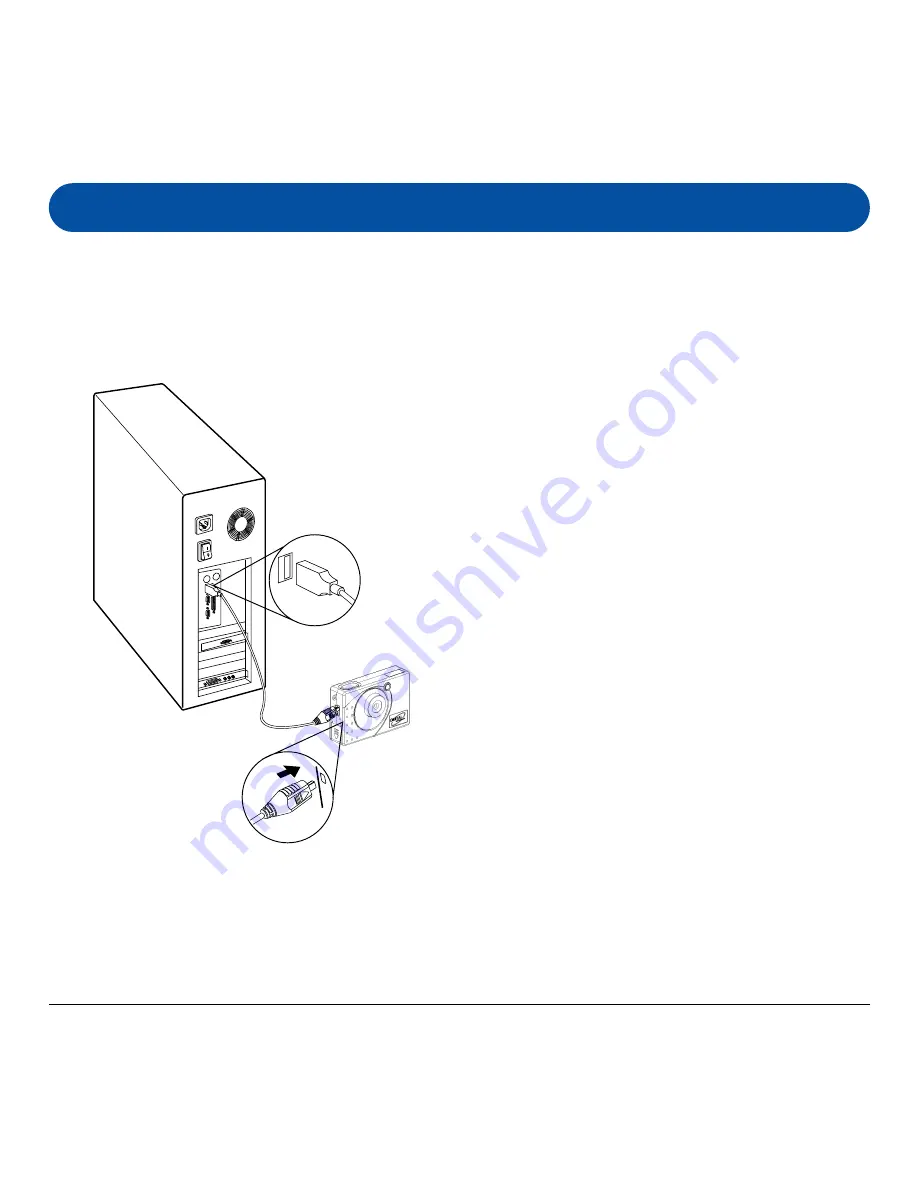
Connecting the Camera to PC

To transfer (download) the images data
from the camera to your PC, connect the
camera to your PC with the supplied USB
cable.

1

Insert the smaller terminal of the
USB cable into the camera's USB
port.

2

Plug the other end of the USB
cable into the USB port of your
computer.

3

Perform downloads to your
computer by referring to the
section on 

“Downloading images”

later in this manual.

4

Operate the camera as 

web

camera

 by referring to the EyeStar

Mail section later in this manual.

Содержание L'espion Xtra

Страница 1: ...User Manual ...

Страница 2: ...rosoft corporation Adobe Acrobat and Photoshop are registered trademarks of Adobe Systems Incorporated Ulead PhotoExpress is a registered trademark of Ulead Systems Inc Important Important Important Important Important Pictures you may acquire from any of the bundled software and or Pictures or Documents you scan may be protected under copyright law The unauthorized use of such materials could be ...

Страница 3: ...Software Installation Utility Software Installation Utility Software Installation Utility Software Installation 13 14 13 14 13 14 13 14 13 14 A Installing Digital Camera Driver 13 B Installing other Bundled Software 14 Using the l espion Xtra as a Digital Camera Using the l espion Xtra as a Digital Camera Using the l espion Xtra as a Digital Camera Using the l espion Xtra as a Digital Camera Using...

Страница 4: ...ital camera Special USB cable l espion Xtra Quick Reference and other inserts Digital Camera CD ROM Contains digital camera software and user s manuals Camera Safety Strap Package Contents AAA Battery Alkaline recommended ...

Страница 5: ...re Instant image frames erasure Instant image frames erasure All images can be cleared instantly to start a new picture taking session Low power consumption with auto energy save mode Low power consumption with auto energy save mode Low power consumption with auto energy save mode Low power consumption with auto energy save mode Low power consumption with auto energy save mode Camera automatically...

Страница 6: ...3 Camera Components ModeButton Select Button LCD Display Panel Key Ring Hole View Finder LENS Shutter USB Port Battery Cover ...

Страница 7: ...m the rail 2 Insert a battery into its chamber making sure that the positive and negative ends is properly oriented with the polarity indicated on chamber 3 Close and slide the battery compartment cover back to its original position WARNING When the LCD Panel displays it indicates that the battery power is low Icon will keep blinking for 5 seconds then power off automatically ...

Страница 8: ... Power Off Press the button twice and then press the shutter button 1 Default Still Mode The LCD panel will display this picture when you first time turn the camera on 1 Press the mode button to cycle through the options 2 Press the select button to select the required mode 3 Press the shutter button to use the selected mode ...

Страница 9: ... then the button to select the image quality Good image quality Normal image quality 4 Quality 3 Resolution Press the M M M M M button twice and then press the button to select High or Low resolution High resolution 800 x 600 image size Low resolution 400 x 300 image size High resolution 800 x 600 pixels Good Quality image Battery Power Counter will show the number of remaining shots available ...

Страница 10: ...ording 7 USB 8 Battery Full power Low Power Press the M M M M M button 4 times to select or press the M M M M M button 5 times to select Press the button to select and then press the shutter button to delete one or all the images Plug The USB cable into the PC USB port for image transfer Please turn the camera on before plugging the USB cable in to PC ...

Страница 11: ...ty Still mode 169 pic Video mode 21 sec recording frame rate 15 sec High resolution normal quality Still mode 200 pic Video mode 29 sec recording frame rate 15 sec Low resolution high quality Still mode 217 pic Video mode 17 sec recording frame rate 30 sec Low resolution normal quality Still mode 492 pic Video mode 26 sec recording frame rate 30 sec The photo number above is based on a test standa...

Страница 12: ...images data from the camera to your PC connect the camera to your PC with the supplied USB cable 1 Insert the smaller terminal of the USB cable into the camera s USB port 2 Plug the other end of the USB cable into the USB port of your computer 3 Perform downloads to your computer by referring to the section on Downloading images later in this manual 4 Operate the camera as web camera by referring ...

Страница 13: ...s select the language you wish to use then select and click Camera Driver Camera Driver Camera Driver Camera Driver Camera Driver on the screen Follow the on line instructions to complete the driver intallation NOTE You may be prompted to restart the computer at this point Do not restart your computer until all the software has been installed 3 Install all the other software as set on the next pag...

Страница 14: ...screen follow the on line instructions to complete the installation of all software components Ulead Photo Express Ulead Photo Express Ulead Photo Express Ulead Photo Express Ulead Photo Express This is your Image editing software for creating digital photo albums cards etc EyeStar Mail EyeStar Mail EyeStar Mail EyeStar Mail EyeStar Mail This is your PC and or Web Camera software 2 A desktop short...

Страница 15: ...when you start downloading images from your digital camera to any of your image editing software Acquire All Click the Acquire All Acquire All Acquire All Acquire All Acquire All button to send and process all the thumbnail images on the panel to a selected application Download Click the Download Download Download Download Download button to transfer and or download another set of images from your...

Страница 16: ...alog box will appear choose Digital Digital Digital Digital Digital Camera Camera Camera Camera Camera from the list and then click the Acquire Acquire Acquire Acquire Acquire button 4 The Xtra Digital Camera interface appears Double click the image s you wish to transfer to Photo Express from the panel 5 Click Exit Exit Exit Exit Exit when you are ready to return to Photo Express to further enhan...

Страница 17: ...l follow the steps as described on the next page NOTE The EyeStar Mail EyeStar Mail EyeStar Mail EyeStar Mail EyeStar Mail is required only when the camera is used as a PC camera The EyeStar Mail EyeStar Mail EyeStar Mail EyeStar Mail EyeStar Mail is a complete consumer video package for recording audio and video clips that you can send to your family and friends This package includes all the soft...

Страница 18: ...2 Click Record Record Record Record Record to start capturing video and audio data 3 Click Stop Stop Stop Stop Stop to end recording 4 Click Send Mail Send Mail Send Mail Send Mail Send Mail to run the Send Mail program with the captured data in order to automatically attach the video image to your E mail message 2 4 3 ...

Отзывы: