


Expanded Systems Guide
14
Magma 7-Slot Expansion
Chassis
Slot Layout for Magma 7-Slot
Expansion Chassis
Magma models P7R-D1 and P7RQ-D1 have slots
that are numbered sequentially, right-to-left
from the front (4–10).
The 64-bit, 33 mHz Magma 7-Slot Expansion
Chassis model PCI7R464 has slots that are num-
bered sequentially, right-to-left from the front
(1–7).
Configuring the Magma 7-Slot
Expansion Chassis
Connecting the Expansion Chassis
Install the chassis host card:
1
Turn off the expansion chassis, your com-
puter, and any peripherals. Leave your com-
puter’s power cable plugged in so the computer
is grounded.
2
Open the computer case. For additional de-
tails on installing a card in your computer, refer
to its documentation.
3
Install the Magma Host Card in the lowest
numbered slot in your computer. On a Windows
PC (such as an HP Workstation xw8000 or Dell
Precision Workstation 650), this will be the slot
furthest from the graphics card. On a Macin-
tosh, this will be the slot closest to the graphics
card.
4
Attach a 2- or 4-foot expansion chassis cable
to the host card. If necessary, refer to the Magma
guide for specific instructions.
5
If using a SCSI HBA, install it in the highest
numbered remaining slot in your computer.
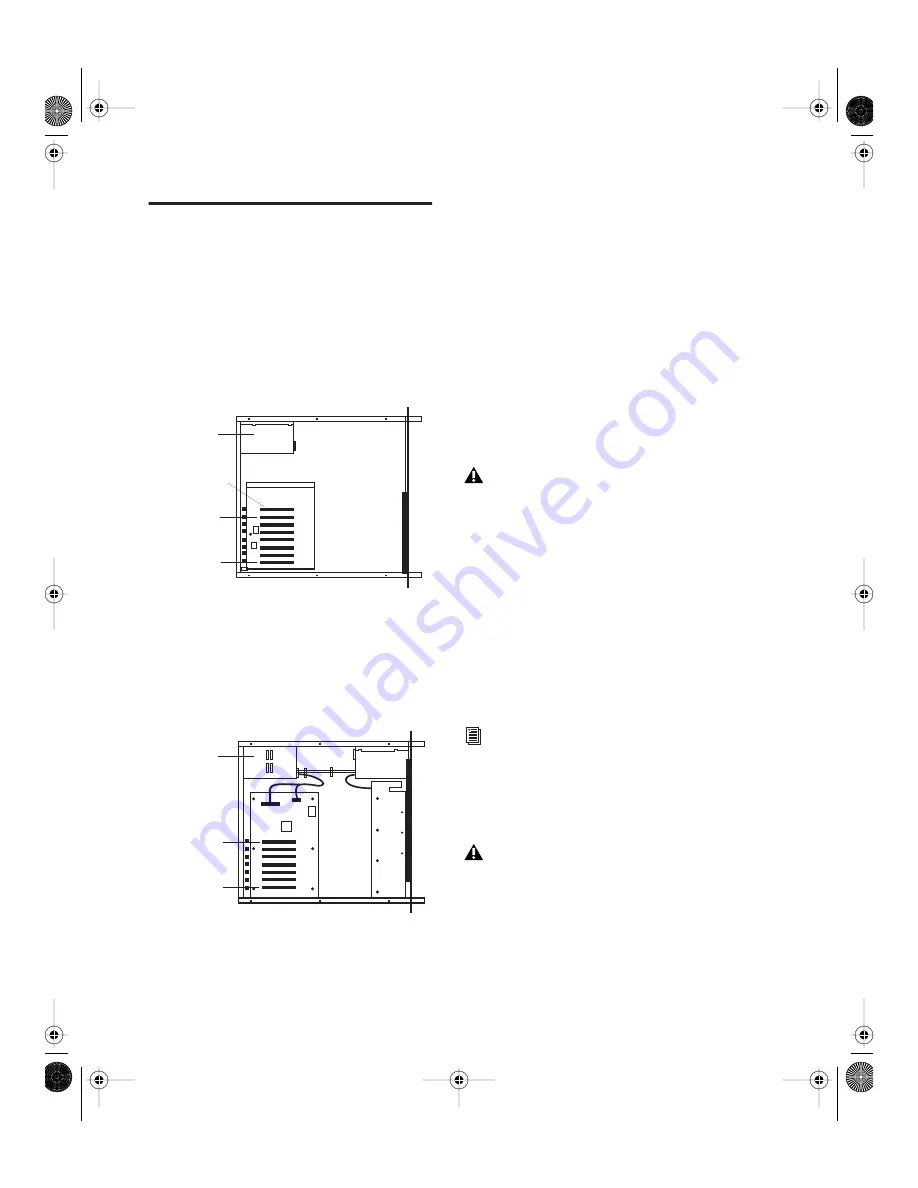
Slot numbering for Magma model PCI-7R
Slot numbering for Magma model PCI7R464
Slot 4
Expansion
Controller
Slot 10
Power
Supply
Slot 1
Slot 7
Power
Supply
Before removing cards from their antistatic
bags or handling any card, discharge any
static electricity that may be on your clothes
or body by touching a grounded metal sur-
face (such as the power supply case inside
your computer).
Refer to your computer’s documentation to
verify slot order.
6-foot expansion chassis cables are not sup-
ported.
Expanded Systems Guide.book Page 14 Friday, March 26, 2004 6:47 AM


