


FWx Record/Playback Option Card
8
12
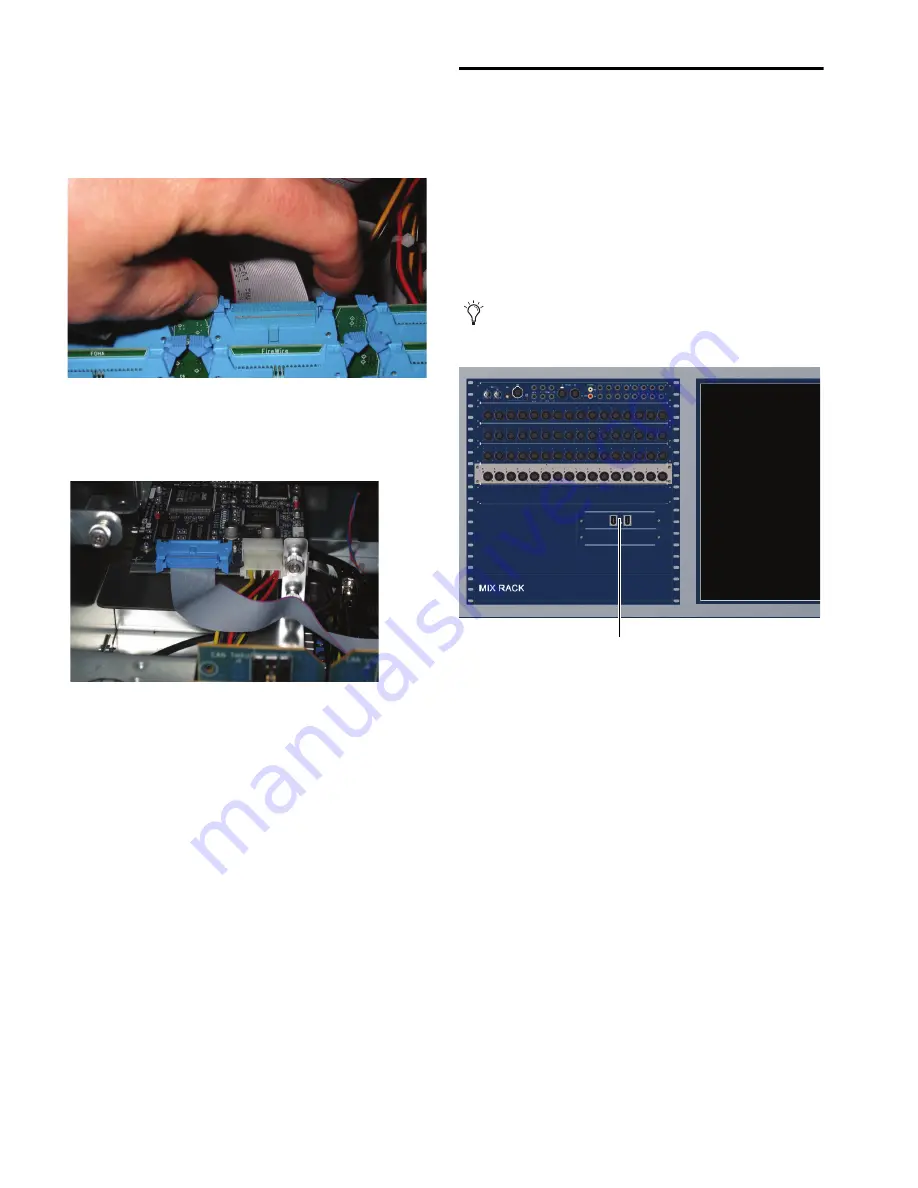
Attach the included ribbon cable to the ribbon connector
socket labelled “FireWire” on the first Mix Engine card (the
rear most card when viewed from the open front panel). Make
sure that the ribbon cable connector’s notch is facing you
when attaching the cable.
13
Attach the other end of the ribbon cable to the ribbon con-
nector socket on the FWx card. Make sure that the ribbon ca-
ble’s notch is facing upwards when attaching the cable.
14
Reattach the Mix Rack faceplate using its screws.
15
Reconnect power, audio, FOH Link, and any other cables
to the FOH Rack.
16
Power on all system components. Proceed to “Confirming
Mix Rack FWx Card Installation” on page 8.
Confirming Mix Rack FWx Card
Installation
After you have installed the FWx card in your Mix Rack, you
can confirm that you have installed it properly.
To confirm FWx card installation, do the following:
1
In D-Show, go to the Options > Devices page.
2
Confirm the FWx card’s presence in your Mix Rack. When
successfully installed, the FWx card is detected and shown
on-screen in the Mix Rack graphic.
Attaching ribbon cable connector to rear most Mix Engine card
A correctly attached ribbon cable and power cable
If the FWx card graphic is not displayed, power down the
system and check all cables and connections.
Detail of Devices tab indicating presence of an FWx card in the
expansion card slot
FWx
Содержание FWx FireWire Record/Playback Option Card
Страница 4: ...FWx Record Playback Option Card iv ...
Страница 14: ...FWx Record Playback Option Card 10 ...
Страница 18: ...FWx Record Playback Option Card 14 ...


