background image

1-5

D-TuBe

1.4 Console Software Configuration

The console Sockets File must now be adjusted to reflect the changes in your rack.
Preconfigured Sockets Files are available for the D5-56EX and D5-112EX at
www.digiconsoles.com in the Support / Technical Notes section.

1)

 Download the relevant file and using Windows Explorer, copy it to the console via a

USB key. It should be put into the C:\D5 directory.

2)

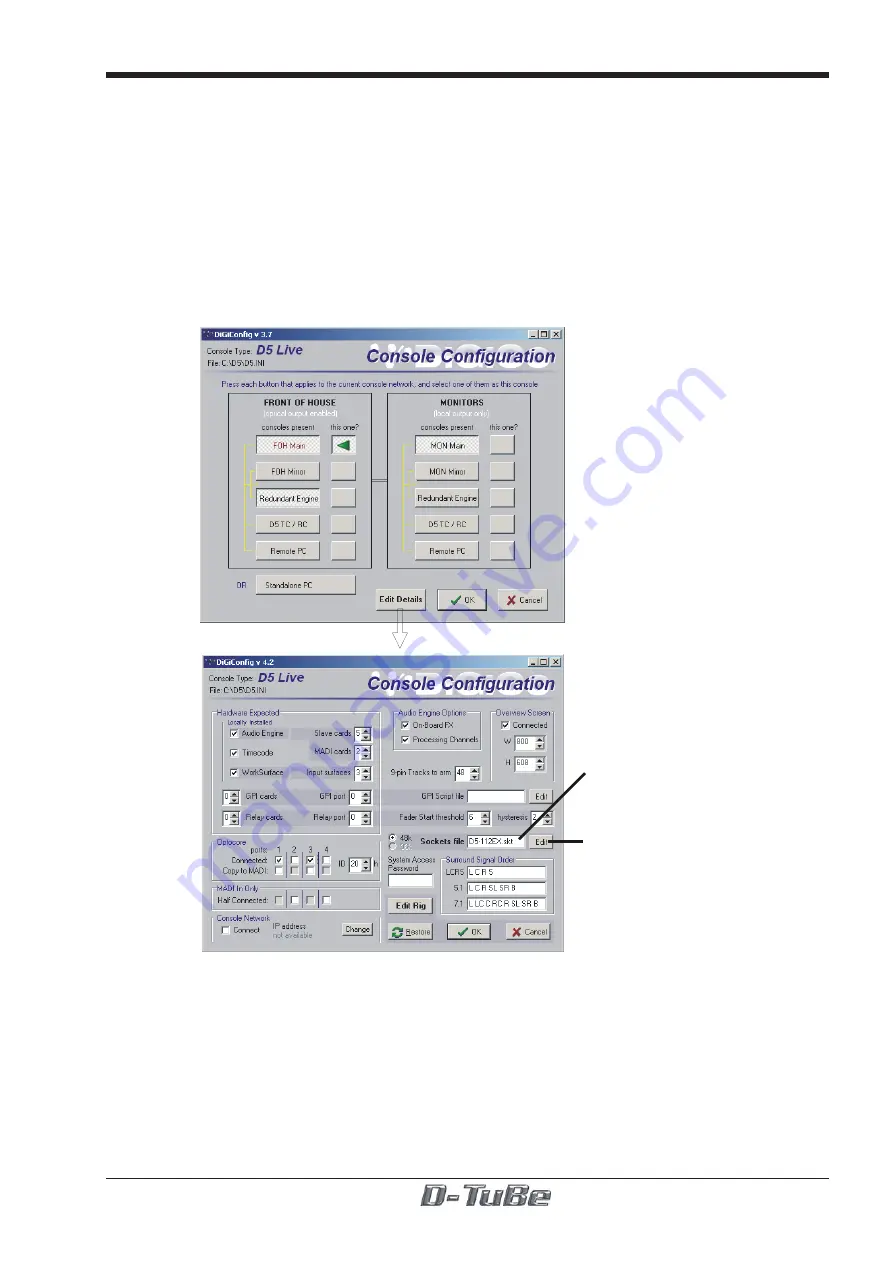
 Open the DiGiConfig program by pressing the System/Service/Configure Hardware

button and then click on the Edit Details button with the mouse (the touch screen does not
work in this program).

Click here to select a

 new sockets file

Click here to edit the 

existing sockets file

3)

 If you have downloaded a standard D-TuBe sockets file then click in the white box next

to the words "Sockets File", select the new file from the list provided and then click OPEN
to return to DiGiConfig.

4)

 Click OK to return to the console application.

NOTE: If your rack configurations are non-standard it is advisable to contact your
local distributor or DiGiCo Technical Support for assistance.
The following explanation assumes prior knowledge of the structure of a DiGiCo
sockets file.

Содержание D-TuBe

Страница 1: ...1 1 D TuBe D TuBe 8 Channel Valve Mic Input Card ...

Страница 2: ...gico UK Ltd or its authorised agents Digico UK Ltd cannot accept any liability whatsoever for any loss or damage caused by service maintenance or repair by unauthorised personnel Software License Notice Your license agreement with Digico UK Ltd which is included with the product speci fies the permitted and prohibited uses of the product Any unauthorised duplication or use of DiGiCo software in wh...

Страница 3: ...Operation Operation of the D TuBe is exactly the same as a standard Mic Input card When a D TuBe input is selected as a source for an input channel analogue gain and digital trim controls will be shown at the top of the input channels The analogue gain control is pre valve and can therefore be used to drive the valve The digital trim control is post valve and can therefore be used to adjust the re...

Страница 4: ...nk panel and inserting the card 4 Install the D TuBe card into the space left in slots 7 and 8 5 Switch the rack power on and default the rack by pressing both of the DATA buttons at the same time to enable paging mode Then scroll up with the PAGE buttons until you see the message DEFAULT in the display Press the DATA UP button and you will see the message SURE in the display Press the DATA UP but...

Страница 5: ...utton and then click on the Edit Details button with the mouse the touch screen does not work in this program Click here to select a new sockets file Click here to edit the existing sockets file 3 If you have downloaded a standard D TuBe sockets file then click in the white box next to the words Sockets File select the new file from the list provided and then click OPEN to return to DiGiConfig 4 C...

Страница 6: ...7 MIC MADI 1 8 ANALOG Should be changed to MADI 1 1 MIC MADI 1 2 MIC MADI 1 3 MIC MADI 1 4 MIC MADI 1 5 MIC MADI 1 6 MIC MADI 1 7 MIC This is the D TuBe MADI 1 9 ANALOG This is the output card that was moved Standard Socket descriptions For Input Slot 7 Stg 49 56 INPUT GROUP Stg 49 1 7 1 MIC Stg 50 1 7 2 MIC Stg 51 1 7 3 MIC Stg 52 1 7 4 MIC Stg 53 1 7 5 MIC Stg 54 1 7 6 MIC Stg 55 1 7 7 MIC Stg 5...

Отзывы: