


© 2012 JSB TECH Pte Ltd. All rights reserved.
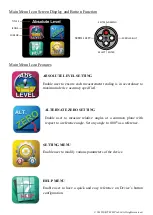
Main Menu Icon Screen Display and Button Function
Main Menu Icon Features
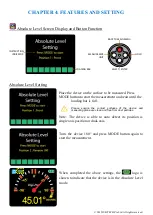
ABSOLUTE LEVEL SETTING
Enable user to ensure each measurement reading is in accordance to
maximum device accuracy specified.
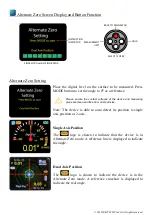
ALTERNATE ZERO SETTING
Enable user to measure relative angles at a common plane with
respect to a reference angle. Set any angle to 0.00
⁰
as a reference.
SETTING MENU
Enable user to modify various parameters of the device.
HELP MENU
Enable user to have a quick and easy reference on Device’s button
configuration.
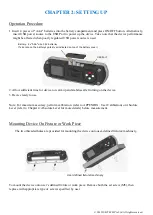
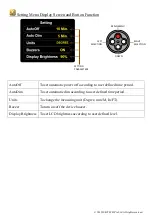
TITLES
CURSOR
ICONS
EXIT MAIN MENU
SCROLL RIGHT
SELECT / ENTER
SCROLL LEFT


