background image


Manual DHMI 10.1 

DH electronics  GmbH 


R01 

USM_DHMI 10.1 

Page 29/ 31 


6.4.2


Update process  

The following is a brief description  of the update process with all the necessary steps. 


1.


Have a FAT32 formatted USB stick with at least 1GB storage capacity ready. 

2.


Unpack the contents  of the update archive  to the root directory  of the  USB stick. 

3.


Disconnect  the power supply. 

4.


Plug the USB stick into the USB socket of the device. 

5.


Connect  the power supply. 

6.


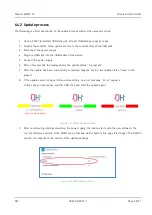
After a few seconds  the display shows  the update status  "in progress". 

7.


After the update has been successfully  completed  (approx. 2 min.),  the  update  status  "done" is dis-

played. 

8.


If the update could not be performed successfully,  an error message  "error" appears.  

In this case you should use another USB stick and start the update again. 


Figure 19- DHMI Update Status


9.


After reconnecting  and disconnecting  the power supply,  the device starts with the new software. The 

current software versions of the DHMI can be checked via the System Info page (start page). The RootFS 

version corresponds to the version of the update package. 


Figure 20- DHMI Update RootFS


Содержание DHMI 10.1

Страница 1: ...DHMI 10 1 Manual Your Digital Heroes ...

Страница 2: ...nics GmbH R01 USM_DHMI 10 1 Page 2 31 History Revision Date Description or changes Name R01 31 03 2021 Draft MAD R01 05 07 2021 Final version incl additional information on the power supply unit used MAD R01 05 07 2021 Release SG ...

Страница 3: ...s as Digital Heroes who work with you to find an individual solution to your problem and this product is no exception Thank you for choosing us and thus a product that contains innovative solutions down to the smallest detail To ensure that you can use our product permanently and without errors please read this manual carefully and keep it for future reference However if you ever have a problem pl...

Страница 4: ...hnical data 10 3 Safety instructions 12 3 1 Graphical symbols for safety related information 12 3 2 Activities according to user groups 12 3 3 Intended use 12 3 4 User group 13 3 5 Hazards 13 3 6 Special precautions 13 4 Preparing the product for use 13 4 1 Transport and storage 13 4 2 Disposal of goods and packaging material 13 4 3 Preparation before installation 14 4 4 Commissioning 15 5 Operati...

Страница 5: ...ration 19 6 1 3 Debugging 19 6 2 Configuration web server 21 6 2 1 Access 21 6 2 2 Login 21 6 2 3 Navigation bar 22 6 2 4 System info 22 6 2 5 Change password 23 6 2 6 Date Time 23 6 2 7 Network settings 24 6 2 8 Web browser settings 25 6 2 8 1 Appearance 25 6 2 8 2 Advanced 25 6 2 9 Security 26 6 2 10 Debug 27 6 2 11 Backup Restore 27 6 2 11 1 Config backup 27 6 2 11 2 Config Restore 27 6 2 11 3 ...

Страница 6: ...H R01 USM_DHMI 10 1 Page 6 31 6 4 1 Update archive 28 6 4 2 Update process 29 6 4 3 Adoption of system settings during an update 30 7 Maintenance 30 8 Decommissioning dismantling disposal 30 9 Ordering information 31 10 Customization 31 ...

Страница 7: ...d software can be found at www dh electronics com Product name DHMI 10 1 Product revision R01 Product variant DH Standard Manufacturer DH electronics GmbH 1 2 Scope of delivery The following list provides an overview of the components included in the scope of delivery Manual DHMI 10 1 1 3 Manufacturer and customer service address We make every effort to provide you with all the necessary informati...

Страница 8: ... of computer module and interfaces yourself during customized development Everything from one source DH electronics is characterized by combined know how in the fields of software and hardware Our experi ence in both areas enables us to develop completely thought out high performance complete devices which we realize completely ourselves from the idea to the implementation As our customer you will...

Страница 9: ...Manual DHMI 10 1 DH electronics GmbH R01 USM_DHMI 10 1 Page 9 31 2 1 Overview Figure 1 Front DHMI 10 1 Figure 2 Rear DHMI 10 1 ...

Страница 10: ...ckets corresponds to the Ethernet standard The assignment of the USB sockets corresponds to the USB 2 0 standard 2 3 Technical data The following table gives an overview of the technical data of the Touch Panel Computer CPU DETAILS CPU Name NXP i MX6 Solo standard version other CPUs are also possible CPU Type ARM Cortex A9 CPU Clock Up to 800 MHz MEMORY DDR3 RAM 1024 MB eMMC Flash 4 GB E2Prom 128 ...

Страница 11: ...6 Solo 2D 3D Acceleration Yes Yes Display diagonal 10 1 inch Resolution 1280 x 800 RGB Color depth 16 7M MTBF Min 20 000 hrs LED life time After 20 000 hrs 50 of original brightness Resistive touch 10 finger multi touch OPERATING SYSTEMS Supported BSPs Linux Yocto or Debian based Android 5 0 or newer Windows on request Setup and Configuration Get our free web browser to configure the DHMI or to di...

Страница 12: ...ty Layman Trained professionals Employee technical sales Unpacking and setting up X Connecting and commissioning X Operation X Disturbance treatment X Maintenance X Disassembly X Disposal X 3 3 Intended use The DHMI 10 1 Touch Panel Computer is a Human Machine Interface specially designed for use in industrial en vironments The device may only be used in indoor applications Any other use is not in...

Страница 13: ... as quickly as possible and if necessary contact a member of the technical sales staff 4 Prepare use of the product The following paragraph describes the correct procedure before the actual use of the product 4 1 Transport and storage All DH electronics products are delivered in professional packaging In any case the products are protected against shocks if necessary special ESD packaging is used ...

Страница 14: ...of electric shock if live parts are touched Make sure that the device is disconnected from the power supply Do not supply the device via an AC mains supply The device must be grounded before use Do not drop the device Make sure that the ventilation slots of the housing are not covered and observe the mounting instructions below The device must not be operated in a flammable or explosive environmen...

Страница 15: ...supply voltage The device boots automatically 5 Operation Observe the safety instructions from chapter 3 and the start up instructions from 4 4 To ensure safe operation the device may only be operated by trained personnel according to 3 2 5 1 Interfaces The device has various interfaces which are listed and briefly explained below It should be mentioned here that the picoITX baseboard and a comput...

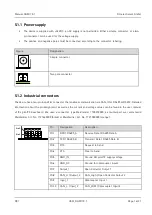
Страница 16: ...nformation about the pin assignment as well as the current and voltage values can be found in the user manual of the picoITX baseboard We used a connector type Weidmüller 1728010000 as counterpart we recommend Weidmüller Art No 1727660000 black or Weidmüller Art No 1727580000 orange Pin Designation Description Pin1 RXD RS485_A Receive Data RS485 Data A Pin2 TXD RS485_B Transmit Data RS485 Data B P...

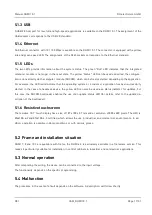
Страница 17: ...cessfully started In the case of a headless device the yellow LED can also be used as a status indicator for updates For this case the DHCOM bootloader enables the use of an update status LED for details refer to the update de scription of the bootloader 5 1 6 Resistive touchscreen The resistive 10 1 touch display has a size of 187 x 100 x 37 mm and a resolution of 800 x 480 pixels The HMI is EN61...

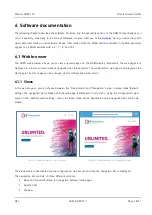
Страница 18: ...screen mode without navigation bar kiosk mode The configuration web page is displayed as the start page The start page can be changed via the configuration web server 6 1 1 Views In the web browser you can choose between the Kiosk mode and Navigation views In kiosk mode default setting the navigation bar is hidden and the web page is displayed in full screen Using the configuration web server in t...

Страница 19: ...gestures are available for this Single click Action is executed e g press button Drag Scroll Navigation to website elements outside the current display image Press and hold Opens the context menu so that you can navigate between individual pages or reload a page even in kiosk mode without a navigation bar The web browser has a virtual keyboard which is automatically displayed as soon as an input c...

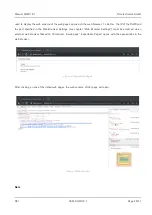
Страница 20: ...e DHMI and the port specified in the Web Browser Settings see chapter Web Browser Settings must be accessed via an external web browser based on Chromium A web page Inspectable Pages opens with the opened tabs in the web browser Figure 6 Inspectable Pages After clicking on one of the listed web pages the web console of that page will open Figure 7 Web console Note ...

Страница 21: ...DHMI the web browser will display the configuration web server by default If the web browser is not running in kiosk mode see chapter 6 2 8 1 the configuration web server can be reached by entering dhmi in the address bar locally on the device Figure 8 Calling theconfiguration web server Alternatively the configuration web server can also be reached from another device Access via IP address obtain...

Страница 22: ...he navigation bar is used to navigate in the menu items of the configuration web server Some menu items have further submenus which are displayed by clicking on the menu item Figure 11 Navigation bar 6 2 4 System Info Software versions and hardware details are displayed under System Info The RootFS version corresponds to the version of the DHMI update package The web browser version web engine is ...

Страница 23: ...Password tab The default data are Username admin Password admin Figure 13 Change Password 6 2 6 DateTime The date and time can be set or changed under the Date Time tab The time and date are also stored in the RTC so that they are retained even after a power failure Alternatively NTP can be activated and the current time can be synchronized with an NTP server ...

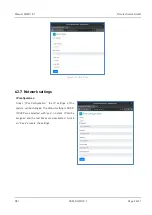
Страница 24: ...Date Time 6 2 7 Network settings IP configuration Under IPv4 Configuration the IP settings of the system can be changed The default setting is DHCP If DHCP was selected with yes no static IP can be assigned and the text boxes are deactivated A click on Save accepts the settings ...

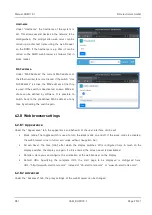
Страница 25: ...dress at any time by activating the switch again 6 2 8 Web browser settings 6 2 8 1 Appearance Under the Appearance tab the appearance and behavior of the user interface can be set Kiosk mode The toggle switch is used to turn the kiosk mode on and off If the kiosk mode is activated the web browser runs in full screen mode without navigation bar Screen Saver The time min after which the display swi...

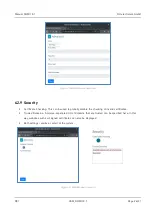
Страница 26: ...e Checking This can be used to globally disable the checking of invalid certificates Trusted Domains A comma separated list of domains that are trusted can be specified here In this way websites with self signed certificates can also be displayed Both settings require a restart of the system Figure 16 Web Browser Security ...

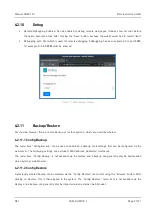
Страница 27: ...up or restore options which are described below 6 2 11 1 Config Backup The menu item Config Backup can be used to download a backup of all settings that can be configured via the web server The following settings are excluded MAC address password hostname The menu item Config Backup is not available via the display and a backup can generally only be downloaded via an external web browser 6 2 11 2 ...

Страница 28: ...rnal web browser Figure 18 Web browser backup 6 3 SSH access No root access is possible via SSH However there is a restricted service user Username service Password service DHMI 2020 When you log in for the first time you will be prompted to change your password 6 4 DHMI Update The following chapter describes the update options for DHMI in more detail 6 4 1 Updatearchive The update archive is deli...

Страница 29: ...ly 6 After a few seconds the display shows the update status in progress 7 After the update has been successfully completed approx 2 min the update status done is dis played 8 If the update could not be performed successfully an error message error appears In this case you should use another USB stick and start the update again Figure 19 DHMI Update Status 9 After reconnecting and disconnecting th...

Страница 30: ...s For this purpose disconnect the device from the power supply to avoid false triggering 8 Decommissioning Dismantling Disposal The decommissioning of the device is carried out step by step and is briefly explained below Save all relevant data and shut down the system Disconnect the device from the supply voltage Remove all connections from the device Disassemble the device Use the original packag...

Страница 31: ... the front panel can be designed and printed upon request If you are interested please contact one of our sales staff DH electronics GmbH Am Anger 8 83346 Bergen Germany www dh electronics com 2021 DH electronics GmbH All rights reserved The copyright of this document remains with DH electronics GmbH The documentation contains technical infor mation that may not be modified copied reproduced sold ...

Отзывы: