www.dfi.com
Chapter 1 Introduction
1
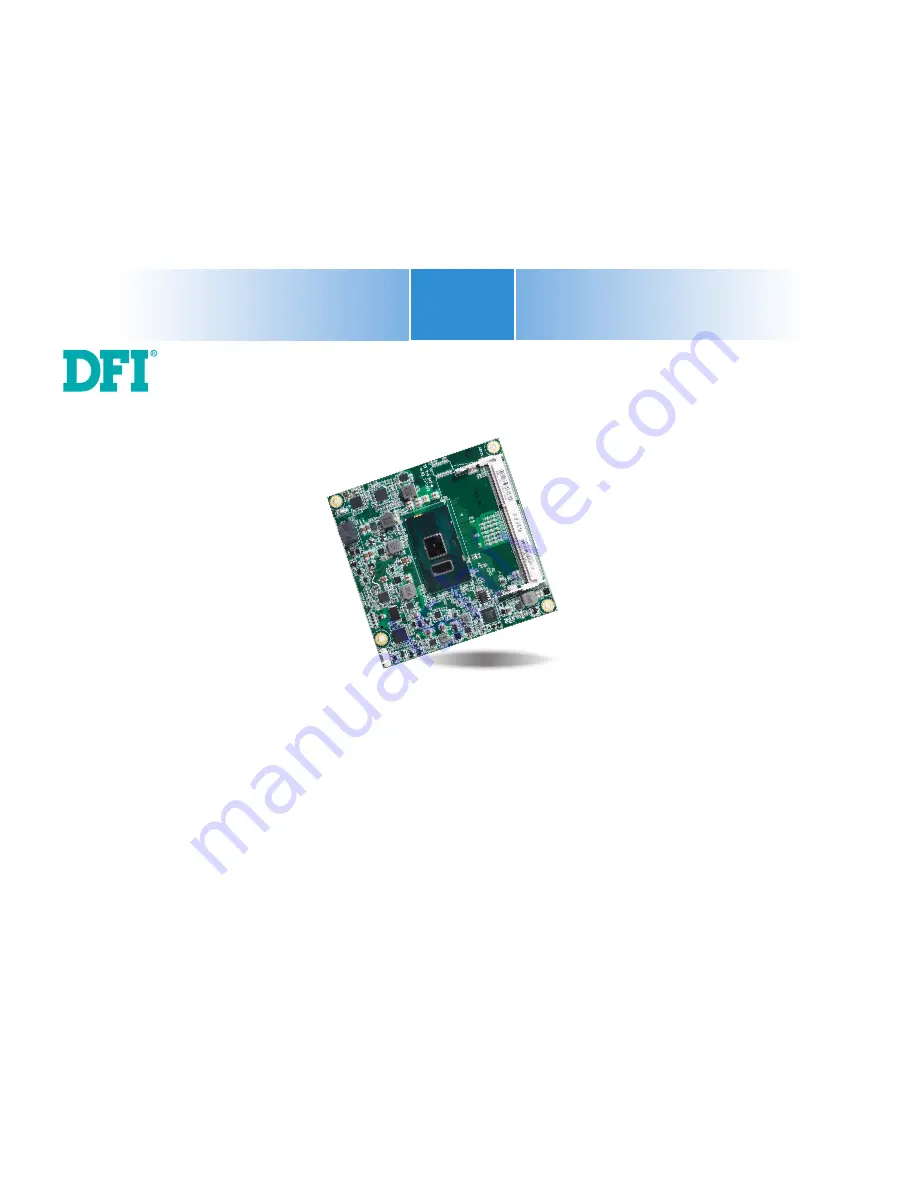
SU968
COM Express Compact Module
User’s Manual
A41300702
Страница 1: ...www dfi com Chapter 1 Introduction 1 SU968 COM Express Compact Module User s Manual A41300702 ...
Страница 2: ...OM Express ModuleTM Base Specification http www picmg org FCC and DOC Statement on Class B This equipment has been tested and found to comply with the limits for a Class B digital device pursuant to Part 15 of the FCC rules These limits are designed to provide reason able protection against harmful interference when the equipment is operated in a residential installation This equipment generates u...
Страница 3: ... 13 COM Express Connectors 14 COM Express Connectors Signals and Descriptions 15 Standby Power LED 22 Cooling Option 22 Installing SU968 onto a Carrier Board 23 Installing the COM Express Debug Card 25 Chapter 4 BIOS Setup 27 Overview 27 Insyde BIOS Setup Utility 28 Main 28 Advanced 28 Security 35 Boot 36 Exit 38 Updating the BIOS 39 Notice BIOS SPI ROM 39 Chapter 5 Supported Software 41 Chapter 6...
Страница 4: ... your system unit Static electrical discharge can damage computer components without causing any signs of physical damage You must take extra care in han dling them to ensure against electrostatic build up 1 To prevent electrostatic build up leave the system board in its anti static bag until you are ready to install it 2 Wear an antistatic wrist strap 3 Do all preparation work on a static free su...
Страница 5: ...sted above This may differ in accordance with the sales region or models in which it was sold For more information about the standard package in your region please contact your dealer or sales representative Before Using the System Board Before using the system board prepare basic system components If you are installing the system board in a new system you will need at least the following internal...
Страница 6: ...00U Processor Dual Core 4M Cache 2 6GHz 3 4GHz 15W Intel CoreTM i5 6300U Processor Dual Core 3M Cache 2 4GHz 3 0GHz 15W Intel CoreTM i3 6100U Processor Dual Core 3M Cache 2 3GHz 15W Intel Celeron Processor 3955U Dual Core 2M Cache 2 0GHz 15W Memory Two 204 pin SODIMM up to 16GB Dual Channel DDR3L 1600MHz BIOS Insyde SPI 128Mbit Graphics Controller Intel HD Graphics GT Series Feature OpenGL 5 0 Dir...
Страница 7: ... DDI LVDS eDP and DDI interfaces for 3 display outputs Serial ATA Serial ATA is a storage interface that is compliant with SATA 1 0a specification With speed of up to 6Gb s SATA 3 0 it improves hard drive performance to be faster than the standard parallel ATA which only has data transfer rate of 100MB s The bandwidth of the SATA 3 0 will be limited by carrier board design Gigabit LAN The Intel I2...
Страница 8: ...d Basic Compact Mini 74 20 80 00 91 00 121 00 151 00 Common for all Form Factors Extended only Basic only Compact only Compact and Basic only Mini only COM Express Module Standards The figure below shows the dimensions of the different types of COM Express modules SU968 is a COM Express Compact module The dimension is 95mm x 95mm ...
Страница 9: ... B LAN Port 0 1 1 1 A B Express Card Support 1 2 2 A B LPC Bus 1 1 1 A B SPI 1 2 1 A B SDIO muxed on GPIO 0 1 0 General Purpose I O 8 8 8 A B SMBus 1 1 1 A B I2C 1 1 1 A B Watchdog Timer 0 1 1 A B Speaker Out 1 1 1 A B External BIOS ROM Support 0 2 1 A B Reset Functions 1 1 1 A B6 System I O System Management Connector Feature COM Express Module Base Specification Type 6 No IDE or PCI add DDI USB3...
Страница 10: ...Bus 8 bit DIO WDT I2 C Bus TPM 1 2 2 0 optional Serial Port 0 1 Fan PWM TACH_IN SLP LID TCA6408A Embedded Controller IT8528E DDI Port 1 HDA USB 2 0 8x eDP DDI optional PTN3460 LVDS optional DDI optional CH7517 VGA DDI Port 2 PCIe x1 2 x1 1 x2 PCIe x1 2 x1 DDR3L 1600MHz SODIMM Channel B CPU Fan 1 SPI Flash BIOS Standby Power LED Intel I219LM Intel BGA 1356 DDR3L_1 SODIMM iTE IT8528VG PWMIC NXP PTN3...
Страница 11: ...re Installation 11 Chapter 3 Mechanical Diagram Heat Sink SU968 Module 20 3 1 5 0 1 0 3 5ā0 05 1 5 95 95 17 7 3 R3 Top View Bottom View 0 4 16 50 45 28 80 91 95 0 4 6 18 46 64 91 95 208 0 4 6 18 91 95 0 4 16 50 80 95 1 71 73 DIMM2 ...
Страница 12: ...SD workstation only If such a station is not available you can provide some ESD protection by wear ing an antistatic wrist strap and attaching it to a metal part of the system chassis If a wrist strap is unavailable establish and maintain contact with the system chassis throughout any procedures requiring ESD protection Important When the Standby Power LED is red it indicates that there is power o...
Страница 13: ...ll display the current speed of the cooling fan Refer to chapter 4 of the manual for more information 3 1 Sense 12V Ground COM Express Connectors The COM Express connectors are used to interface the SU968 COM Express board to a carrier board Connect the COM Express connectors located on the solder side of the board to the COM Express connectors on the carrier board Refer to the Installing SU968 on...
Страница 14: ...E_TX4 B55 PCIE_RX4 A110 GND FIXED B110 GND FIXED C55 NA D55 NA C110 GND FIXED D110 GND FIXED Row C Row D Row A Row B Row C Row D Row A Row B A1 GND FIXED B1 GND FIXED A56 PCIE_TX4 B56 PCIE_RX4 C1 GND FIXED D1 GND FIXED C56 NA D56 NA A2 GBE0_MDI3 B2 GBE0_ACT A57 GND B57 GPO2 C2 GND D2 GND C57 TYPE1 D57 TYPE2 A3 GBE0_MDI3 B3 LPC_FRAME A58 PCIE_TX3 B58 PCIE_RX3 C3 USB_SSRX0 D3 USB_SSTX0 C58 NA D58 NA...
Страница 15: ...rent limit resistor 150Ω to 3 3VSB GBE0_LINK1000 A5 OD CMOS 3 3V Suspend 3 3V Connect to LED and recommend current limit resistor 150Ω to 3 3VSB Signal Pin Module Pin Type Pwr Rail Tolerance SU968 Carrier Board Description SATA0_TX A16 O SATA AC coupled on Module AC Coupling capacitor SATA0_TX A17 O SATA AC coupled on Module AC Coupling capacitor SATA0_RX A19 I SATA AC coupled on Module AC Couplin...
Страница 16: ...D62 NA PEG_RX3 C61 NA PEG_RX3 C62 NA PEG_TX4 D65 NA PEG_TX4 D66 NA PEG_RX4 C65 NA PEG_RX4 C66 NA PEG_TX5 D68 NA PEG_TX5 D69 NA PEG_RX5 C68 NA PEG_RX5 C69 NA PEG_TX6 D71 NA PEG_TX6 D72 NA PEG_RX6 C71 NA PEG_RX6 C72 NA PEG_TX7 D74 NA PEG_TX7 D75 NA PEG_RX7 C74 NA PEG_RX7 C75 NA PEG_TX8 D78 NA PEG_TX8 D79 NA PEG_RX8 C78 NA PEG_RX8 C79 NA PEG_TX9 D81 NA PEG_TX9 D82 NA PEG_RX9 C81 NA PEG_RX9 C82 NA PEG...
Страница 17: ...I Express Graphics receive differential pairs 6 PCI Express Graphics transmit differential pairs 4 I PCIE AC coupled off Module I PCIE AC coupled off Module PCI Express Graphics receive differential pairs 3 I PCIE AC coupled off Module PCI Express Graphics receive differential pairs 2 O PCIE AC coupled on Module PCI Express Graphics transmit differential pairs 3 PCI Express Graphics receive differ...
Страница 18: ...oupling Capacitors 0 1uF to Device DDI2_PAIR2 D47 Connect AC Coupling Capacitors 0 1uF to Device DDI2_PAIR3 D49 Connect AC Coupling Capacitors 0 1uF to Device DDI2_PAIR3 D50 Connect AC Coupling Capacitors 0 1uF to Device I O PCIE AC coupled on Module PD 100K to GND S W IC between Rpu PCH Connect to DP AUX DP AUX function if DDI2_DDC_AUX_SEL is no connect I O OD CMOS 3 3V 3 3V PU 4 7K to 3 3V PD 10...
Страница 19: ...ng capacitor USB_SSRX3 C13 USB_SSRX3 C12 O PCIE AC coupled on Module Connect 90Ω 100MHz Common Choke in series and ESD suppressors to GND to USB connector Additional transmit signal differential pairs for the SuperSpeed USB data path I PCIE AC coupled off Modul Connect 90Ω 100MHz Common Choke in series and ESD suppressors to GND to USB connector Additional receive signal differential pairs for the...
Страница 20: ...3 3V PU 10K to 3V3_DU_EC PU 4 7K to 3V3_SB A falling edge creates a power button event Power button events can be used to bring a system out of S5 soft off and other suspend states as well as powering the system down SYS_RESET B49 I CMOS 3 3V Suspend 3 3V PU 10K to 3V3_DU NC PU 4 7K to 3V3_SB Reset button input Active low request for Module to reset and reboot May be falling edge sensitive For sit...
Страница 21: ...ogic Level Signals on Pins Reclaimed from VCC_12V SER1_TX A101 O CMOS 3 3V 5V PD 4 7K to GND General purpose serial port 1 transmitter Recommend add Protecting Logic Level Signals on Pins Reclaimed from VCC_12V SER1_RX A102 I CMOS 3 3V 5V PU 10K to 3 3V General purpose serial port 1 receiver Recommend add Protecting Logic Level Signals on Pins Reclaimed from VCC_12V Signal Pin Module Pin Type Pwr ...
Страница 22: ...ion of the thermal pad designed to contact the corresponding components that are on the SU968 Top View of the Heat Sink Important Remove the plastic covering from the thermal pads prior to mounting the heat sink onto the SU968 Note The system board used in the following illustrations may not resemble the actual board These illustrations are for reference only Bottom View of the Heat Sink 1 1 ...
Страница 23: ...elow shows the location of the mounting holes on the carrier board COM Express connectors on the carrier board 3 Press SU968 down firmly to seat it in the COM Express connectors of the carrier board Note The illustration above shows the pressing points of the module onto the carrier board Be careful when pressing the module to avoid damages to the connectors 2 Grasp SU968 by its edges and position...
Страница 24: ...tion 24 Chapter 3 4 Verify that SU968 is firmly seated in the COM Express connectors of the carrier board 5 Install a heat sink onto the SU968 with the carrier board The photo below shows the heat sink installed on SU968 Carrier board SU968 ...
Страница 25: ...ard designed for COM Express Compact modules to debug and display signals and codes of COM Express modules COMe LINK1 Bottom view Top view COMe DEBUG Connector COM Express Connectors 2 Connect the COMe DEBUG card to COMe LINK1 via a cable COMe DEBUG COMe LINK1 Cable COMe DEBUG COM Express Connectors COMe LINK1 2 Connector Port 80 Display LPC COM Express Signal Display Power Reset Sleep LID control...
Страница 26: ...COMe LINK1 debug card onto the carrier board COMe LINK1 Carrier Board 4 Then use the instructions from the previous section to install SU968 and heat sink on the top of the COMe LINK1 debug card Screws COMe DEBUG Side View of the Module Debug Card and Carrier Board COMe LINK1 Carrier Board BW968 ...
Страница 27: ...red in the CMOS RAM of the EEPROM will stay unchanged unless a configuration change has been made such as a hard drive replaced or a device added It is possible that the CMOS battery will fail causing CMOS data loss If this happens you need to install a new CMOS battery and reconfigure the BIOS settings Default Configuration Most of the configuration settings are either predefined according to the...
Страница 28: ...0 to 59 0 to 59 INCREASE REDUCE InsydeH20 Setup Utility Security F1 Help Select Item F5 F6 Change Values F9 Setup Defaults Esc Exit Select Item Enter Select SubMenu F10 Save and Exit Project Name BIOS Version Processor Type EC Ver CPUID CPU Speed CPU Stepping L1 Data Cache L1 Instruction Cache L2 Cache L3 Cache Number of Processors Microcode Rev Total Memory System Memory Speed SODIMM 0 SODIMM 1 P...
Страница 29: ...wer loss S5 State The system appears to be off when power is re applied after AC power loss CPU Configuration This section configures the CPU Enable Disable CPU Power Management Allows CPU to go to C states when it s not 100 utilized CPU Configuration Intel R SpeedStep tm Enabled Turbo Mode Enabled Advanced F1 Help Select Item F5 F6 Change Values F9 Setup Defaults Esc Exit Select Item Enter Select...
Страница 30: ... Exit InsydeH20 Setup Utility Boot display LVDS DP1 LVDS VGA VGA DP1 DP1 VGA Choose display device combination Boot display Set the display device combination during system booting Rev 5 0 Rev 5 0 Internal Graphics Keep IGFX enabled or disabled based on the setup options Always Enabled PEG Enable or disable the PCIe graphics function Video Configuration Internal Graphics Always Enabled PEG Boot di...
Страница 31: ...e Disabled HDA will be unconditionally disabled Enabled HDA will be unconditionally enabled Auto HDA will be ena bled if present disabled otherwise Rev 5 0 Advanced F1 Help Select Item F5 F6 Change Values F9 Setup Defaults Esc Exit Select Item Enter Select SubMenu F10 Save and Exit InsydeH20 Setup Utility LCD Panel Type 800x480 800x600 1024x768 1366x768 1280x1024 1920x1080 Select LCD Panel Type Re...
Страница 32: ... s AHCI Mode This option allows the Serial ATA devices to use AHCI Advanced Host Controller Inter face RAID Mode This option allows you to create RAID or Intel Matrix Storage configurations on Serial ATA devices Serial ATA Port 0 1 2 and 3 This field is used to enable or disable each serial ATA port USB Configuration This section configures the parameters of the USB devices USB BIOS Support Disabl...
Страница 33: ...Setup Utility Rev 5 0 PCI Express Root Ports PCI Express Root Port 1 Settings Control the PCI Express Root Port PCI Express Root Port This field is used to enable or disable the PCI Express Root Port PCIe Speed Select the speed of the PCI Express Root Port Auto Gen1 Gen2 or Gen3 Active Management Technology Support Intel AMT Support Advanced F1 Help Select Item F5 F6 Change Values F9 Setup Default...
Страница 34: ...nfiguration COM Port 1 and COM Port 2 Configure the settings of the serial ports Disable Disable the serial port Enable Enable the serial port COM Port 1 Disabled Enabled Enable disable to flash ME region Me Fw Image Re Flash Advanced F1 Help Select Item F5 F6 Change Values F9 Setup Defaults Esc Exit Select Item Enter Select SubMenu F10 Save and Exit Disabled InsydeH20 Setup Utility Rev 5 0 Me Fw ...
Страница 35: ...F 0 RPM 4956 RPM InsydeH20 Setup Utility Rev 5 0 InsydeH20 Setup Utility Rev 5 0 Security This section configures the trusted platform module TPM and storage security TPM Availability Show or hide the TPM availability and its configurations TPM Operation Enable or disable the TPM function It displays the following options No Operation No changes to the current state Disable Disable and deactivate ...
Страница 36: ... is not enabled when enter ing SCU How to clear HDD password only press Enter when set new password Set Storage Password Enter New Password Enter New Password Again Set Master HDD Password Set a password for the master HDD Device Name Security Mode Set Storage Password Set Master Hdd Password Main Advanced F1 Help Select Item F5 F6 Change Values F9 Setup Defaults Esc Exit Select Item Enter Select ...
Страница 37: ...Boot This section configures boot options Numlock Select the power on state for numlock Boot Type Select the boot type The options include Dual Boot Type Legacy Boot Type and UEFI Boot Type Network stack Enable or disable UEFI network stack It supports the operation of these functions or software Windows 8 BitLocker Network Unlock UEFI IPv4 IPv6 PXE and legacy PXE Option ROM USB Boot Enable or dis...
Страница 38: ... Exit InsydeH20 Setup Utility Security Exit Boot Hard Disk Drive ST160LT007 9ZV14D Hard Disk Drive Rev 5 0 Boot Type Order Use and keys to arrange the sequence of storage devices that the system s hardware will check in the operating system s boot files The first device in the order list has the first boot priority Hard Disk Drive All installed hard disk drives will be displayed in this field Use ...
Страница 39: ...ges Load Optimal Defaults Discard Changes Main Advanced F1 Help Select Item F5 F6 Change Values F9 Setup Defaults Esc Exit Select Item Enter Select SubMenu F10 Save and Exit InsydeH20 Setup Utility Security Boot Rev 5 0 Exit CD DVD ROM Drive All installed CD DVD ROM drives will be displayed in this field Use and keys to arrange the sequence of CD DVD ROM drives that the system s hardware checks fo...
Страница 40: ...cease to be effective Note a You can take advantage of flash tools to update the default configuration of the BIOS SPI ROM to the latest version anytime b When the BIOS IC needs to be replaced you have to populate it properly onto the system board after the EEPROM programmer has been burned and follow the technical person s instructions to confirm that the MAC address should be burned or not Updat...
Страница 41: ...o enhance the performance of the system board Insert the DVD into a DVD ROM drive The autorun screen Mainboard Utility DVD will appear If after inserting the DVD Autorun did not automatically start which is the Mainboard Utility DVD screen did not appear please go directly to the root directory of the DVD and double click Setup Auto Run Page For Windows 10 Auto Run Page For Windows 8 1 ...
Страница 42: ...ipset Software Installatn Utility is used for updating Windows INF files so that the Intel chipset can be recognized and configured properly in the system To install the utility click Intel Chipset Software Installation Utility on the main menu 1 Setup is ready to install the utility Click Next 2 Read the license agreement then click Yes ...
Страница 43: ... driver Click Next 2 Read the license agreement then click Yes By default the Automatically run WinSAT and enable the Windows Aero desktop theme is enabled With this enabled after installing the graphics driver and the system rebooted the screen will turn blank for 1 to 2 minutes while WinSAT is running before the Windows 7 Windows 8 1 Windows 10 desktop appears The blank screen period is the time...
Страница 44: ... the system will allow the new software installation to take effect 1 Setup is now ready to install the audio driver Click Next 2 Follow the remainder of the steps on the screen clicking Next each time you finish a step 3 Click Yes I want to restart my computer now then click Finish Restarting the system will allow the new software installation to take effect Audio Drivers For COM332 B Carrier Boa...
Страница 45: ...tel LAN Drivers on the main menu 1 Setup is ready to install the driver Click Next 2 Click I accept the terms in the license agreement then click Next 3 Select the program featuers you want installed then click Next 4 Click Install to begin the installation 5 After completing installa tion click Finish ...
Страница 46: ... Kernel Mode Driver For Windows 7 only To install the driver click Kernel Mode Driver Framework on the main menu 1 Click Yes to install the update 2 The update is installed now 3 Click Restart Now to restart your computer when the installation is complete ...
Страница 47: ...Management Engine Drivers on the main menu 1 Setup is ready to install the driver Click Next 2 Read the license agreement then click Next 3 Setup is currently installing the driver After installation has completed click Next 4 Please wait while the prod uct is being installed 5 After completing installa tion click Finish ...
Страница 48: ...sing Windows 7 or later versions you need to access the operating system as an administrator to be able to install the utility 1 Setup is ready to install the driver 2 Click Next to continue 3 Read the license agreement then click I accept the terms in the license agreement Click Next 4 The wizard is ready to begin installation Click Install 5 Please wait while the program features are being insta...
Страница 49: ...he desktop Double click the icon to open the utility SU968 Note Note The screenshot displayed above is for illustrative purpose only and may not resemble the actual screen The SU968 HW Utility features the following tabs Information HW Health HW Healthset Watchdog DIO and Backlight Click on the tabs to access information about the board ...
Страница 50: ...er on the main menu 2 Read the license agreement then click Yes 1 Setup is ready to install the driver Click Next 3 Go through the readme docu ment for more installation tips then click Next 4 Setup is currently installing the driver After installation has com pleted click Next 5 After completing installation click Finish ...
Страница 51: ...on the main menu 1 Setup is now extracting files Note Before installing Microsoft Framework 4 5 2 make sure you have updated your Windows 7 operating system to Service Pack 1 2 Read the license agreement care fully Click I have read and accept the terms of the License Agree ment then click Install 4 Click Finish 3 Setup is now installing the driver ...
Страница 52: ...e storage subsystem To install the driver click Intel Rapid Storage Technology on the main menu Please refer to Chapter 6 for more information Infineon TPM 1 2 Driver and Tool Optional To install the driver click Infineon TPM driver and tool option on the main menu 1 The setup program is preparing to install the driver 2 The setup program is now ready to install the utility Click Next 3 Click I ac...
Страница 53: ...ormation and then click Next 5 Select a setup type and then click Next 6 Click Install 7 TPM requires installing the Micro soft Visual C package prior to installing the utility Click Install 8 The setup program is currently installing the Microsoft Visual C package 9 Click Finish ...
Страница 54: ...estart your system Adobe Acrobat Reader 9 3 To install the reader click Adobe Acrobat Reader 9 3 on the main menu 1 Click Next to install or click Change Destination Folder to select another folder 2 Click Install to begin instal lation 3 Click Finish to exit installation ...
Страница 55: ...ring providing the benefits of both RAID 0 and RAID 1 Use four new drives or an existing drive and three new drives for this configuration RAID Level Min Drives Protection Description RAID 0 2 None Data striping without redundancy RAID 1 2 Single Drive Failure Disk mirroring RAID 5 3 Single Drive Failure Block level data striping with distributed parity RAID 10 4 1 Disk Per Mirrored Stripe not sam...
Страница 56: ... 12 Press Y to confirm exit Note These steps are cited from the Intel Suppot site Set Up a System with Intel Matrix RAID Technology Article ID 000005789 http www intel com content www us en support boards and kits 000005789 htm Step 3 1 Create a RAID Volume if the boot type is UEFI If the boot type is set to UEFI RAID volume creation will be different Please use the following steps to create RAID ...
Страница 57: ...us of the RAID volume and or SATA drives It enables enhanced performance and power management for the storage subsystem 1 Insert the provided DVD into an optical drive 2 Click Intel Rapid Storage Technology Utility on the main menu 4 Read the license agree ment and click I accept the terms in the License Agreement Then click Next 3 Setup is ready to install the utility Click Next 5 Go through the ...
Страница 58: ...www dfi com Chapter 6 RAID 58 Chapter 6 8 Click Yes I want to restart this computer now to complete the installation and then click Finish ...
Страница 59: ...ts before they impact the network and proactively alerting when critical software agents are removed Enable Intel AMT in the Insyde BIOS 1 Power on the system then press Del to enter the main menu of the Insyde BIOS 2 In the Advanced menu select AMT Configuration 3 In the Advanced menu select Enable in the AMT field AMT Configuration ACPI Configuration CPU Configuration Video Configuration Audio C...
Страница 60: ...ess Enter Exit system setup and save your changes Exit Saving Changes Load Optimal Defaults Discard Changes Main Advanced F1 Help Select Item F5 F6 Change Values F9 Setup Defaults Esc Exit Select Item Enter Select SubMenu F10 Save and Exit InsydeH20 Setup Utility Security Boot Rev 5 0 Exit Intel R Management Engine BIOS Extension v11 0 0 0005 Intel R ME v11 0 0 1197 Copyright C 2003 15 Intel Corpo...
Страница 61: ...ME Password Move Highlight Enter Select Entry Esc Exit Intel R ME New Password 3 You will be asked to verify the password Enter the same new password in the space pro vided under Verify Password then press Enter Intel R Management Engine BIOS Extension v11 0 0 0005 Intel R ME v11 0 0 1197 Copyright C 2003 15 Intel Corporation All Rights Reserved MAIN MENU MEBx Login Intel R ME General Settings Int...
Страница 62: ... Esc Exit 6 Select Local FW Update then press Enter Select Enabled then press Enter Intel R Management Engine BIOS Extension v11 0 0 0005 Intel R ME v11 0 0 1197 Copyright C 2003 15 Intel Corporation All Rights Reserved Change ME Password Local FW Update Enabled Move Highlight Enter Complete Entry Esc Discard Changes Disabled Enabled Password Protected 7 Select Previous Menu until you return to th...
Страница 63: ...s Reserved SOL Storage Redirection KVM Username and Password Enabled SOL Enabled Storage Redirection Enabled KVM Feature Selection Enabled Disabled Enabled 11 In the SOL Storage Redirection KVM menu select SOL then press Enter Select Enabled or Disabled then press Enter Move Highlight Enter Complete Entry Esc Discard Changes Move Highlight Enter Complete Entry Esc Discard Changes Intel R Managemen...
Страница 64: ...OL Enabled Storage Redirection Enabled KVM Feature Selection Enabled Disabled Enabled Move Highlight Enter Complete Entry Esc Discard Changes Move Highlight Enter Complete Entry Esc Discard Changes 14 Select Previous Menu until you return to the Intel R AMT Configuration menu Select User Consent then press Enter Intel R Management Engine BIOS Extension v11 0 0 0005 Intel R ME v11 0 0 1197 Copyrigh...
Страница 65: ...ime Network Setup Activate Netwok Access Unconfigure Network Access Full Unprovision Remote Setup And Configuration Power Control INTEL R AMT CONFIGURATION Default Password Only During Step And Configuration Anytime Move Highlight Enter Complete Entry Esc Discard Changes Move Highlight Enter Complete Entry Esc Discard Changes 18 In the Intel R AMT Configuration menu select Network Setup then press...
Страница 66: ... Domain Name _ Shared Dedicated FQDN Shared Dynamic DNS Update Disabled Computer Domain Name Enter Complete Entry Esc Discard Changes 22 Select Shared Dedicated FQDN then press Enter Select Shared or Dedicated then press Enter Intel R Management Engine BIOS Extension v11 0 0 0005 Intel R ME v11 0 0 1197 Copyright C 2003 15 Intel Corporation All Rights Reserved INTEL R ME NETWORK NAME SETTINGS Host...
Страница 67: ...n press Enter Intel R Management Engine BIOS Extension v11 0 0 0005 Intel R ME v11 0 0 1197 Copyright C 2003 15 Intel Corporation All Rights Reserved INTEL R AMT CONFIGURATION Move Highlight Enter Select Entry Esc Exit 27 In the Intel R AMT Configuration menu select Unconfigure Network Access then press Enter Intel R Management Engine BIOS Extension v11 0 0 0005 Intel R ME v11 0 0 1197 Copyright C...
Страница 68: ...rrent Provisioning Mode Provisioning Record Provisioning Server IPV4 IPV6 _ Provisioning Server FQDN _ RCFG TLS PKI Provisioning Mode PKI 30 In the Intel R Remote Setup And Configuration menu select Provisioning Re cord then press Enter Intel R Management Engine BIOS Extension v11 0 0 0005 Intel R ME v11 0 0 1197 Copyright C 2003 15 Intel Corporation All Rights Reserved INTEL R REMOTE SETUP AND CO...
Страница 69: ... REMOTE CONFIGURATION Start Configuration Move Highlight Enter Select Entry Esc Exit 34 In the Intel R Remote Setup And Configuration menu select TLS PKI then press Enter Intel R Management Engine BIOS Extension v11 0 0 0005 Intel R ME v11 0 0 1197 Copyright C 2003 15 Intel Corporation All Rights Reserved INTEL R REMOTE SETUP AND CONFIGURATION Current Provisioning Mode Provisioning Record Provisio...
Страница 70: ...ctive Active Active Active Active Active Active Active Active Active Active Active Active Active Active Active Active Active Default Default Default Default Default Default Default Default Default Default Default Default Default Default Default Default Default Default SHA256 SHA256 SHA256 SHA256 SHA256 SHA256 SHA256 SHA256 SHA256 SHA256 SHA256 SHA256 SHA256 SHA256 SHA256 SHA256 SHA256 SHA256 Hash ...
Страница 71: ...rporation All Rights Reserved INTEL R AMT POWER CONTROL Mobile ON in S0 Mobile ON in S0 ME Wake in S3 S4 5 AC only Intel R AMT ON in Host Sleep States Mobile ON in S0 ME Wake in S3 S4 5 AC only Idle Timeout 65535 Move Highlight Enter Complete Entry Esc Discard Changes These configurations are effective only after AMT provisioning has started MAIN MENU 41 In the Intel R AMT Power Control menu selec...
Страница 72: ...tor s power switch is on 2 Check that one end of the monitor s power cord is properly attached to the monitor and the other end is plugged into a working AC outlet If necessary try another outlet 3 Check that the video input cable is properly attached to the monitor and the system s display adapter 4 Adjust the brightness of the display by turning the monitor s brightness control knob The picture ...
Страница 73: ... attaching it to a serial port that is work ing and configured correctly If the serial device does not work either the cable or the serial device has a problem If the serial device works the problem may be due to the onboard I O or the address setting 4 Make sure the COM settings and I O address are configured correctly Keyboard Nothing happens when a key on the keyboard was pressed 1 Make sure th...
Страница 74: ...Code Value Description POST_BDS_NO_BOOT_DEVICE F9 No Boot Device POST_BDS_JUMP_BOOT_SECTOR FE Try to Boot with INT 19 ACPI 8 Bit POST Code Values Functionality Name POST Code Value Description ASL_ENTER_S1 51 Prepare to enter S1 ASL_ENTER_S3 53 Prepare to enter S3 PEI_CPU_AP_INIT 72 Multi processor Early initialization PEI_CPU_HT_RESET 73 HyperTransport initialization PEI_PCIE_MMIO_INIT 74 PCIE MM...