25
2
Hardware Installation
Installing the Fan and Heat Sink
The CPU must be kept cool by using a CPU fan with heat sink. Without suf
fi
cient
air circulation across the CPU and heat sink, the CPU will overheat damaging both
the CPU and system board.
Note:
A boxed Intel
®
processor already includes the CPU fan and heat sink as-
sembly. If your CPU was purchased separately, make sure to only use
Intel
®
-certi
fi
ed fan and heat sink.
1. Before you install the fan / heat sink, you must apply a thermal paste onto
the top of the CPU. The thermal paste is usually supplied when you purchase
the fan / heat sink assembly. Do not spread the paste all over the surface.
When you later place the heat sink on top of the CPU, the compound will dis-
perse evenly.
Some heat sinks come with a patch of pre-applied thermal paste. Do not ap-
ply thermal paste if the fan / heat sink already has a patch of thermal paste
on its underside. Peel the strip that covers the paste before you place the fan
/ heat sink on top of the CPU.
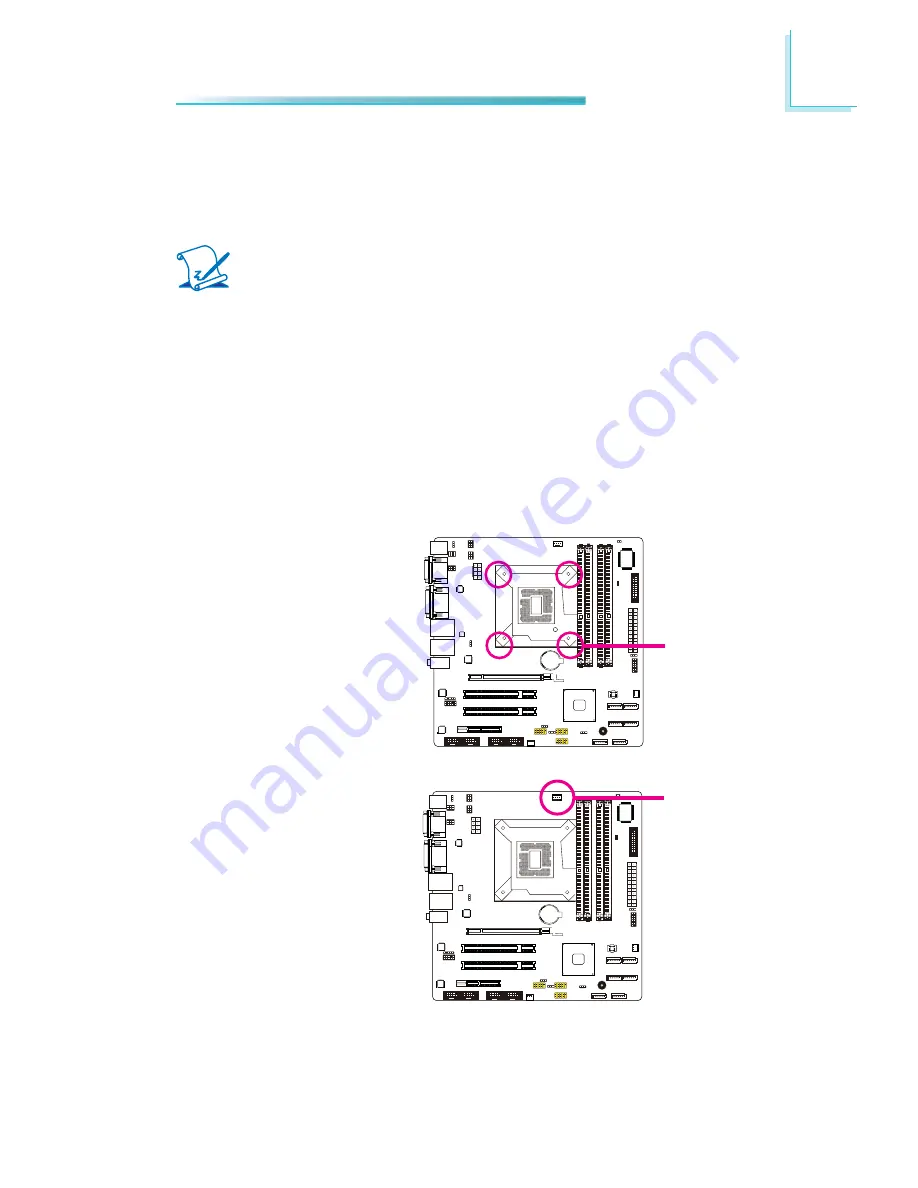
2. Place the heat sink on top
of the CPU. The 4 push-
pins around the heat sink,
which are used to secure
the heat sink onto the sys-
tem board, must match the
4 mounting holes around
the socket.
Mounting hole
3. Orient the heat sink such
that the CPU fan’s cable is
nearest the CPU fan con-
nector.
CPU fan
connector
Содержание MB331-CRM
Страница 1: ...MB331 CRM System Board User s Manual A20820442 ...
Страница 88: ...88 4 Supported Software Auto Run Pages for Windows 7 ...
Страница 90: ...90 4 Supported Software 3 Click Exit ...
Страница 100: ...100 4 Supported Software 4 Click Install to begin the installation 5 After completing installa tion click Finish ...
Страница 113: ...113 4 Supported Software 7 Click Install 8 The setup program is cur rently installing the driver 9 Click Finish ...


