20
2
Hardware Installation
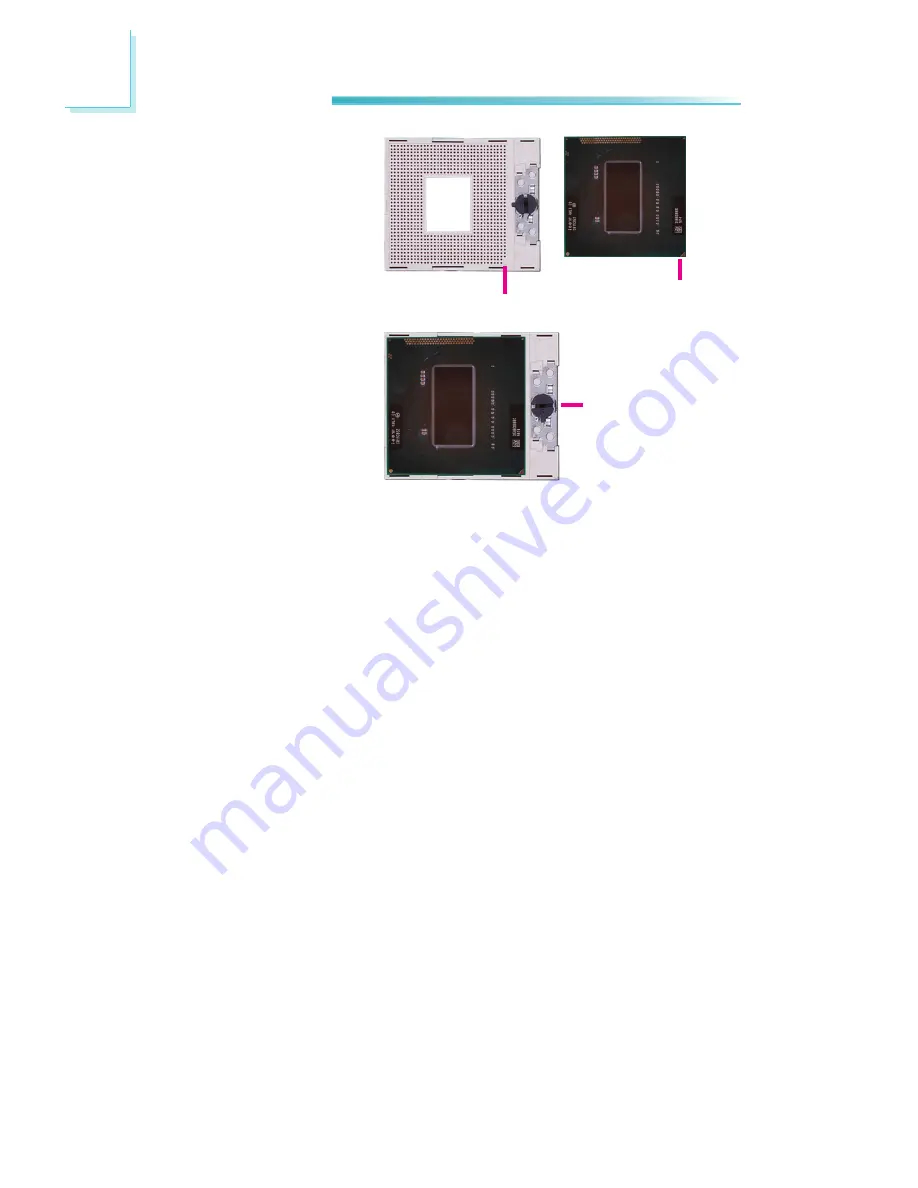
5. Position the CPU above the
socket. The gold triangular
mark on the CPU must
align with pin 1 of the CPU
socket.
Important:
Handle the CPU by its edg-
es and avoid touching the
pins.
Pin 1
Gold triangular mark
6. Insert the CPU into the
socket until it is seated
in place. The CPU will fit
in only one orientation
and can easily be inserted
without exerting any force.
Use a screwdriver to turn
the screw to its lock posi-
tion.
Important:
Do not force the CPU into
the socket. Forcing the
CPU into the socket may
bend the pins and damage
the CPU.
Screw in locked
position
Содержание HR100-CRM
Страница 1: ...HR100 CRM System Board User s Manual A15310120 ...
Страница 89: ...89 4 Supported Software 3 Click Exit ...
Страница 101: ...101 4 Supported Software 4 Click Install to begin the installation 5 After completing installa tion click Finish ...
Страница 105: ...105 4 Supported Software 4 After completing instal lation click Finish to exit setup ...
Страница 108: ...108 4 Supported Software 4 Click Install 5 The setup program is cur rently installing the soft ware 6 Click Finish ...
Страница 112: ...112 4 Supported Software 7 Click Install 8 The setup program is cur rently installing the driver 9 Click Finish ...


