


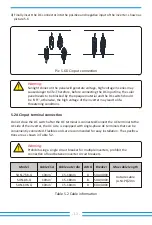


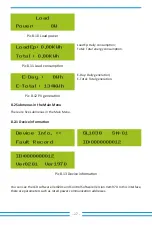


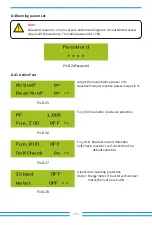

Pic 5.10 AC input connec�on
- 15 -
Step 5: Use the hexagon screwdriver, loosen the bolts of the socket in turn, and insert each
cable core into the corresponding jack, and set each screw. The connec�on hole of AC
connec�on terminal labeling is shown in picture 5.9.
Step 6: Set the sleeve and sealing ring in place.
Step 7: Connect the terminals to the inverter as shown in picture 5.10.
Pic 5.9 AC Connector Hole Pa�ern


