


28
E N G L I S H
If the mains is functioning but the battery pack does
not charge, take your charger to an authorised
D
E
WALT repair agent. Whilst charging, the charger
and the battery pack may become warm to touch.
This is a normal condition and does not indicate a
problem.
Do not charge the battery pack at
ambient temperatures < 4 °C or > 40 °C.
Recommended charging temperature:
approx. 24 °C.
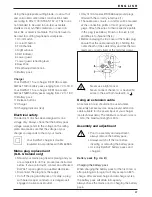
• To charge the battery pack (10), insert it into the
charger (12) as shown and plug in the charger.
Be sure that the battery pack is fully seated in the
charger. The red charging indicator (13) will blink.
After approx. 1 hour, it will stop blinking and
remain on. The battery pack is now fully charged.
The battery pack can be removed at any time or
left in the connected charger indefinitely.
Inserting and removing the battery pack
• Insert the battery pack into the grip until it clicks
in place.
• To remove the battery pack, press the two
release buttons (11) simultaneously and pull the
pack out of the grip.
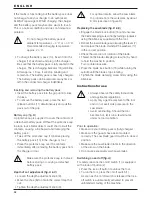
Battery cap (fig. B)
A protective cap is supplied to cover the contacts of
a detached battery pack. Without the protective cap
in place, loose metal objects could short circuit the
contacts, causing a fire hazard and damaging the
battery pack.
• Take off the protective cap (14) before placing
the battery pack (10) in the charger or tool.
• Place the protective cap over the contacts
immediately after removing the battery pack from
the charger or tool.
Make sure the protective cap is in place
before storing or carrying a detached
battery pack.
Depth of cut adjustment (fig. A & C)
• Loosen the depth adjustment knob (9).
• Move the shoe (8) to obtain the correct depth of
cut.
• Tighten the depth adjustment knob (9).
For optimal results, allow the saw blade
to protrude from the workpiece by about
3 mm (see inset in figure C).
Replacing the saw blade (fig. D & E)
• Engage the blade lock button (15) and unscrew
the blade camping screw (16) by turning clockwise
using the Allen key supplied with the tool.
• Retract the lower blade guard (6) using the lever (7)
and replace the blade. Reinstall the washers (17)
in the correct position.
• Check the direction of rotation of the blade.
• Thread on the blade clamping screw (16) by hand
to hold the washer in position.
Turn counterclockwise.
• Press the blade lock button (15) while turning the
spindle until the blade stops rotating.
• Tighten the blade clamping screw firmly using the
Allen key.
Instructions for use
• Always observe the safety instructions
and applicable regulations.
• Apply only a gentle pressure to the tool
and do not exert side pressure on the
saw blade.
• Avoid overloading. Should the tool
become hot, let it run a few minutes
under no load condition.
Prior to operation:
• Make sure your battery pack is (fully) charged.
• Make sure the guards have been mounted
correctly. The saw blade guard must be in closed
position.
• Make sure the saw blade rotates in the direction
of the arrow on the blade.
• Do not use excessively worn saw blades.
Switching on and off (fig. A)
For safety reasons the on/off switch (1) is equipped
with a lock-off button (2).
• Press the lock-off button to unlock the tool.
• To run the tool, press the on/off switch (1).
As soon as the on/off switch is released the lock-
off switch is automatically activated to prevent
unintended starting of the machine.


