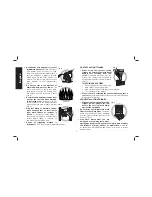
SEQUENTIAL TRIP OPERATION (GRAY TRIGGER)
When using the sequential trip (gray) trigger the tool contains a
contact trip that operates in conjunction with the trigger to drive a
fastener. To operate a sequential trip tool, first position the contact
trip on the work surface
WITHOUT PULLING THE TRIGGER. Depress the contact trip and
then pull the trigger to drive a fastener. As long as the contact trip
is contacting the work and is held depressed, the tool will drive a
fastener each time the trigger is depressed. If the contact trip is
allowed to leave the work surface, the sequence described above
must be repeated to drive another fastener.
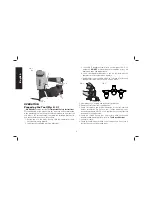
Tool Operation Check (Fig.1)
WARNING:
Remove all fasteners from tool before performing tool
operation check.
CONTACT TRIP OPERATION (BLACK TRIGGER)
A. With finger off the trigger (A), press the contact trip against the
work surface.
THE TOOL MUST NOT CYCLE.
B. Hold the tool off the work surface, and pull the trigger.
THE TOOL MUST NOT CYCLE.
C. With the tool off the work surface, pull the trigger. Press the
contact trip against the work surface.
THE TOOL MUST CYCLE.
D. Without touching the trigger, press the contact trip against the
work surface, then pull the trigger.
THE TOOL MUST CYCLE.
SEQUENTIAL TRIP OPERATION (GRAY TRIGGER)
A. Press the contact trip against the work surface, without touching
the trigger.
THE TOOL MUST NOT CYCLE.
B. Hold the tool off the work surface and pull the trigger.
THE TOOL MUST NOT CYCLE.
Release the trigger. The trigger must return to the trigger stop on
the frame.
C. Pull the trigger and press the contact trip against the work
surface.
THE TOOL MUST NOT CYCLE.
D. With finger off the trigger, press the contact trip against the work
surface. Pull the trigger.
THE TOOL MUST CYCLE.
Loading the Tool (Fig. 1, 4–7)
WARNING:
Keep tool pointed in a safe direction when loading
nails.
WARNING:
Never load nails with the contact trip or trigger
activated.
1. Open the magazine (F). Pull down magazine latch (E) and swing
door/magazine cover outward. Refer to Figure 4.
FIG. 4
FIG. 5
E
English
8


