4. Use the up and down arrows to scroll through the menu until the System Settings menu is
displayed. Select OK.
5. Use the up and down arrows to scroll through the menu until the Wireless Device
Maintenance menu is displayed. Select OK.
6. Use the up and down arrows to scroll through the menu until the Add/Replace Device screen
is displayed. Select OK.
7. The next available device number will be displayed. Up to three Repeaters can be regis-
tered to the system. To increase RF communication, an unlimited number of unregistered
Repeaters may be placed in the area. If these Repeaters are not registered, status mes-
sages will not be sent to the Base Unit. If there are no slots available, the ALL DEVICES
IN USE screen will be displayed. When the device number is shown, select OK.
8. When prompted by the LCD screen to Reset Device, press and release the Reset Button
(D) located on the inside of the cover (Fig. 1). The DEVICE REGISTERED screen will be
displayed.
9. Snap the cover in place.
10. To edit the description of the device, select EDIT.
11. To edit the description, use the keypad to type a description of up to 8 characters. The
character that is being changed will be underlined. To move back a character, use the
left/down arrow. To move forward a character, use the right/up arrow. When complete,
select SAVE. Refer to the DS100 instruction manual for more information.
IMPORTANT:
Write the device description and corresponding device number on the
Sensor
Location List
included with the DS100 Jobsite Security Portable Alarm System. Keep this
sheet for reference. This information will be needed during the monitoring service enrollment
process. As device changes are made, be sure to contact D
E
WALT customer service to make
adjustments to the monitoring service.
12. After registration, test the Repeater.
Mounting
RECOMMENDED LOCATIONS
• Recommended within 2000' (610m) from the DS100 Base Unit and sensors or another
DS380 Repeater and up to 12' (3.7m) from the ground.
• Avoid RF barriers and other obstacles.
• Do not mount Repeater(s) on or near metal surfaces, ductwork, wire screens, etc. This may
block signal transmissions.
• Use multiple Repeaters as necessary to enable communication between the DS100 Base
Unit and the wireless devices. Up to 5 Repeaters can be used in one direction.
MOUNTING INSTRUCTIONS
To mount the Repeater, use two #8 screws or bolts (not included) as appropriate for the mate-
rial to which it is affixed.
1. The DS380 must be connected to a power source.
2. The Battery Switch (B) should be in the ON position (I).
3. Mark and drill the locations for the two holes (E).
4. Place a #8 screw or bolt through each hole.
5. Lock screws/bolts with appropriate nut (washer, if desired).
6. Using #8 screws/bolts, mount power supply at least 1 foot (.3m) off ground and at least
10 ft. (3m) from a pool or spa.
IMPORTANT:
To eliminate false alarms, be sure that the Repeater cover (C) is closed. Securely
mount the Repeater to a stable surface so it will not be removed.
Walk Test
To activate the Repeater during a walk test:
1. Press the TEST button on the DS100.
2. Enter the master code.
3. Use the up/down arrow buttons to scroll through the menu until the “Wireless Devices” menu
is displayed.
4. Press TEST.
5. Use the up/down arrow buttons, scroll to the device number of the Repeater to be tested.
6. Press the Reset Button on the DS380.
7. The DS100 Base Unit will indicate that the test was successful when the device is removed
from the list on the LCD screen. This verifies that the Repeater is in communication with the
Base Unit.
To verify that the sensors are in communication with the Repeater, complete the walk test for
each sensor as indicated in each sensor’s instruction manual.
Tamper – Faults
Faults indicate when there has been a serious issue that needs to be addressed. This could be
a number of things including an unsecured device, low battery, tamper or weak signal. By com-
pleting Device Registration, the Repeater will send status messages to the DS100 Base Unit.
If a fault is present, the system will chime and the Fault screen will be displayed. To silence the
chime, select SILENCE. To display the fault and resolve immediately, select DISPLAY. Use the
up and down arrows to scroll through the faults. Resolve the issue with the action listed in
Description of Fault Codes
chart.
TO REMOVE A TAMPER FAULT
1. Select CLEAR.
2. Use the keypad to enter the master code.
3. Select OK.
Specifications
Power
120 V AC into power supply
Battery capacity
1800 mAH @ 3.7 V typical
Battery backup life
up to 18 hours
Operating temperature
-18˚ to 60˚C (0˚ to 140˚F)
Charger operating temperature
0˚ to 40˚C (32˚ to 104˚F)
Cleaning
Use only mild soap and a damp cloth to clean the unit. Many household cleaners contain chem-
icals which could seriously damage plastic. Also, do not use gasoline, turpentine, lacquer or paint
thinner, dry cleaning fluids or similar products. Never let any liquid get inside the unit; never
immerse any part of the unit into a liquid.
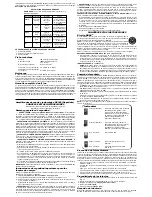
Fault Code Fault Display
Description
Action
DevPower
Primary Power
No external
Check plug,
Lost Device #
power
check power supply
or restore power
DevLowBatt
Low Battery
Device battery
Check plug,
Device #
low
check power supply
or restore power
to recharge battery
WeakSig
Weak Signal Transmission signal Check for interference;
Device #
from device is weak
move device
NoCheckIn
No Check In
Device check-in
Check for interference;
Device #
messages have
move device
not been received
Tamper
Tamper
Device has been
Close device or
opened or damaged
replace if damaged
DESCRIPTION OF FAULT CODES
NOTE:
Fault codes are generated only if the DS380 is registered.
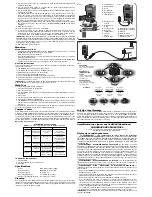
FIG. 1
FIG. 2
C
B
D
A
E
E
up to 2000'
jusqu'à 610 m
hasta 610 m
(610m)
(2 000 pi)
(2000')
up to 2000'
jusqu'à 610 m
hasta 610 m
(610m)
(2 000 pi)
(2000')
up to 2000'
jusqu'à 610 m
hasta 610 m
(610m)
(2 000 pi)
(2000')
RF BARRIER
(i.e., fence, trailer, structure,
metal, concrete, elevations,
etc.)
BARRIÈRE À LA
COMMUNICATION
PAR RF
(c.-à-d., clôture, roulotte,
structure, métal, béton,
élévations, etc.)
BARRERA DE RF
(p. ej., guía, remolque,
estructura, metal, hormigón,
elevaciones, etc.)
DISTANCE
FIG. 3
FIG. 4
A. Tamper Switch
B. Battery Switch
C. Cover
D. Reset Button
E. Mounting Holes
F. LED Indicators
1'
(.3m)
F
Full One Year Warranty
The D
E
WALT Jobsite Security Portable Alarm System is warranted for one year from date of
purchase. We will repair, without charge, any defects due to faulty materials or workmanship.
For warranty repair information, visit www.dewalt.com or call 1-877-SITELOCK (1-877-748-
3562). This warranty does not apply to accessories or damage caused where repairs have been
made or attempted by others. This warranty gives you specific legal rights and you may have
other rights which vary in certain states or provinces.
Amplificateur de signal sans fil DS380 (Répétiteur)
CONSERVER CES DIRECTIVES
Ce mode d'emploi contient d'importantes directives de sécurité et
d'utilisation à propos du bloc d'alimentation.
Règles de sécurité générales
AVERTISSEMENT : Lire, comprendre et suivre toutes les directives
précisées de ce mode d'emploi
y compris les consignes de sécurité afin d'éviter
les risques de chocs électriques, d'incendie, de dommages à la propriété et/ou de
blessures corporelles graves, voire la mort. De plus, lire et suivre toutes les directives,
consignes et avertissements fournis avec le système d'alarme de sécurité portatif de
chantier DS100.
AVERTISSEMENT : BLESSURES GRAVES OU FATALITÉ.
Ne pas utiliser ce système
dans des zones dangereuses. Ces zones comprennent les zones de dynamitage et les milieux
potentiellement déflagrants. Des étincelles dans de telles zones pourraient provoquer une
explosion ou un incendie pouvant engendrer des blessures corporelles, voire même la mort.
Ces zones comprennent mais ne sont pas limitées aux zones de ravitaillement comme les
stations d'essence; les installations pour le transfert ou l'entreposage de carburant ou de
produits chimiques; les véhicules qui utilisent du gaz de pétrole liquéfié (comme le propane et
le butane); les zones où l'atmosphère est chargé de produits chimiques ou de particules comme
du grain, des poussières ou des poudres métalliques; et toute autre zone qui exige la mise à
l'arrêt du moteur d'un véhicule.
AVERTISSEMENT : BLESSURES GRAVES OU FATALITÉ.
Lors de l'utilisation de tout
type d'appareil élévateur ou de levage (c.-à-d., échelle), s'assurer de lire et de comprendre le
mode d'emploi et toutes les précautions de sécurité relatives à cet appareil.
AVERTISSEMENT : PILES – D’EXPLOSION, DE BLESSURE OU D’INCENDIE.
Le
répétiteur possède une pile au lithium-ion. Suivre soigneusement toutes les directives de ce
mode d'emploi.
•
Ne pas jeter le DS380 ou sa pile dans un feu. Retourner l'appareil à un centre de réparation
D
E
WALT pour le recyclage.
•
La pile peut exploser dans un incendie. Des vapeurs et des matières toxiques peuvent se
produire lorsque les piles au lithium-ion sont brûlées.
•
Ne pas broyer, plier, déchiqueter, perforer ni déformer le DS380 et sa pile.
•
Si le contenu de la pile entre en contact avec la peau, laver immédiatement la zone
touchée au savon doux et à l'eau. Si le liquide de la pile entre en contact avec les yeux,
rincer l'œil ouvert à l'eau pendant 15 minutes ou jusqu'à ce que l'irritation cesse. Si des
soins médicaux sont nécessaires, l'électrolyte de la pile est composé d'un mélange de car-
bonates organiques liquides et de sels de lithium.
•
Le contenu des cellules de pile ouvertes peut provoquer une irritation respiratoire. Exposer
la personne à de l'air frais. Si les symptômes persistent, obtenir des soins médicaux.
IMPORTANT :
Mettre l'interrupteur en position d'arrêt (O) pour désactiver la pile avant le
transport du DS380.
A. Interrupteur de
sécurité
B. Interrupteur de
la pile
C. Panneau avant
D. Bouton de
réinitialisation
E. Trous de
fixation
F. Voyants DEL
A. Interruptor de seguridad
B. Interruptor de la batería
C. Cubierta
D. Botón de reinicio
E. Orificios para montaje
F. Indicadores LED

