28
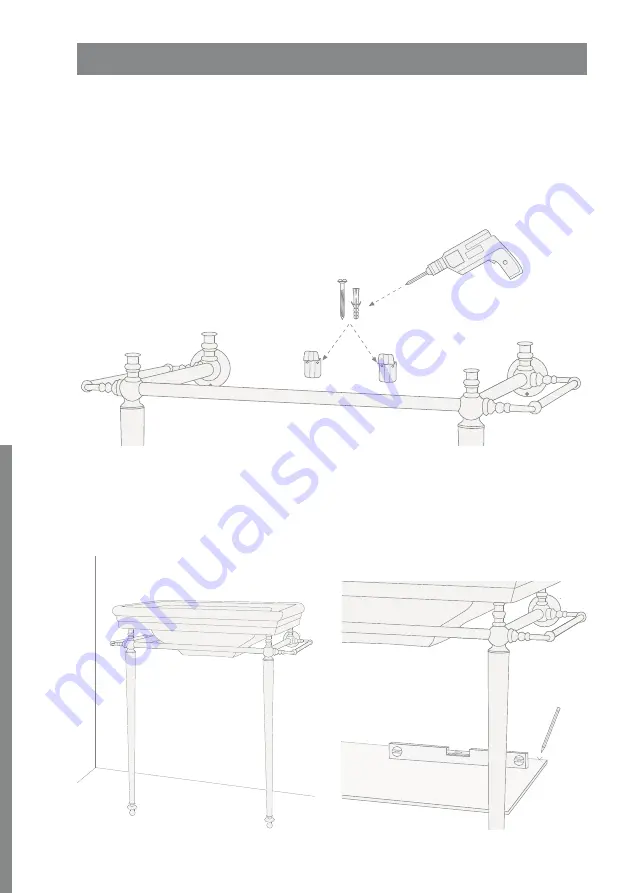
13)
Nun kann das Waschbecken beiseite gestellt werden, um
die Wandlöcher der Zeichnung entsprechend anzubringen. Jetzt
werden die Tragebügel montiert. Dübel und Schrauben, die der
Befestigung dienen, werden nicht mitgeliefert.
14)
Positionieren Sie das
Waschbecken erneut und setzen
Sie den hinteren Teil zwischen
Bügel und Wand.
15)
Legen Sie die Glasplatte auf
die Auflagen an den Beinen und
zeichnen Sie mit Hilfe einer
Wasserwaage die Wandlöcher
für die Halterungen an (J).
Содержание Etoile Console
Страница 11: ...10 17 Applicare il silicone tra il lavabo e il muro 18 Al termine la consolle dovrebbe apparire come mostrato...
Страница 21: ...20 17 Apply silicon between the basin and the wall 18 Once you have finished the console should look as shown...
Страница 52: ...51 P Y C A B C D 6 E F Devon Devon Devon Devon Devon Devon 21 22 23 24 25 26 7 8 1 2 3 4 5 6 7 8 A B D F E C...
Страница 53: ...52 A x1 B x1 C 4 D x2 E 2 F 2 G 2 H 2 I x2 J x2 A B C x4 D E F G H I x4 J...
Страница 54: ...53 P Y C K 1 L S 2 K L Devon Devon...
Страница 55: ...54 1 2 D...
Страница 56: ...55 P Y C 5 3 F E 4 6...
Страница 57: ...56 8 7 4 9 10 G...
Страница 58: ...57 P Y C 11 Etoile K 12 S L 2...
Страница 59: ...58 13 14 15 J...
Страница 60: ...59 P Y C 16 I...
Страница 61: ...60 17 18...


