6
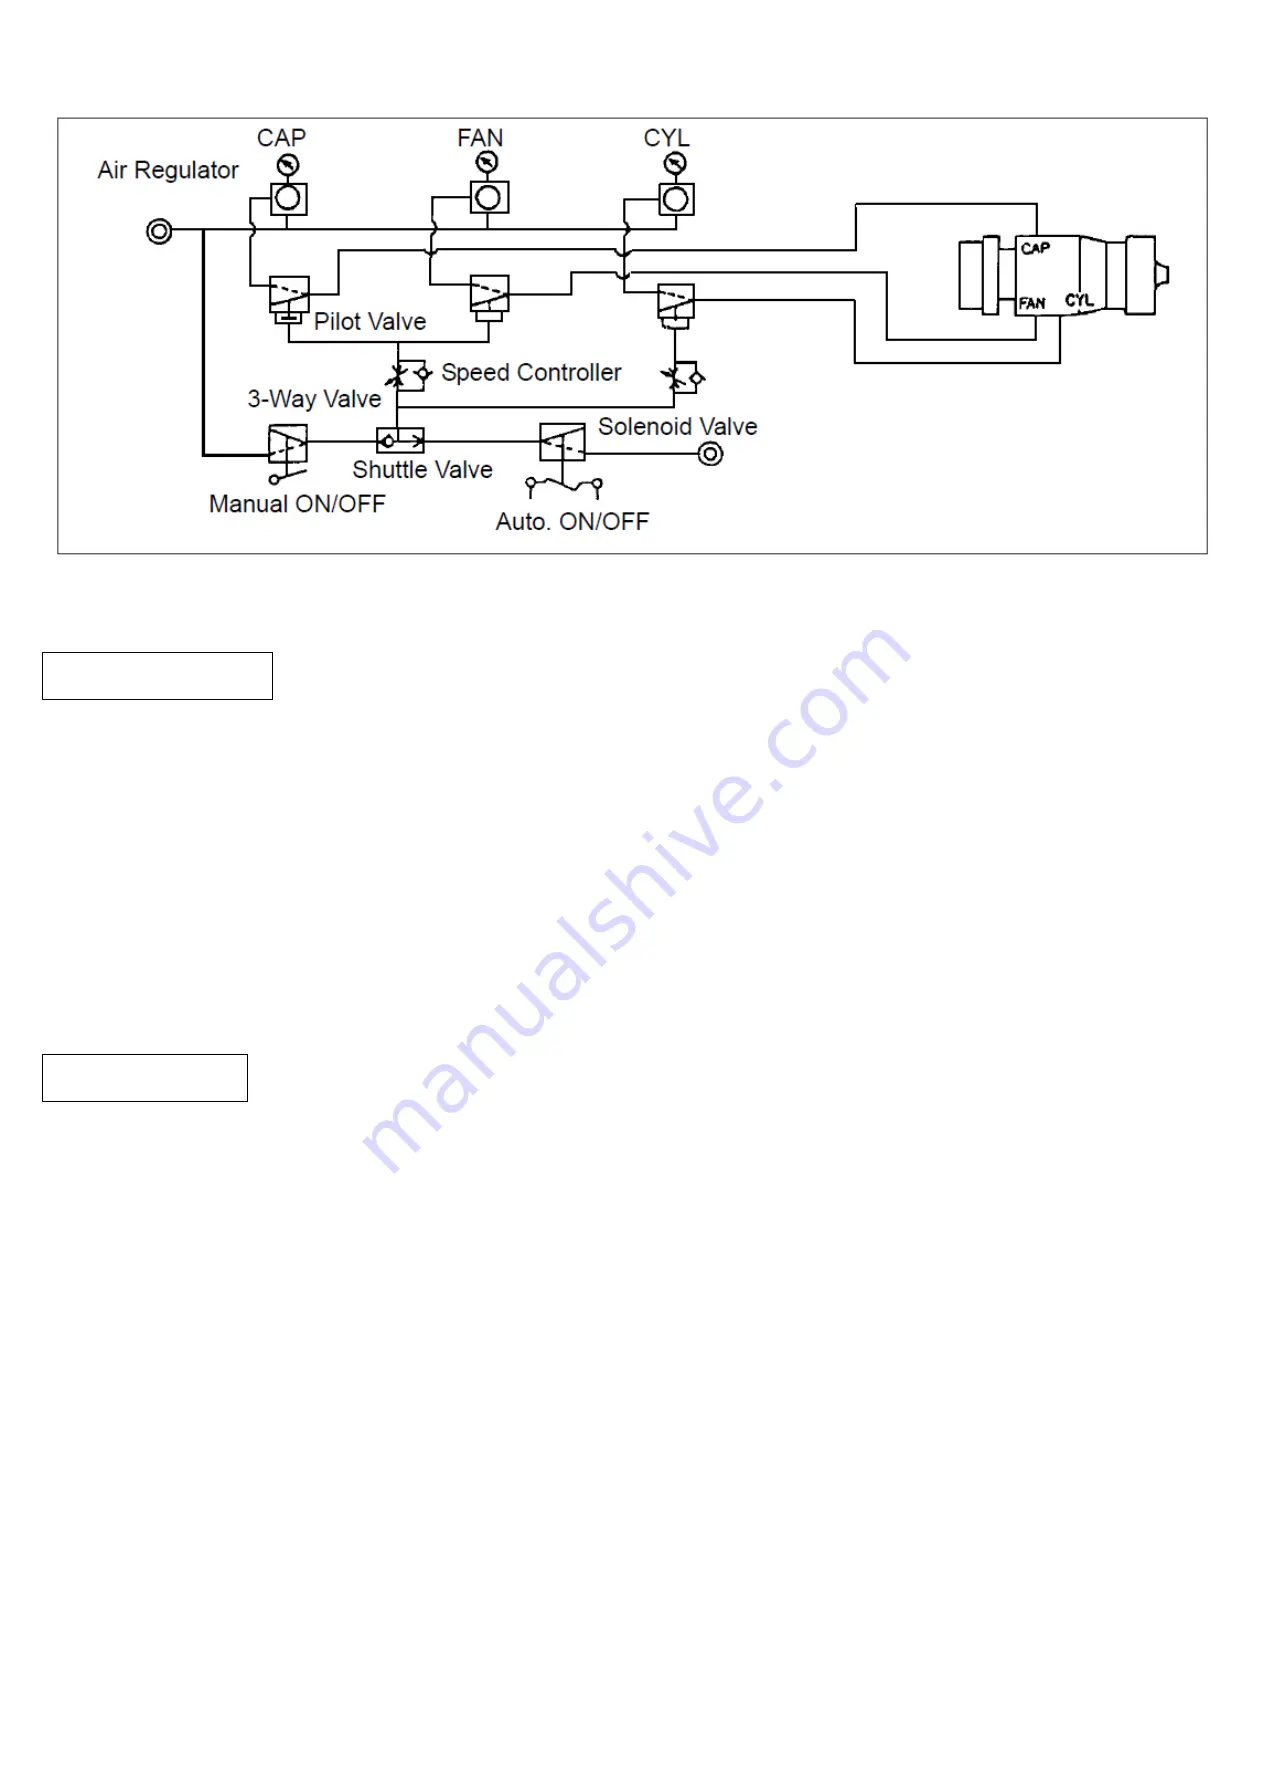
Figure 2. Installation
Mount the gun with the stud (Ø19) or tighten with Manifold (14) 8.2mm whole.
CAUTION:
The air supplied to the gun should be clean air that removed any impurities.
OPERATION
1. Mix, prepare and strain the coating material to be sprayed according to paint manufacturer’s instructions.
2. Adjust the CYL air at 0.34~0.49Mpa.
3. When the adjustable type is used, turn the Adjusting Screw counter-clockwise about 4.0 turns from fully closed position to
make it fully opened (where it lightly bumps against). Do not turn it more than that.
4. Adjust the CAP/FAN air at about 0.20Mpa.
5. Adjust fluid air at about 0.07Mpa~0.1Mpa.
6. Turn on CYL air and test spray. Adjust fluid and air pressure until desired pattern is obtained. Control fluid pressure at
source supply. Always attempt to keep CAP pressure as low as possible to minimize overspray.
WARNING
Risk of injury. Equipment and fluid may be under pressure. Pressure in the system must be relieved before beginning the
cleaning procedure and before replacing any parts. Follow the procedures in the literature provided with the system.
CLEANING
1. Please follow the instruction manual for the pressure tank or the feed pump to clean the supply equipment.
2. Supply gun with thinner from that supply equipment or another supply device.
3. Turn on CYL air and clean the fluid passages until the thinner comes out clean and clear. Quick Cleaner which supplies a
mixture of air and solvent can be used to improve cleaning efficiency and save solvent. See “ACCESSORIES” for Quick
Cleaner. Wipe gun exterior with a solvent dampened cloth.
4. When the gun is used in a paint circulation system, it may be necessary to design a system in which the paint return line
will be shut off temporarily in order to clean the forward portion of the gun.
CAUTION
Do not totally submerge gun in solvent. It is possible to damage the inside of the gun with solids.
CAUTION
The air cap can be immersed in solvent for cleaning. If orifices are clogged, use a cocktail stick or toothpick to remove
obstruction. Never use a steel wire or hard instrument. This will damage air cap and result in a distorted spray pattern.


