This Quick user guide will make the installation of
the DB3012 - Advanced DAB/DAB+ & IP Audio
Confidence Monitoring Receiver
quick and easy
. Follow
these
steps
to
simplify the process and save
you
rself
extra time and effort.
For more information about the Safety precautions and the Operating
environment recommendations please refer to the User Manual.
A standard web browser can be used to monitor DB3012's status or to make some adjustments. There
are two options for access to the WEB Interface: through manual identification of the IP address of the
device, and alternatively through the Network discovery option.
(
For Windows 7
and above
users only
).
Both are explained in details below.
WEB Interface
STEP 3
Connect the device to a local network or to the Internet by
a
LAN cable.
Through
the Front panel
navigational menu
pressing the
[
OK
]
button will
enable you to
enter the device main menu.
Manual IP Address Identification
STEP 3.1
Depending on your preferences, DEVA's confidence monitor can be configured in two methods :
1.
Through t
he very intuitive user interface
with OLED screen, front panel navigational and soft
buttons ensures an easy usage of the device's build-in features
;
2.
Through
the built-in Web server
– you can use a standard web browser to monitor the status or to
make some adjustments. iOS and Android devices are also supported
.
For more information about the Front panel navigational menu
,
please refer to the User Manual
which can be found on www.devabroadcast.com/downloads
Configuration
STEP 1
1.
Install the unit on its operation place;
2.
Before connecting the AC Power, make
sure
that the fuse rating is in accordance with the mains
supply at your location. DB
3012
Power Supply Factory Settings are: 100-240
VAC; 1Amp Fuse.;
3.
Connect the antenna cable to the RF antenna input connector located on the rear panel of the device;
4. Connect the LAN Cable to the Ethernet connector placed on the rear panel of the device;
5.
If you prefer so, p
lug the headphones into the front panel jack
while setting the device, if not the audio
received will be heard through the built-in speakers;
6.
U
s
ing
the
[
LEF
T]
or
[
RIGHT
]
Navigational Buttons
or WEB Interface set the
FM
station
(s)
and IP Audio
URL(s)
that
you would like to monitor. For further information on the procedure, please refer to
Step 4
.
Device Connection
STEP 2
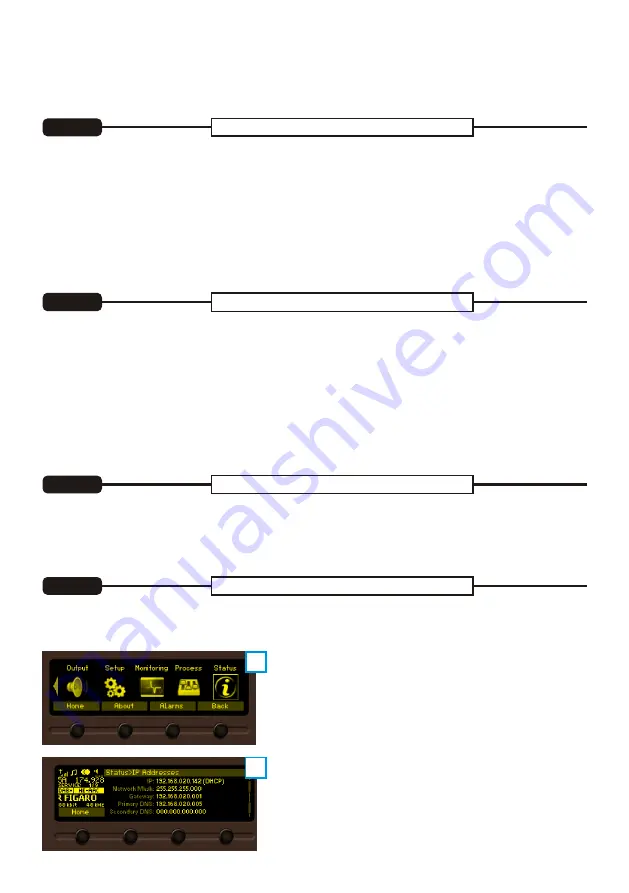
Using the
[
RIGHT
]
navigational button find the
Status
section
located
at the end of the Menu
.
P
ress the
[
OK
]
Button to enter the
Status
s
ection
and
then
press the
[
DOWN
]
button.
(
A
)
This operation will
visualize
the screen
containing
information about the IP Address of the device.
(B)
A
A
B
B


