


Network discovery is a network setting that
defines
whether your computer can see (find) other
computers and devices on the network and whether other computers on the network can see your
computer. By default, Windows Firewall blocks network discover
y
but you can enable it.
1.
Open Advanced sharing settings by clicking the
[
Start
]
butto
n
, and then
on "
Control Panel
"
. In the
search box, type
"
network
"
, click
"
Network and Sharing Center
"
, and then, in the left pane click
"
Change advanced sharing settings
";
2.
S
elect
your current network profile
;
3.
Click
Turn on network discovery
, and then click Save changes
.
If you're prompted for an
administrator password or confirmation, type the password or provide confirmation.
4.
To access the device open a new Explorer bar and click on
Network
. If you have successfully enabled
the network discovery option, the device will be
displayed
. Double click on
the device's icon
will open a
new WEB browser window requiring
u
sername and password.
(
For more information refer to
Step
3.3
)
NOTE:
If you have already enabled this function on your computer just open a new Explorer bar and click
on
Network
. The device must be
displayed
. If not follow the instructions from
Step
3.1
or
Step 3.2
Network discovery for Windows 7
STEP 3.2
WEB Access
STEP 3.3
DB3010
provides you with
a
protected access to the device settings. You can choose between two
types of log in:
1. As an
ADMINISTRATOR
– which will give you full control over the settings (username:
admin
,
password:
pass
);
2. As
a
USER
– this type of log-i
n
will allow you to monitor the device and choose different stations
without applying setting
s
(username:
user
, password:
pass
).
In order to make the necessary adjustments to the device
,
please log in as
ADMINISTRATOR
.
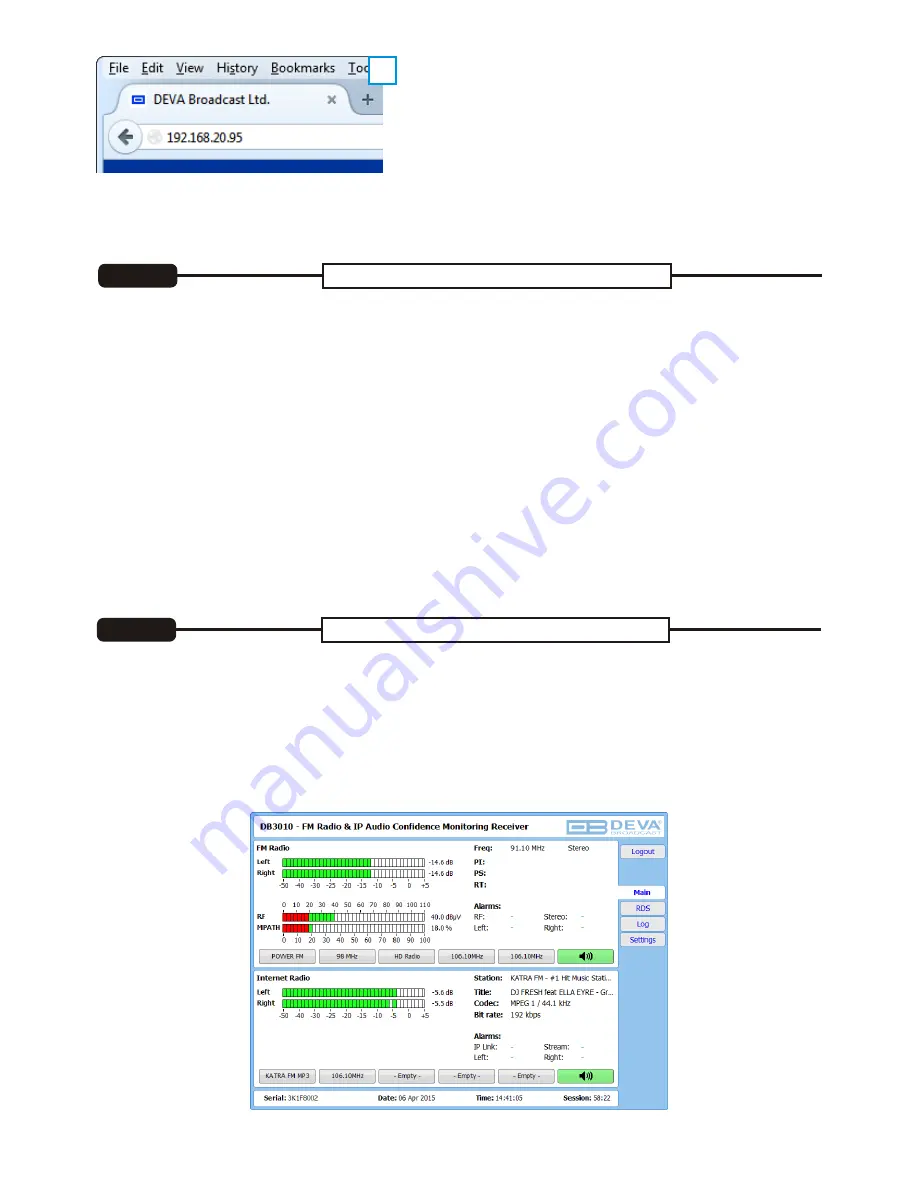
C
Open a new WEB Browser and enter the device IP
address in the address field then press
[
Enter
]
.
A window
that
requir
es
username and password will
appear. (
For more information refer to
Step
3.3
)
(
C
)
NOTE:
Due to the inability of some WEB Browsers to read the IP address format displayed on the screen
of the device, the numbers included in the IP Address must be written without the leading zeros.
For example:
192.168.020.0
95
must be written as
192.168.20.
95
After successful log in the Control Window will look like this
.


