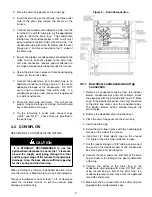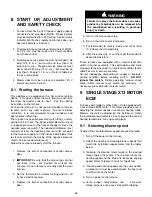
3. Place the gasket on the drain trap.
4. Screw the drain trap in place with 2 self-tapping
screws to the side of the furnace.
5. Install two 1/2” black caps on the unused inlets of
the drain trap inside the furnace.
6. Connect a small length of 5/8" condensate tubing
to the condensate box and route with an elbow to
the drain trap. Make sure it can drain properly.
7. Connect the outlet of the drain trap to the
condensate drain piping with a tee.
DO NOT
vent using the remaining 3 inlets. If a condensate
pump is used, make sure it is approved for acidic
condensate.
8. Prime the drain trap with water. This will ensure
proper furnace drainage at startup and will avoid
any recirculation of flue gas.
9. On the remaining 5 inlets, connect black caps
(1x5/8" and 2x1/2"). These caps are provided in
the parts bag.
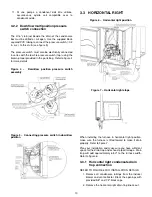
3.3.2
Horizontal right multiposition
pressure switch connection
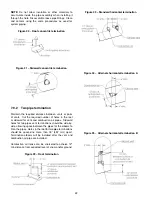
Figure 8 –
Horizontal right pressure switch
connection
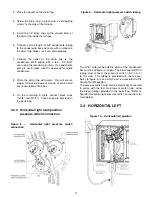
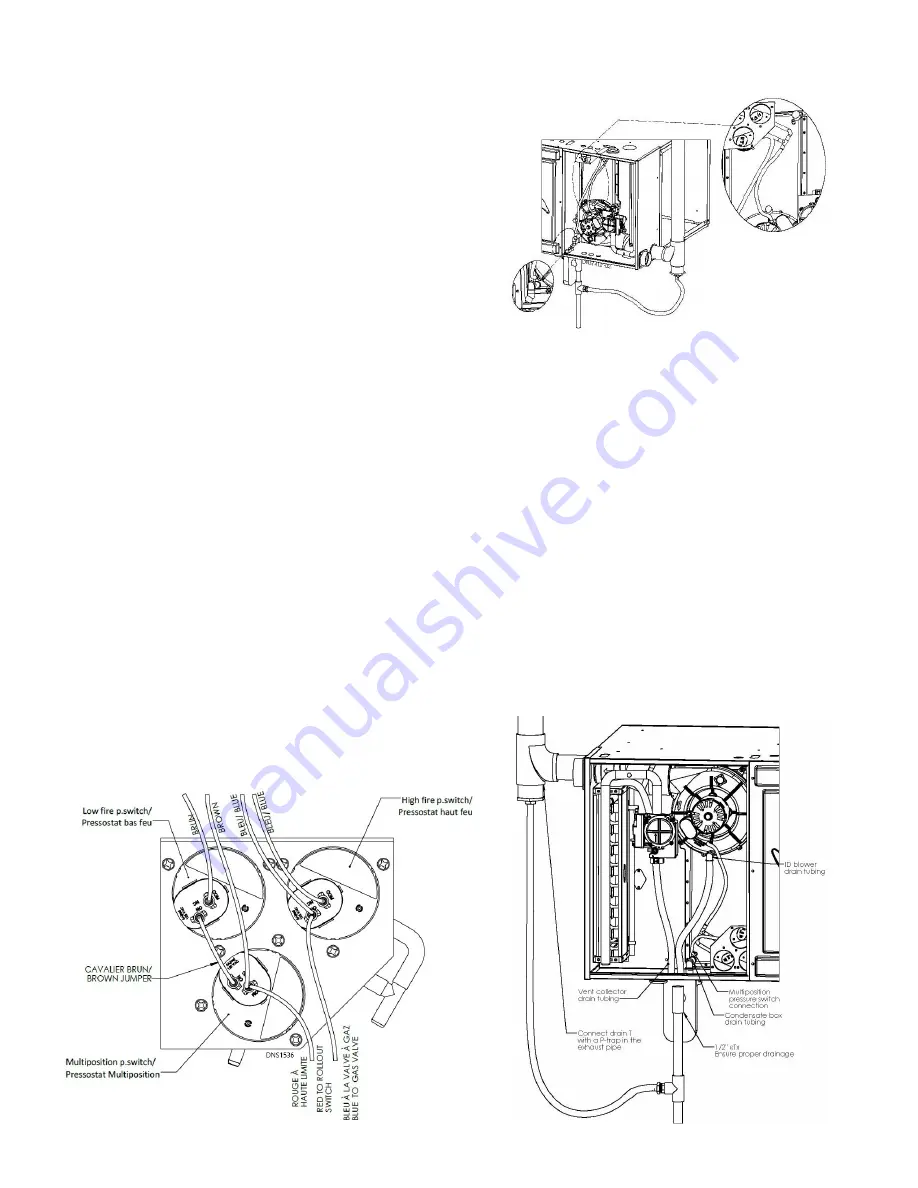
Figure 9 – Horizontal right pressure switch tubing
The 3/16" stub just beside the drain of the condensate
box must be drilled or cut open. The black squared PVC
tubing must connect the pressure switch (-0.2 in w.c.)
to this stub. This tubing is provided with the furnace.
Refer to figure 6 to see which port is associated to the
horizontal right position.
The pressure switch must also be electrically connected
in series with the low fire pressure switch (top) using
the brown jumper provided in the parts bag. Refer to
figure8 (Horizontal right pressure switch connection) for
more details.
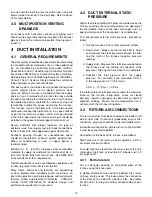
3.4
HORIZONTAL LEFT
Figure 10 – Horizontal left position
11
Содержание C105-1-D
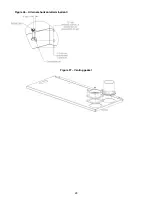
Страница 24: ...Figure 26 Alternate horizontal termination C Figure 27 Venting gasket 23...
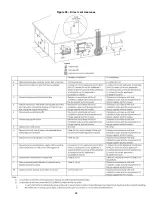
Страница 25: ...Figure 28 Direct vent clearance 24...
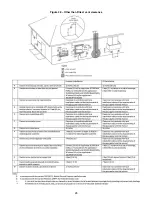
Страница 26: ...Figure 29 Other than Direct vent clearance 25...
Страница 34: ...Figure 32 Single Stage PSC Wiring diagram...
Страница 35: ...Figure 33 Two Stage PSC Wiring diagram...
Страница 36: ...Figure 34 Single Stage ECM Wiring diagram...
Страница 39: ...Figure 35 Dimensions 38...
Страница 40: ...Figure 36 Exploded view CXX 1 X part 1...
Страница 41: ...Figure 37 Exploded view CXX 1 X part 2...
Страница 43: ...Figure 38 Exploded view Cxx 1 D part 1...
Страница 44: ...Figure 39 Exploded view Cxx 1 D part 2...
Страница 46: ...Figure 40 Exploded view Cxx 2 D part 1...
Страница 47: ...Figure 41 Exploded view Cxx 2 D part 2...


