


2 Peripherals and options
48
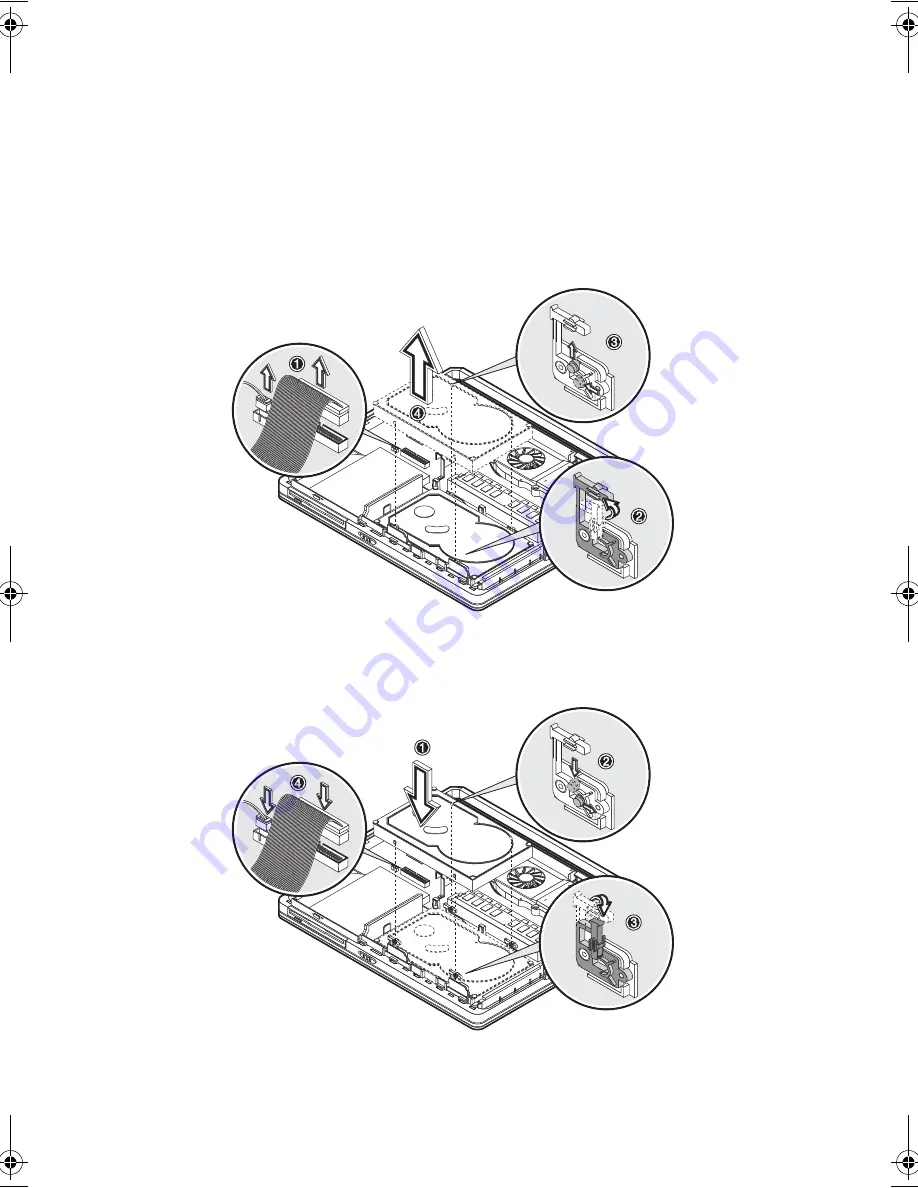
Hard disk
To upgrade the hard disk, follow the instructions below:
1.
Follow the instructions in “Opening the computer” on page 44.
2.
Disconnect the power connector and signal cable (1); lift the four rubber locks
holding the hard disk (2); slide out and lift up the old hard disk as shown in
the illustration below (3, 4).
3.
Carefully place the new hard disk along the four rubber locks as shown in the
illustration below (1, 2); flip down the four rubber locks to hold the hard disk
in place (3); plug the power connector and the signal cable (4).
Jaguar2-e.book Page 48 Tuesday, June 17, 2003 5:27 PM
Содержание B165
Страница 1: ...DeskBook B165 User s guide...
Страница 4: ...iv...
Страница 12: ...Contents xii...
Страница 13: ...1 Getting familiar with your computer...
Страница 41: ...29 To use the fax data modem port connect a phone cable from the modem port to a telephone jack...
Страница 45: ...2 Peripherals and options...
Страница 71: ...3 Moving with your computer...
Страница 72: ...This chapter gives you tips and hints on things to consider when moving around or traveling with your computer...
Страница 77: ...4 Software...
Страница 78: ...This chapter discusses the important system utilities bundled with your computer...
Страница 85: ...5 Troubleshooting...
Страница 93: ...A Specifications...
Страница 94: ...This appendix lists the general specifications of your computer...
Страница 97: ...85 Additional AC adapter 802 11b USB module Upgradeable VGA on daughtercard...
Страница 98: ...A Specifications 86...
Страница 99: ...B Notices...
Страница 100: ...This appendix lists the general notices of your computer...


