www.deponti.com Assembly Manual
– Pinela Deluxe Pergola page
22
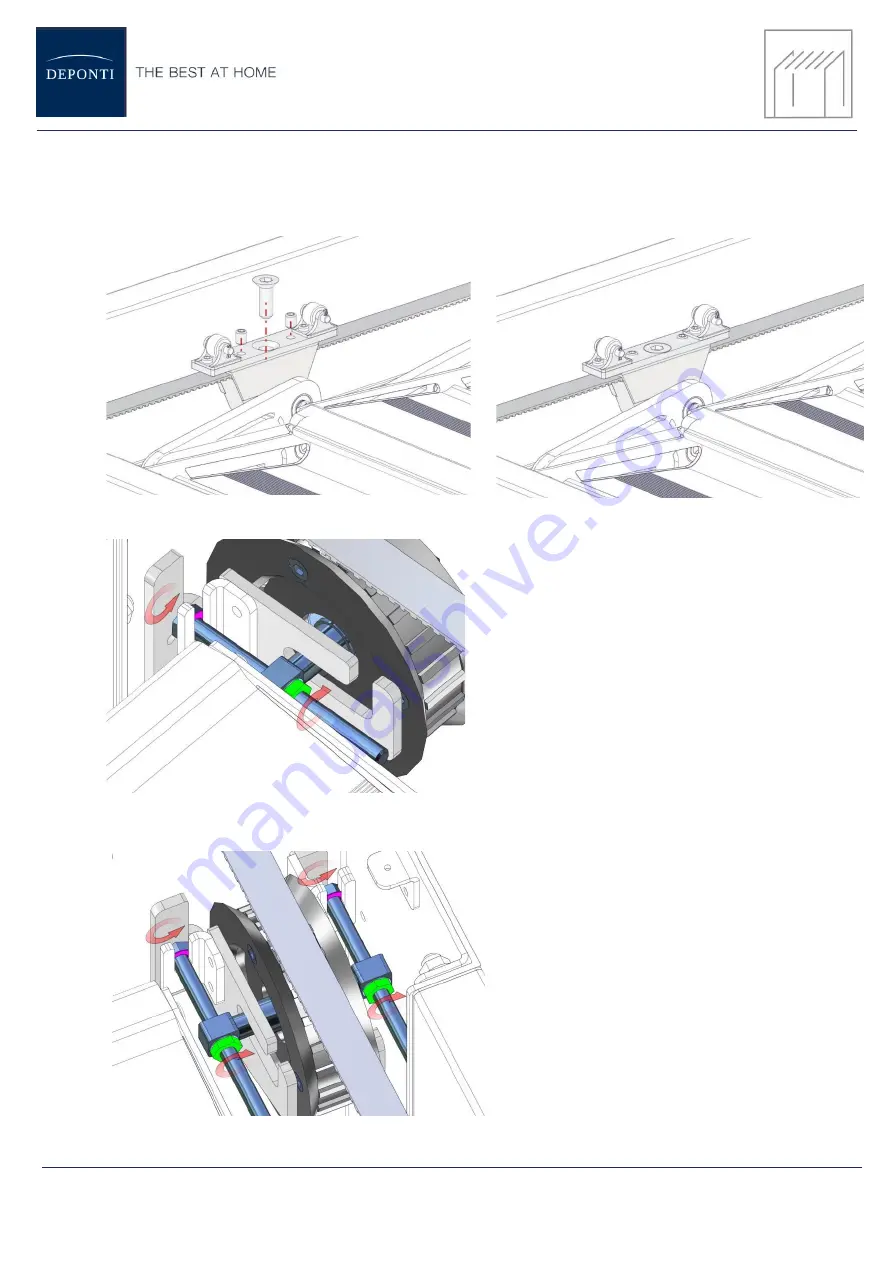
2
. Fasten the brackets with a stay bolt and countersunk head bolt.
3.
Rail belt stretching; This bolt ensures the tension on the belt is adjustable
4.
Make sure there is the same stretch level of the belt on both sides.


