background image


VER DY20130812RPIF-EN   

13


 Figure 7 


Figure 8


SECTION 5: OPERATION 
 

Touch-screen key and traditional button control are both available! 


VER DY20130812RPIF-EN   

14


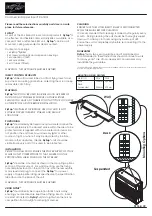
1. The plug of the probe wire should be completely inserted into the 
socket on the right side of the control part.   
Note: Do not pull out the probe wire by taking the wire instead of 
catching hold of the plug to avoid breaking down the probe


wire. 


2. Please connect file holder to probe wire and insert the stainless 
electrode hook into the socket.   


3. Extended pressing power on/off button, 
 Note: Extended pressing power on/off button for 2 seconds to turn 
on/off the device.   
4. Clip the metal part of the endodontic file with the holder, then insert 
the file into the teeth. 
5. Hang the stainless hook up at any side of the suffer’s mouth, insert 
the file into the teeth, when the endodontic file reaches the position 
which the number indicated in the color screen is 0.5mm. Then please 
fasten the file with the rubber positioning ring on the reference point of 
the tooth crest. And this means that the file has reached the position 

Содержание iFinder

Страница 1: ...RMATION Apex Locator iFinder is manufactured by DENJOY DENTAL CO LTD Address 4th Floor A3 Building Lugu International Industry Park No 229 Tongzipo Road West Changsha City P R China 410205 Website www...

Страница 2: ...angle Up to date multi frequency operating system Rechargeable do not need prepare extra battery III SYMBOL DESCRIPTIONS The following symbols may appear in this manual on the label or on it s accesso...

Страница 3: ...5V 1A Battery 3 7V 2200mAh 3 Display mode 4 3 inch TFT 480 272 color screen 4 Dimensions 132 120 31mm 5 Weight about 500g 6 Classification Internally powered equipment 7 Degree of protection against...

Страница 4: ...mation OK key 10 Length between top of file and the apex of root canal 11 Scale displaying the magnified apex area 12 Apical Area Adjustment cursor a Save key VER DY20130812RPIF EN 8 On the Main Inter...

Страница 5: ...uch sound adjuster user can select required volume level after adjustment touch enter key if as shown in Figure 4 it means set up successfully Please note no operation for 10 seconds it will automatic...

Страница 6: ...n Figure 5 it means self checking successfully Otherwise if as shown in Figure 6 it means self checking unsuccessfully VER DY20130812RPIF EN 12 Figure 5 Figure 6 b Calibration key for accessories prob...

Страница 7: ...wire and insert the stainless electrode hook into the socket 3 Extended pressing power on off button Note Extended pressing power on off button for 2 seconds to turn on off the device 4 Clip the meta...

Страница 8: ...at the power of the battery is in sufficient supply to guarantee the correct VER DY20130812RPIF EN 16 measurement result When change the battery do not mix the old battery with the new one and mix the...

Страница 9: ...ON 7 TOUBLESHOOTING GUIDE Question After switch on the machine the LCD screen has no reaction Answer a Check that the machine if it need to be changed VER DY20130812RPIF EN 18 Question No alert Answer...

Страница 10: ...INSTRUCTION When the surface of main body is polluted please rub the surface with dry soft cloth ONLY REMARKS Any liquid lotion like ethanol banana oil and light oil are not allowed PROBE WIRE CLEANIN...

Страница 11: ...VER DY20130812RPIF EN 21 WARRANTY REGISTRATION FORM Item Name Model Name Serial No Date of Purchase Name Address Phone Email Name of Distributor Authorized Distributors Stamp and Signature...

Отзывы: