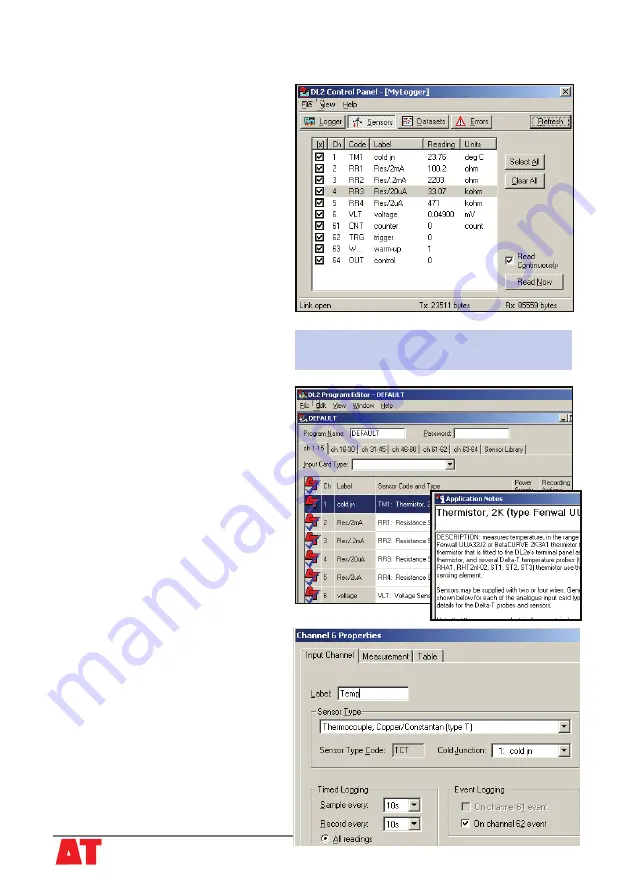
Check readings via the DL2 Control Panel
© 2006 Delta-T Devices Ltd
v1.1 Page 7
Sensors panel showing real-time readings from
the Tutorial Kit using DEFAULT logging
1. Wait until the logger sleeps before
you try to communicate via the PC.
2. Double click on the
My Logger
desktop icon to open the
DL2
Control Panel.
3. Click
Sensors
in the
DL2 Control
Panel.
4. Enable
Read Continuously
and
click
Select All,
and
Read Now.
5. Touch the thermocouple tip and
observe channel 6. The sensitivity is
~ 0.04 mV/°C temperature difference
between the thermocouple junction
and the cold junction.
Note: The resistors supplied are ±1%
so readings may differ a little from
the nominal values.
6) Reprogram the
Logger
1. On the
Logger
panel of the
DL2
Control Panel
click
Retrieve
to
upload a copy of the existing
DEFAULT
program in the logger.
An
Application Notes
box also
opens.
2. Examine the
ch 1-15
tab. Each
row represents a channel.
3. You have to tell the logger which
input card is connected to each
terminal group.
Select
LAC1, 15 channel
.
4. Double click on channel 6 to open
the
Sensor Type Properties
dialog.
5. From the
Sensor Type
drop
down list on the
Input Channels
tab,
select
Thermocouple: Copper
Constantan (type T)
.
6. Type in a new label of up to 8
characters e.g. “Temp”.
7. Select channel 1 for the
Cold
Junction Channel
.
(A cold junction is needed by all
thermocouples. A built-in thermistor
is provided on channel 1).


