- 6 -
- 7 -
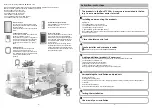
Installing and mounting the products
1
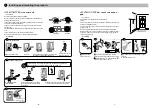
1.3 DMB TYXAL+ motion detector
DMB TYXAL+ uses infrared (heat) to detect any moving presence in the room. It has 2 removable lenses:
- no. 1: standard (fi tt ed on the product supplied).
- no. 2: animal immunity (does not detect animals of a certain size,
or household appliances such as robot vacuum cleaners).
• Location
The moti on detector must preferably be placed in a corner:
- prevent any source of heat or moti on of a hot body nearby (convector, fi replace, ...),
- the fi eld of detecti on must be clear of any obstacles (curtain, cupboard, etc.),
- the detector must not be pointi ng at an opening to the outside (window),
- you can cross the beams of 2 detectors,
- the detector must be installed between 2.20 m and 2.40 m from the fl oor.
For a greater height, use a RO DMB ball joint
(unless with the animal immunity lens).
- For opti mum use, the room must be clear and larger than 9 m² (3 x 3).
• Field of detection/Restrictions
The diff erence between body temperature and room temperature can aff ect detecti on sensiti vity. Detecti on with the stan-
dard lens is more sensiti ve than with the animal immunity lens.
The sensiti vity can be adjusted according to three levels
A
,
B
,
C
.
. This enables bett er adaptati on to various types of ani-
mals or unti mely detecti ons to be corrected (sensiti vity
A
by default).
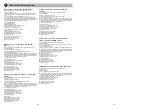
• Animal immunity
Zone not authorised for animals
Zone authorised for animals
≤
than 10 kg
Zone authorised for animals (see details A1, A2, A3)
If there are several animals, add their weights together.
Example 1: A French bulldog that weighs 15 kg and 30 cm in height.
It is a short-haired dog that will generate detecti on with sensiti vity
A
but
not sensiti vity
B
or
C
.
Example 2: A Bichon dog that weighs 10 kg and 30 cm in height generates
no detecti on. Sensiti vity
A
is recommended.
No.2
A1
A2
A3
Long coated
✔
✔
✔
Medium coated
✔
✔
-
Short coated
✔
-
-
Fur authorised zone A
1 m mini
!
V3,V7,V8 = Tamper alarm on opening.
Important: do not damage or lose the rubber part (required for
the tamper alarm).
30 kg
20 kg
10 kg
0 kg
0 cm
10 cm
20 cm
30 cm
40 cm
50 cm
60 cm
40 kg
50 kg
A1
A2
A3
30 kg
20 kg
10 kg
0 kg
0 cm
10 cm
20 cm
30 cm
40 cm
50 cm
60 cm
40 kg
50 kg
A1
A2
A3
30 kg
20 kg
10 kg
0 kg
0 cm
10 cm
20 cm
30 cm
40 cm
50 cm
60 cm
40 kg
50 kg
A1
A2
A3
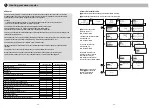
Sensitivity
B
= Standard sensitivity
Sensitivity
A
= High sensitivity (+25%)
Sensitivity
C
= Low sensitivity (-25%)
Side view
Side view
Top view
Top view
0,5m
4 m
7 m
12 m
2,30m
H
12m
10m
8m
6m
4m
2m
0m
0m
2m
4m
6m
2m
4m
6m
90°
2m
4 m
7 m
10 m
2,30m
H
10 m
8 m
6 m
4 m
2 m
0 m
0 m
2 m
4 m
6 m
2 m
4 m
6 m
90°
No.1
No.2
2m
4 m
7 m
10 m
2,30m
H
!
10 m
8 m
6 m
4 m
2 m
0 m
0 m
2 m
4 m
6 m
8 m
2 m
4 m
6 m
8 m
90°
A
B
30 kg
20 kg
10 kg
0 kg
0 cm
10 cm
20 cm
30 cm
40 cm
50 cm
60 cm
40 kg
50 kg
A1
A2
A3
C
10 m
8 m
6 m
4 m
2 m
0 m
0,6 m
1,6 m
2,3 m
≤
10 Kg
•
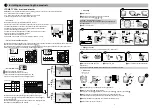
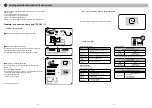
Mounting
❶
Open the unit.
❷
Mark and drill the holes according to the locati on
of the detector (see below
A
,
B
,
C
or
D
)
❸
Mount it on the wall
•
Change the lens
Example: you want to replace the standard lens by the “animal” lens.
•
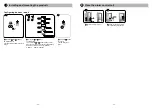
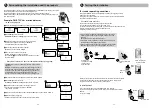
Activation
❶
Press and hold the T2 butt on while inserti ng the batt ery.
❷
Release it when the LED begins to fl ash.
Note: 1 fl ash = sensiti vity
A
(by default), 2 fl ashes = sensiti vity
B
, 3 fl ashes = sensiti vity
C
.
❸
Briefly press the T1 button to switch from one sensitivity to the other.
Note: The selecti on must be made within 8 seconds aft er the batt ery is inserted.
❹
Wait for the LED to stop flashing. The selected sensitivity is saved.
❺
Use a screwdriver to close the unit.
1
V1
V2
V3
V4
V5
V6
V7
V8
V9
V10
2
!
V6
V8
V9
V2
V3
V4
V1
V5
V7
V10
V2
V8
V9
A
B
C
D
3
Ø max = 3 mm
1
n°1
n°2
2
!
3
❶
Push the stops to lift off and re-
move the lens.
❷
Fit the new lens.
❸
Be careful not to touch the sensor
.
Do not use ball joint RO DMB (P/N: 6416221) with the animal immunity lens.
1
5
2
3
4
T2
T1
< 8 s
A
B
C
OFF
... ... ...
...
...
...
...
A
B
C
Lithium Battery - AA
LS 17500 - 3,6 V


