


108
Processor Module
11
Remove the bluetooth card (see "Removing the Bluetooth Card" on
12
Follow the instructions from step 13 to step 18 in "Removing the Top
13
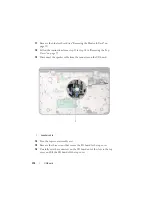
Turn the top-cover assembly over.
14
Remove the heat sink (see "Removing the Heat Sink" on page 101).
CAUTION:
To prevent intermittent contact between the ZIF-socket cam screw
and the processor when removing or replacing the processor, press to apply slight
pressure to the centre of the processor while turning the cam screw.
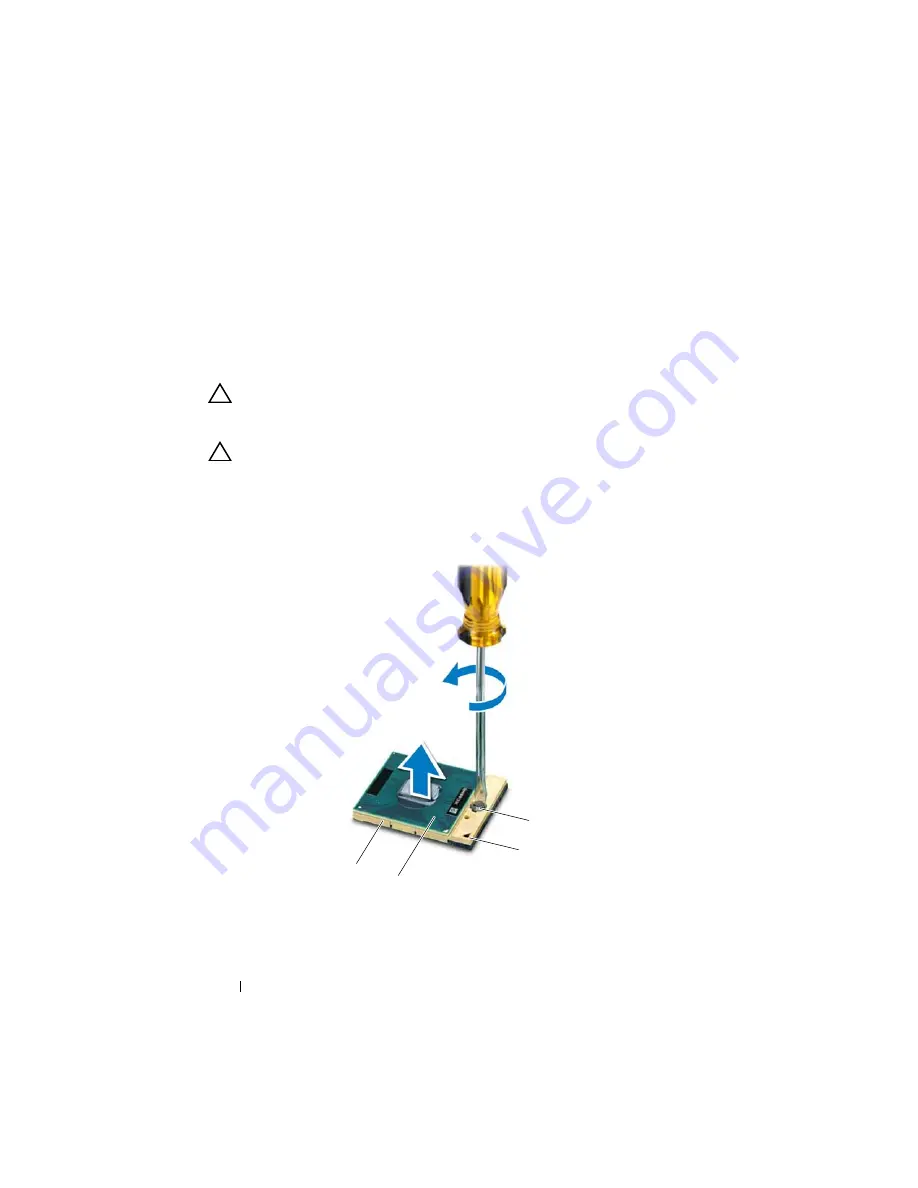
CAUTION:
To avoid damage to the processor, hold the screwdriver so that it is
perpendicular to the processor when turning the cam screw.
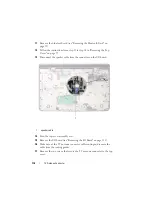
15
To loosen the ZIF socket, use a small, flat-blade screwdriver and rotate the
ZIF-socket cam screw counterclockwise until it comes to the cam stop.
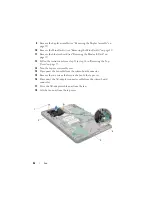
1
2
4
3
Содержание XPS L701X
Страница 1: ...Dell XPS L701X Service Manual Regulatory model P09E series Regulatory type P09E001 ...
Страница 12: ...12 Before You Begin ...
Страница 26: ...26 Wireless Mini Card s ...
Страница 32: ...32 Hard Drive s ...
Страница 35: ...Optical Drive 35 ...
Страница 36: ...36 Optical Drive ...
Страница 42: ...42 Palm Rest Assembly ...
Страница 50: ...50 Power Button Board ...
Страница 54: ...54 Coin Cell Battery ...
Страница 58: ...58 Internal Card With Bluetooth Wireless Technology ...
Страница 72: ...72 Display ...
Страница 78: ...78 Camera Module ...
Страница 81: ...Top Cover 81 16 Disconnect the subwoofer cable from the system board connector ...
Страница 86: ...86 Top Cover ...
Страница 90: ...90 Subwoofer ...
Страница 94: ...94 AC Adapter Connector ...
Страница 98: ...98 Fan ...
Страница 99: ...Fan 99 ...
Страница 100: ...100 Fan ...
Страница 104: ...104 Heat Sink ...
Страница 105: ...Heat Sink 105 ...
Страница 106: ...106 Heat Sink ...
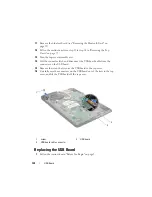
Страница 122: ...122 USB Board ...
Страница 128: ...128 System Board ...
Страница 134: ...134 Flashing the BIOS 8 Double click the file icon on the desktop and follow the instructions on the screen ...


