5. Lift the hard-drive assembly away from the chassis.
6. Remove the four screws (#6-32) that secure the hard drive to the hard-drive cage.
7. Slide the hard drive from the hard-drive cage.
Installing the 3.5-inch hard drive
Prerequisites
If you are replacing a component, remove the existing component before performing the installation procedure.
About this task
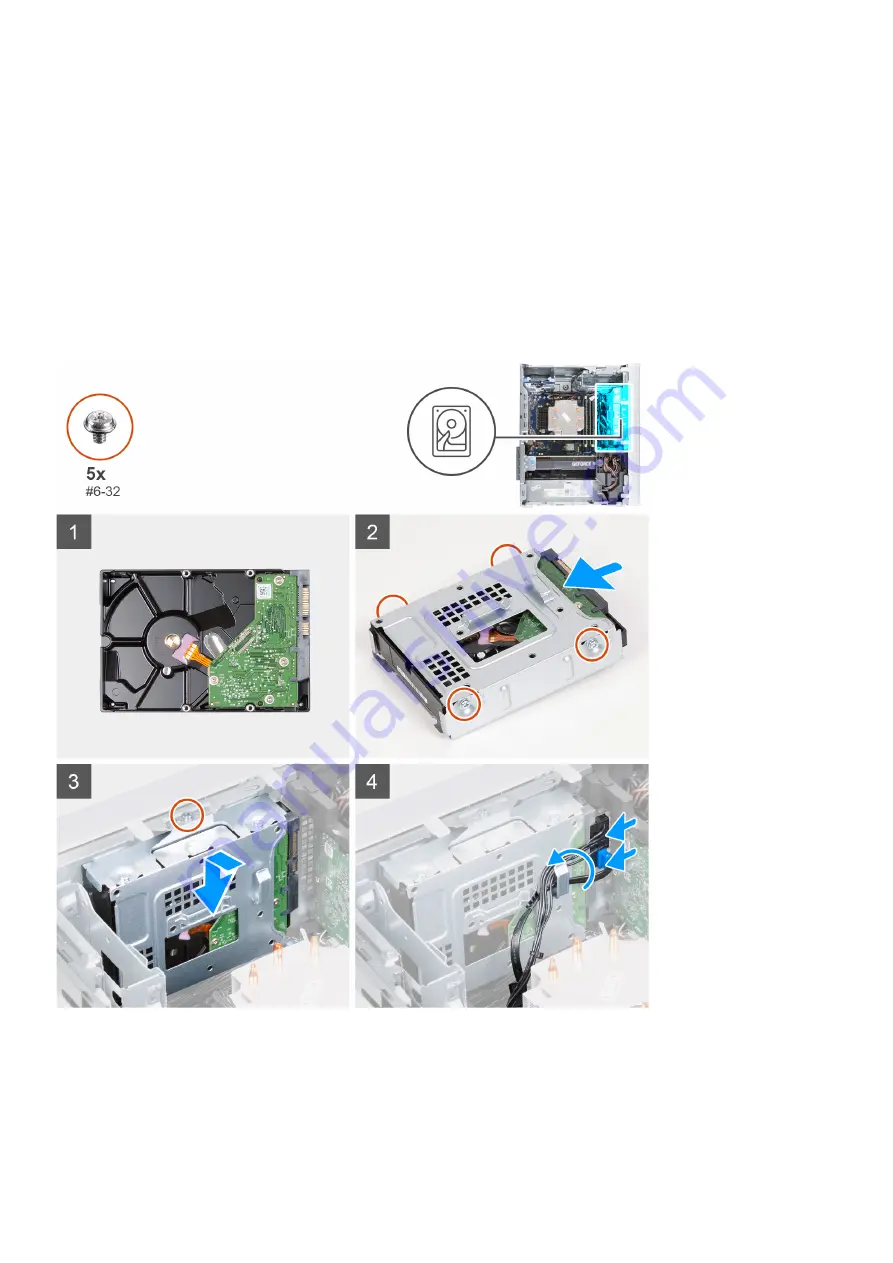
The following images indicate the location of the 3.5-inch hard-drive assembly and provide a visual representation of the installation
procedure.
Steps
1. Slide the hard drive into the hard-drive cage.
2. Replace the four screws (#6-32) that secure the hard drive to the hard-drive cage.
3. Align the hard-drive assembly with the tabs on the chassis.
4. Using the alignment post, align the screw hole on the hard-drive assembly with the screw hole on the chassis.
Removing and installing components
25
Содержание XPS 8940
Страница 1: ...XPS 8940 Service Manual Regulatory Model D28M Regulatory Type D28M003 July 2020 Rev A00 ...
Страница 5: ...Chapter 6 Getting help and contacting Dell 75 Contents 5 ...
Страница 11: ...Removing and installing components 11 ...
Страница 35: ...Removing and installing components 35 ...
Страница 41: ...Removing and installing components 41 ...
Страница 52: ...52 Removing and installing components ...


