


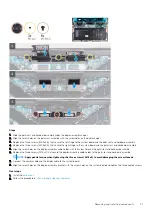
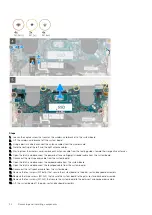
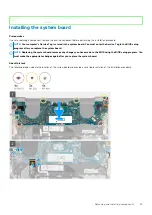


Steps
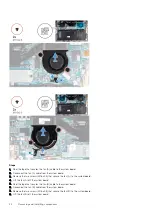
1. Align the screw holes on the fan (B) with the screw holes on the system board.
2. Replace the two screws (1.6x2.5) that secure the fan (B) to the system board.
3. Connect the fan (B) cable to the system board.
4. Adhere the tape that secures the fan (B) cable to the system board.
5. Align the screw holes on the fan (A) with the screw holes on the system board.
6. Replace the two screws (1.6x2.5) that secure the fan (A) to the system board.
7. Connect the fan (A) cable to the system board.
8. Adhere the tape that secures the fan (A) cable to the system board.
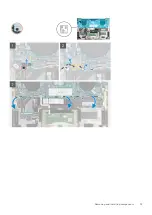
Next steps
1. Install the
.
2. Follow the procedure in
After working inside your computer
.
Identifier
GUID-4DA6FA84-FF63-4D31-A148-125AAD9F4B2B
Version
1
Status
Released
Heat sink
Identifier
GUID-A837597B-2FB9-4804-AE1E-B059B086720D
Version
1
Status
Released
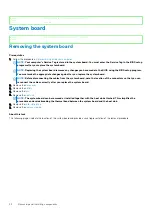
Removing the heat sink
Prerequisites
1. Follow the procedure in
Before working inside your computer
.
CAUTION:
For maximum cooling of the processor, do not touch the heat transfer areas on the heat sink. The oils in
your skin can reduce the heat transfer capability of the thermal grease.
24
Removing and installing components
Содержание XPS 13 9300
Страница 1: ...XPS 13 9300 Service Manual Regulatory Model P117G Regulatory Type P117G001 ...
Страница 12: ...12 Removing and installing components ...
Страница 13: ...Removing and installing components 13 ...
Страница 15: ...Removing and installing components 15 ...
Страница 27: ...Removing and installing components 27 ...
Страница 30: ...30 Removing and installing components ...
Страница 33: ...Removing and installing components 33 ...
Страница 53: ...3 The Bios flash menu will open then click the Flash from file 4 Select external USB device System setup 53 ...