background image

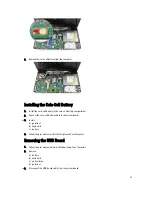
Installing the Heat-Sink Fan Assembly

1.

Place and align the heat-sink fan assembly.

2.

Tighten the captive screws to secure the heat-sink fan assembly.

3.

Connect the CPU-fan cable to the system board.

4.

Install:
a) palmrest
b) keyboard
c) battery

5.

Follow the procedures in 

After Working Inside Your Computer

.

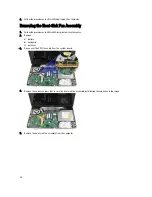
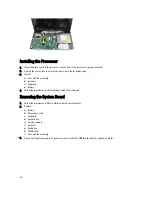
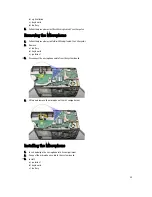
Removing the Processor

1.

Follow the procedures in 

Before Working Inside Your Computer

.

2.

Remove:
a) battery
b) keyboard
c) palmrest
d) heat-sink fan assembly

3.

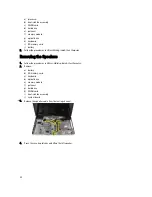
Rotate the processor-cam screw in a counter-clockwise direction.

4.

Lift up the processor and remove it from the computer.

25

Содержание Vostro 2520

Страница 1: ...Dell Vostro 2520 Owner s Manual Regulatory Model P18F Regulatory Type P18F0032 ...

Страница 2: ...ademarks or trademarks of Intel Corporation in the U S and other countries AMD is a registered trademark and AMD Opteron AMD Phenom AMD Sempron AMD Athlon ATI Radeon and ATI FirePro are trademarks of Advanced Micro Devices Inc Microsoft Windows MS DOS Windows Vista the Windows Vista start button and Office Outlook are either trademarks or registered trademarks of Microsoft Corporation in the Unite...

Страница 3: ...emoving the Optical Drive 13 Installing the Optical Drive 14 Removing the Memory Module 14 Installing the Memory Module 15 Removing the Palmrest 15 Installing the Palmrest 16 Removing the Power Button Board 17 Installing the Power Button Board 18 Removing the Hard Drive 18 Installing the Hard Drive 19 Removing the Wireless Local Area Network WLAN Card 19 Installing the Wireless Local Area Network ...

Страница 4: ...splay Panel 35 Installing the Display Panel 37 Removing the Low Voltage Differential Signaling LVDS Cable 38 Installing the Low Voltage Differential Signaling LVDS Cable 39 3 System Setup 41 Boot Sequence 41 Navigation Keys 41 System Setup Options 42 Main 42 Advanced 43 Security 43 Boot 44 Exit 44 Updating the BIOS 44 System and Setup Password 44 Assigning a System Password and Setup Password 45 D...

Страница 5: ...ching an unpainted metal surface such as a connector on the back of the computer CAUTION Handle components and cards with care Do not touch the components or contacts on a card Hold a card by its edges or by its metal mounting bracket Hold a component such as a processor by its edges not by its pins CAUTION When you disconnect a cable pull on its connector or on its pull tab not on the cable itsel...

Страница 6: ... off your computer 1 Shut down the operating system In Windows 7 Click Start then click Shut Down In Windows Vista Click Start then click the arrow in the lower right corner of the Start menu as shown below and then click Shut Down In Windows XP Click Start Turn Off Computer Turn Off The computer turns off after the operating system shutdown process is complete 2 Ensure that the computer and all a...

Страница 7: ...a network cable first plug the cable into the network device and then plug it into the computer 3 Replace the battery 4 Connect your computer and all attached devices to their electrical outlets 5 Turn on your computer 7 ...

Страница 8: ...8 ...

Страница 9: ...r Recommended Tools The procedures in this document may require the following tools Small flat blade screwdriver Phillips screwdriver Small plastic scribe Removing the Battery 1 Follow the procedures in Before Working Inside Your Computer 2 Slide the release latches to unlock the battery 3 Slide the battery and remove it from the computer 9 ...

Страница 10: ...ter 2 Press in on the SD memory card to release it from the computer 3 Slide the memory card out of the computer Installing the Secure Digital SD Card 1 Push the memory card into the compartment until it clicks into place 2 Follow the procedures in After Working Inside Your Computer Removing the Hinge Cover 1 Follow the procedures in Before Working Inside Your Computer 2 Remove the battery 3 Remov...

Страница 11: ...omputer 2 Flip the computer and install the screw that secures the hinge cover 3 Install the battery 4 Follow the procedures in After Working Inside Your Computer Removing the Keyboard 1 Follow the procedures in Before Working Inside Your Computer 2 Remove the battery 3 Pry up to release the tabs securing the keyboard to the computer 11 ...

Страница 12: ...4 Flip the keyboard and lay it on the palmrest 5 Disconnect the keyboard cable from the system board 6 Remove the keyboard from the computer 12 ...

Страница 13: ... the keyboard until it clicks into place 4 Install the battery 5 Follow the procedures in After Working Inside Your Computer Removing the Optical Drive 1 Follow the procedures in Before Working Inside Your Computer 2 Remove the battery 3 Remove the keyboard 4 Remove the screw that secures the optical drive 5 Slide the optical drive out of the computer 13 ...

Страница 14: ...omputer 3 Install the keyboard 4 Install the battery 5 Follow the procedures in After Working Inside Your Computer Removing the Memory Module 1 Follow the procedures in Before Working Inside Your Computer 2 Remove the battery 3 Remove the keyboard 4 Pry the retention clips away from the memory module until it pops up 5 Remove the memory module from the computer 14 ...

Страница 15: ...ce 3 Install the keyboard 4 Install the battery 5 Follow the procedures in After Working Inside Your Computer Removing the Palmrest 1 Follow the procedures in Before Working Inside Your Computer 2 Remove the battery 3 Remove the keyboard 4 Remove the screws that secure the bottom base 5 Flip the computer and disconnect the power board cable 1 and the touchpad cable 2 15 ...

Страница 16: ...st 1 Insert the palmrest towards the display screen at a 30 degree angle 2 Align and adjust the palmrest into position before pressing it down 3 Connect the power board cable and touchpad cable to their respective connectors 4 Tighten the screws that secure the palmrest to the computer 5 Flip the computer and install the screws that secure the bottom base 16 ...

Страница 17: ...edures in Before Working Inside Your Computer 2 Remove a battery b keyboard c palmrest 3 Peel the power button board cable from the adhesive affixing it to the palmrest 4 Flip the palmrest and remove the screw that secures the power button board to the palmrest 5 Lift up the power button board and release the power button board cable through the opening 17 ...

Страница 18: ...er and attach the power button board cable to the palmrest 5 Install a palmrest b keyboard c battery 6 Follow the procedures in After Working Inside Your Computer Removing the Hard Drive 1 Follow the procedures in Before Working Inside Your Computer 2 Remove a battery b keyboard c palmrest 3 Remove the screws that secure the hard drive bracket 4 Slide and lift the hard drive and lift it out of the...

Страница 19: ...tor to secure it to the system board 4 Install a palmrest b keyboard c battery 5 Follow the procedures in After Working Inside Your Computer Removing the Wireless Local Area Network WLAN Card 1 Follow the procedures in Before Working Inside Your Computer 2 Remove a battery b keyboard c palmrest 3 Disconnect the antennae connected to the WLAN card 4 Pry the latch to release the WLAN card from its c...

Страница 20: ...in place 3 Connect the antennae according to the color code on the WLAN card 4 Install a palmrest b keyboard c battery 5 Follow the procedures in After Working Inside Your Computer Removing the Coin Cell Battery 1 Follow the procedures in Before Working Inside Your Computer 2 Remove a battery b keyboard c palmrest 3 Disconnect the coin cell battery cable from the system board 20 ...

Страница 21: ...nect the coin cell battery cable to the system board 3 Install a palmrest b keyboard c battery 4 Follow the procedures in After Working Inside Your Computer Removing the USB Board 1 Follow the procedures in Before Working Inside Your Computer 2 Remove a battery b keyboard c optical drive d palmrest 3 Disconnect the USB board cable from the system board 21 ...

Страница 22: ...B board and remove it from the computer Installing the USB Board 1 Insert and align the USB board into its compartment on the computer 2 Install the screw that secures the USB board in place 3 Connect the USB board cable to the system board 4 Install a palmrest 22 ...

Страница 23: ...Working Inside Your Computer 2 Remove a battery b keyboard c palmrest 3 Disconnect the microphone cable from the system board 4 Lift up and remove the microphone from its compartment Installing the Microphone 1 Insert and align the microphone into its compartment 2 Connect the microphone cable to the system board 3 Install a palmrest b keyboard c battery 23 ...

Страница 24: ...he procedures in Before Working Inside Your Computer 2 Remove a battery b keyboard c palmrest 3 Disconnect the CPU fan cable from the system board 4 Remove the captive screws that secure the heat sink fan assembly by following the sequence in the image 5 Remove the heat sink fan assembly from the computer 24 ...

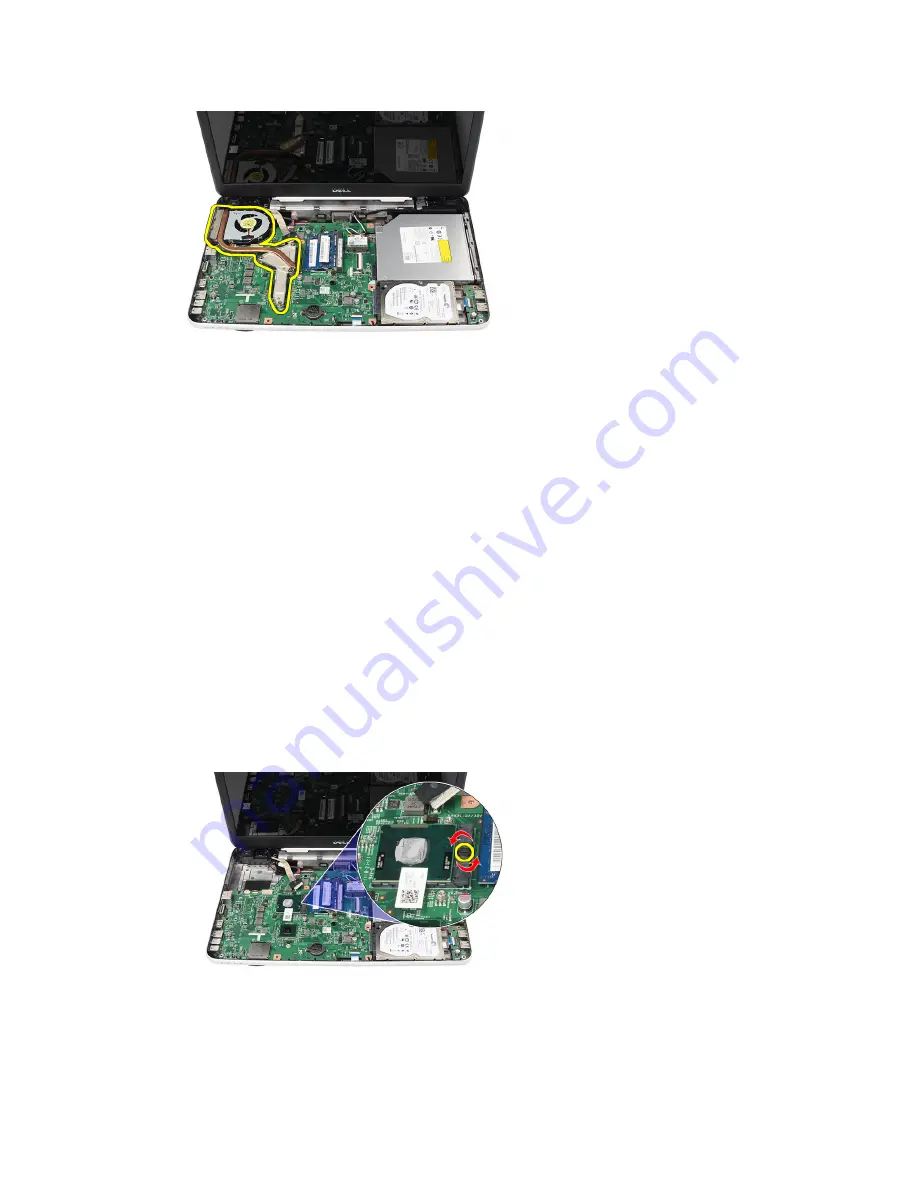
Страница 25: ...em board 4 Install a palmrest b keyboard c battery 5 Follow the procedures in After Working Inside Your Computer Removing the Processor 1 Follow the procedures in Before Working Inside Your Computer 2 Remove a battery b keyboard c palmrest d heat sink fan assembly 3 Rotate the processor cam screw in a counter clockwise direction 4 Lift up the processor and remove it from the computer 25 ...

Страница 26: ...ly b palmrest c keyboard d battery 4 Follow the procedures in After Working Inside Your Computer Removing the System Board 1 Follow the procedures in Before Working Inside Your Computer 2 Remove a battery b SD memory card c keyboard d optical drive e memory module f palmrest g hard drive h WLAN card i heat sink fan assembly 3 Disconnect the display cable 1 power connector cable 2 USB board cable 3...

Страница 27: ...ling the System Board 1 Insert the system board with the LAN VGA HDMI and USB connectors into their respective sockets and align the system board in place 2 Install the screw that secure the system board in place 3 Connect the LCD cable power connector cable USB board cable audio board cable coin cell battery cable and the speaker cable 4 Install 27 ...

Страница 28: ...rking Inside Your Computer Removing the Speakers 1 Follow the procedures in Before Working Inside Your Computer 2 Remove a battery b SD memory card c keyboard d optical drive e memory module f palmrest g hard drive h WLAN card i heat sink fan assembly j system board 3 Release the speaker cable from the routing channel 4 Press the securing latches and lift up the left speaker 28 ...

Страница 29: ...aker assembly and the speaker cable from the computer Installing the Speakers 1 Insert and attach the left and right speakers into their respective compartments 2 Align and route the speaker cable to the chassis 3 Install a system board b processor c heat sink fan assembly 29 ...

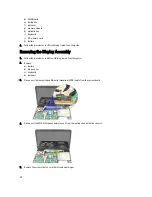
Страница 30: ...ing the Display Assembly 1 Follow the procedures in Before Working Inside Your Computer 2 Remove a battery b hinge cover c keyboard d palmrest 3 Disconnect the low voltage differential signaling LVDS cable from the system board 4 Disconnect the WLAN antennae and release it from the routing channel on the chassis 5 Remove the screws that secure the left and right hinges 30 ...

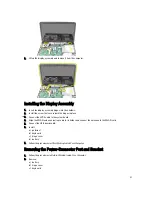
Страница 31: ...S cable to the system board 4 Align the WLAN antennae routing cable to its holder and connect the antennae to the WLAN card 5 Connect the USB board cable 6 Install a palmrest b keyboard c hinge cover d battery 7 Follow the procedures in After Working Inside Your Computer Removing the Power Connector Port and Bracket 1 Follow the procedures in Before Working Inside Your Computer 2 Remove a battery ...

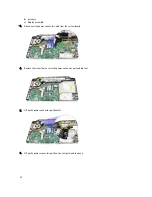
Страница 32: ...connect the power connector cable from the system board 4 Remove the screw that secures the power connector port and bracket 5 Lift up the power connector port bracket 6 Lift up the power connector port from the computer and remove it 32 ...

Страница 33: ...a display assembly b palmrest c keyboard d hinge cover e battery 5 Follow the procedures in After Working Inside Your Computer Removing the Display Bezel 1 Follow the procedures in Before Working Inside Your Computer 2 Remove the battery 3 Starting from the bottom pry the bezel inside out from the display assembly and work your way to the right and the left corners of the display bezel 4 Remove th...

Страница 34: ...it clicks into place 3 Install the battery 4 Follow the procedures in After Working Inside Your Computer Removing the Camera 1 Follow the procedures in Before Working Inside Your Computer 2 Remove the battery 3 Remove the display bezel 4 Disconnect the camera cable from the camera module 5 Pry the latch lift up the camera and remove it from the computer 34 ...

Страница 35: ...battery 5 Follow the procedures in After Working Inside Your Computer Removing the Display Panel 1 Follow the procedures in Before Working Inside Your Computer 2 Remove a battery b hinge cover c keyboard d palmrest e display assembly f display bezel 3 Disconnect the camera cable from the camera module 4 Remove the screws that secure the display brackets and hinges 35 ...

Страница 36: ... Release the wireless antennae from the right hinge 6 Release the low voltage differential singnaling LVDS cable from the left hinge 7 Lift up the display panel and brackets from the display top cover 36 ...

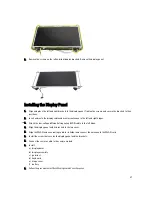
Страница 37: ...right hinges 3 Attach the low voltage differential singnaling LVDS cable to the left hinge 4 Align the display panel with its brackets to the top cover 5 Align the WLAN antennae routing cable to its holder and connect the antennae to the WLAN card 6 Install the screw that secures the display panel and the brackets 7 Connect the camera cable to the camera module 8 Install a display bezel b display ...

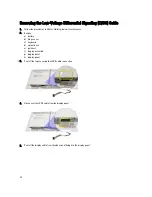
Страница 38: ...mputer 2 Remove a battery b hinge cover c keyboard d optical drive e palmrest f display assembly g display bezel h display panel 3 Peel off the tape securing the LVDS cable connection 4 Disconnect the LVDS cable from the display panel 5 Peel off the display cable from the adhesive affixing it to the display panel 38 ...

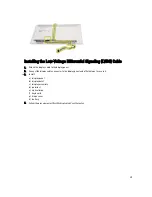
Страница 39: ...e display panel 2 Connect the display cable connector to the display panel and affix the tape to secure it 3 Install a display panel b display bezel c display assembly d palmrest e optical drive f keyboard g hinge cover h battery 4 Follow the procedures in After Working Inside Your Computer 39 ...

Страница 40: ...40 ...

Страница 41: ...ess System Setup by pressing F2 key Bring up the one time boot menu by pressing F12 key The one time boot menu displays the devices that you can boot from including the diagnostic option The boot menu options are Removable Drive if available STXXXX Drive NOTE XXX denotes the SATA drive number Optical Drive Diagnostics NOTE Choosing Diagnostics will display the ePSA diagnostics screen The boot sequ...

Страница 42: ...puter s internal clock BIOS Version Displays the BIOS revision Product Name Displays the product name and the model number Service Tag Displays the service tag of your computer Asset Tag Displays the asset tag of your computer if available CPU Type Displays the type of processor CPU Speed Displays the speed of the processor CPU ID Displays the processor ID L1 Cache Size Displays the processor L1 c...

Страница 43: ...bled Function Key Behavior Specifies the behavior of the function key Fn Default Function key first Charger Behavior Specifies if the computer battery will be charged when connected to an AC power source Default Enabled Miscellaneous Devices These fields let you enable or disable various on board devices Security Set Service Tag This field displays your system s service tag If the service tag is n...

Страница 44: ...rvice Code NOTE For desktops the service tag label is available on the front of your computer NOTE For notebooks the service tag label is available on the bottom of your computer a Enter the Service Tag or Express Service Code and click Submit b Click Submit and proceed to step 5 4 If you do not have your computer s service tag or express service code select one of the following a Automatically de...

Страница 45: ...ty and press Enter The System Security screen appears 2 In the System Security screen verify that Password Status is Unlocked 3 Select System Password enter your system password and press Enter or Tab Use the following guidelines to assign the system password A password can have up to 32 characters The password can contain the numbers 0 through 9 Only lower case letters are valid upper case letter...

Страница 46: ...g system password and press Enter or Tab 4 Select Setup Password alter or delete the existing setup password and press Enter or Tab NOTE If you change the System and or Setup password re enter the new password when promoted If you delete the System and or Setup password confirm the deletion when promoted 5 Press Esc and a message prompts you to save the changes 6 Press Y to save the changes and ex...

Страница 47: ...he system diagnostics to test only your computer Using this program with other computers may cause invalid results or error messages NOTE Some tests for specific devices require user interaction Always ensure that you are present at the computer terminal when the diagnostic tests are performed 1 Power on the computer 2 As the computer boots press the F12 key as the Dell logo appears 3 On the boot ...

Страница 48: ...lay between each set of beeps is 3 seconds and the beep sound lasts 300 ms After each beep and each set of beeps the BIOS should detect if the user presses the power button If so BIOS will jump out from looping and execute the normal shutdown process and power system Code Cause and Troubleshooting Steps 1 BIOS ROM checksum in progress or failure System board failure covers BIOS corruption or ROM e...

Страница 49: ...sh EPROM SPI 32 Mbits Table 3 Processor Feature Specification Types Intel Celeron Intel Core i3 series Intel Core i5 series L2 cache up to 6 MB Table 4 Memory Feature Specification Memory connector two SODIMM slots Memory capacity 2 GB or 4 GB Memory type DDR3 SDRAM 1333 MHz and 1600 MHz Minimum memory 1 GB Maximum memory 8 GB Table 5 Audio Feature Specification Type 2 1 channel high definition au...

Страница 50: ...tel HD Graphics Intel HD Graphics 3000 Intel HD Graphics 4000 Discrete Vostro 2420 nVidia GeForce GT 620M Table 7 Camera Feature Specification Camera resolution 1 3 Mega pixel Video resolution maximum 640 x 480 at 30 FPS Table 8 Communications Feature Specification Network adapter 10 100 1000 Mbps Ethernet LAN Wireless internal wireless local area network WLAN Table 9 Ports and Connectors Feature ...

Страница 51: ... 355 60 mm 14 00 inches 396 24 mm 15 60 inches Active area X Y 309 40 mm x 173 95 mm 344 23 mm x 193 54 mm Maximum brightness 200 nits 220 nits Maximum resolution 1366 x 768 pixels at 262K colors Operating angle 0 closed to 140 Refresh rate 60 Hz Minimum viewing angles Horizontal 40 40 Vertical 15 30 H L Pixel pitch 0 252 mm X 0 252 mm Table 11 Keyboard Feature Specification Number of keys United ...

Страница 52: ... 40 F to 149 F Coin cell battery 3 V CR2032 lithium coin cell Table 14 AC Adapter Feature Specification Type Vostro 2420 Vostro 2520 with integrated video card 65 W Vostro 2420 with discrete video card 90 W Input voltage 100 VAC to 240 VAC Input current maximum 1 50 A 1 60 A 1 70 A 2 50 A Input frequency 50 Hz to 60 Hz Output power 65 W and 90 W Output current 65 W 3 34 A continuous 90 W 4 62 A Ra...

Страница 53: ...ED panel 31 50 mm to 34 50 mm 1 24 inches to 1 35 inches Width 376 00 mm 14 80 inches Depth 260 mm 10 23 inches Weight minimum 2 37 kg 5 22 lb Table 16 Environmental Feature Specification Temperature Operating 0 C to 35 C 32 F to 95 F Storage 40 C to 65 C 40 F to 149 F Relative humidity maximum Operating 10 to 90 non condensing Storage 5 to 95 non condensing Altitude maximum Operating 15 2 m to 30...

Страница 54: ...54 ...
Страница 55: ...ice options Availability varies by country and product and some services may not be available in your area To contact Dell for sales technical support or customer service issues 1 Visit support dell com 2 Select your support category 3 If you are not a U S customer select your country code at the bottom of the support dell com page or select All to see more choices 4 Select the appropriate service...

Отзывы: